10/ 2019
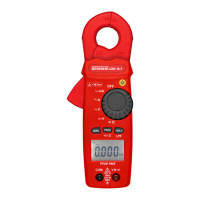
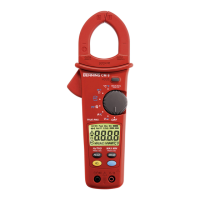
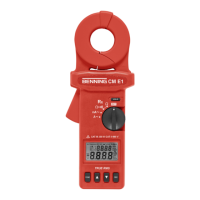
BENNING CM 9-1
16
8.3 Current measurement
Do not apply any voltage to the input jacks
J
and
K
of the
BENNING CM 9-1! Any possibly connected safety measuring
leads have to be removed.
- Use the rotary switch
5
to select the required function mA
or A
on the
BENNING CM 9-1.
- If necessary, press the ZERO key
6
for 2 seconds to enable the low-pass
filter (LPF).
- Press the “ZERO” button
6
to set the BENNING CM 9-1 to the starting
point.
- Operate opening lever
4
, clamp
1
single wire live conductor centrally by
means of the BENNING CM 9-1 current probe.
- Read off the digital display unit
9
.
8.3.1 Leakage current measurement at the ground conductor
Seegure4: Leakagecurrentmeasurementatthegroundconductor
8.3.2 Differential current measurement at single-phase systems
Seegure5: Differentialcurrentmeasurementatsingle-phasesystems
8.3.3 Leakage current measurement via ground conductor (charge
eliminator) for three-phase supply
Seegure6: Leakage currentmeasurement viagroundconductor (charge
eliminator) for three-phase supply
8.3.4 Differential current measurement, load supplied in three-phase,
without N-type conductor
Seegure7: Differential current measurement, load supplied in three-
phase, without N-type conductor
8.3.5 Differential current measurement, load supplied in three-phase,
with N-type conductor
Seegure8: Differential current measurement, load supplied in three-
phase, with N-type conductor
8.3.6 Alternating current measurement
Seegure9: Alternatingcurrentmeasurement
8.4 Resistance measurement
- Select the function by means of the rotary switch
5
of the BENNING
CM 9-1.
- The black safety measuring lead has to be contacted with the COM jack
J
on the BENNING CM 9-1.
- ConnecttheredsafetymeasuringleadtotheV-Ωjack
K
, marked in red.
- Bring the safety measuring leads into contact with the measuring points,
read off measured value on the digital display
9
on the BENNING CM 9-1.
Note:
- To obtain a correct measurement, ensure that no voltage is applied to the
measuring point.
Seegure10: Resistancemeasurement
8.5 Continuity testing with buzzer
- Use the rotary switch
5
to select the required function on the
BENNING CM 9-1 and press the „PEAK“ key
7
.
- The black safety measuring lead has to be contacted with the COM jack
J
on the BENNING CM 9-1.
- ConnecttheredsafetymeasuringleadtotheV-Ωjack
K
, marked in red.
- Apply the safety measuring leads to the measuring points. If the resistance
betweenthemeasuringpointsfallsbelowapprox.45Ω,theintegratedbuzz-
er of the BENNING CM 9-1 sounds.
Seegure11: Continuitytestingwithbuzzer
9. Maintenance
Before opening the BENNING CM 9-1, make sure that it is free of
voltage! Electrical danger!
Work on the opened BENNING CM 9-1 under voltage may be carried out only
by skilled electricians with special precautions for the prevention of ac-
cidents.
Make sure that the BENNING CM 9-1 is free of voltage as described below
 Loading...