12/ 2007
BENNING MM P3
21
- the device was exposed to extraordinary stress during transport.
In order to prevent danger
- do not touch the bare measuring probe tips of the measuring
lines
3. Scope of delivery
The scope of delivery of the BENNING MM P3 comprises:
3.1 One BENNING MM P3, with rmly connected attached safety measuring
lines, black and red (L = 0.6 m, tip Ø 2 mm)
3.2 One protective case,
3.3 Two 1.5 V (LR44) batteries are integrated into the device,
3.4 One operating manual.
Parts subject to wear:
- The BENNING MM P3 is supplied by means of two integrated 1.5 V batteries
(LR44).
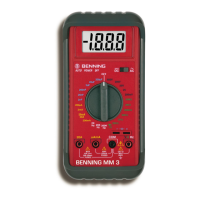
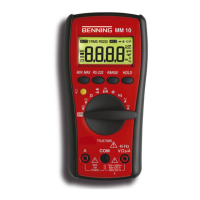
4. Device description
See gure 1:
Device front
The display and operating elements shown in gure 1 are designated as follows:
Digital display, displaying measured value and range exceedance,
Polarity indication,
Battery indication, appears in case of discharged battery,
4 HOLD key, storage of the displayed measured value,
5 SELECT key for selecting the secondary or tertiary function,
6 RANGE key, switch-over between automatic/ manual measuring range,
7 Rotary switch, for selecting the measuring function,
8 Safety measuring line (red), positive
1
connection for V, Ω, , Hz,
9 COM safety measuring line (black), common connection for voltage/ resistance/
frequency/ pulse duty factor/ capacity measurements, continuity and diode
tests,
1
) This is what the automatic polarity indication for DC voltage refers to
5. General information
5.1 General information on the multimeter
5.1.1 The digital display is a 3
5
/6-digit LC display with a font size of 14 mm and
a decimal point. The highest numerical value to be displayed is 5000.
5.1.2 The polarity indication works automatically. Only a polarity contrary to the
connection denition is indicated with “-“.
5.1.3 The range exceedance is indicated by “ 0L“ or “- 0L“ and partly by an acoustic
warning.
Attention, no indication and warning in case of overload!
5.1.4 Measured value storage „HOLD“: Press the “HOLD“ key 4 to store the
measuring result. At the same time, the display shows the “HOLD“ symbol.
 Loading...