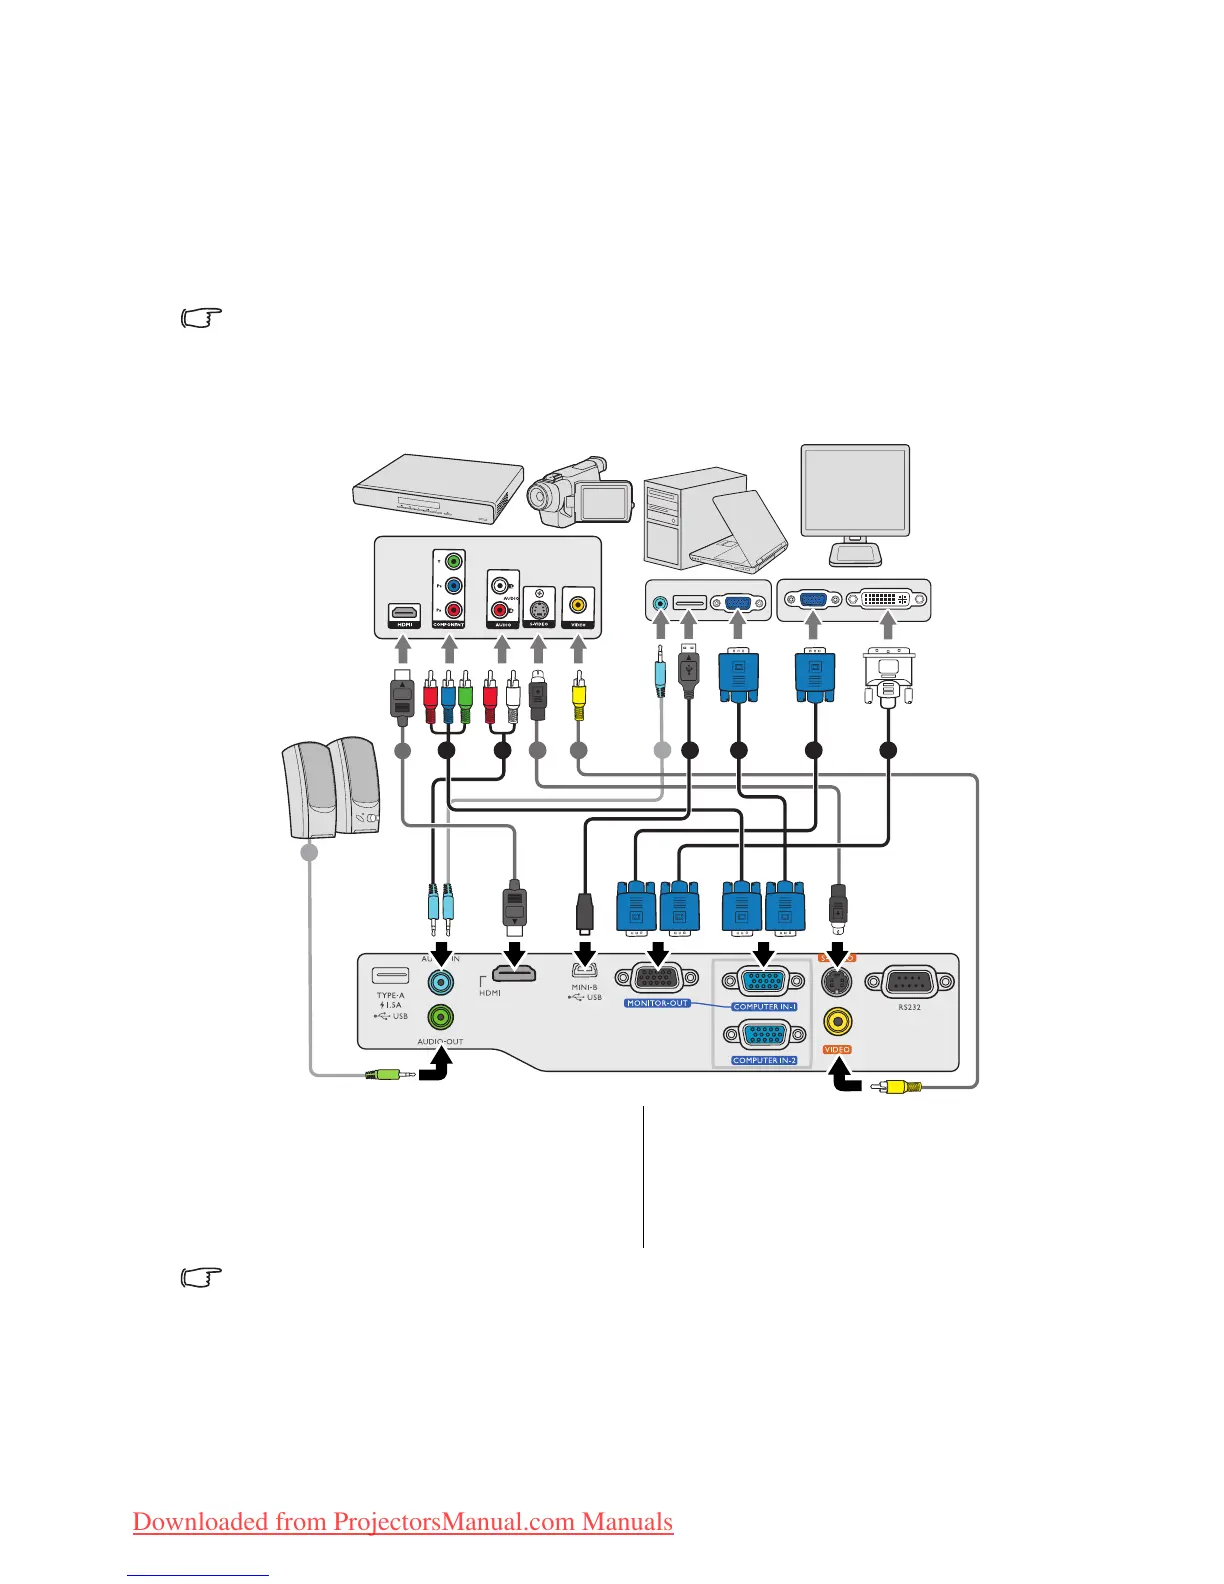
Connection16
Connection
When connecting a signal source to the projector, be sure to:
1. Turn all equipment off before making any connections.
2. Use the correct signal cables for each source.
3. Ensure the cables are firmly inserted.
• In the connections shown below, some cables may not be included with the projector (see "Shipping
contents" on page 8). They are commercially available from electronics stores.
• The connection illustrations below are for reference only. The rear connecting jacks available on the
projector vary with each projector model.
• Many notebooks do not turn on their external video ports when connected to a projector. Usually a key
combo like FN + F3 or CRT/LCD key turns the external display on/off. Locate a function key labeled CRT/
LCD or a function key with a monitor symbol on the notebook. Press FN and the labeled function key
simultaneously. Refer to your notebook's documentation to find your notebook's key combination.
• The D-Sub output only works when an appropriate D-Sub input is made to the COMPUTER 1 jack.
• If you wish to use this connection method when the projector is in standby mode, make sure the
Monitor Out function is turned on in the SYSTEM SETUP: Advanced menu. See "Standby Settings"
on page 44 for details.
1. VGA cable
2. VGA to DVI-A cable
3. USB cable
4. Component Video to VGA (D-Sub)
adapter cable
5. S-Video cable
6. Video cable
7. Audio cable
8. HDMI cable
774 1 216 35
7
8