16 Positioning your projector
• Ask your dealer to install the projector for you. Installing the projector on your own may cause it to
fall and result in injury.
• Take necessary procedures to prevent the projector from falling off such as during an earthquake.
• The warranty doesn’t cover any product damage caused by mounting the projector with a non-BenQ
brand projector mounting kit.
• Consider the surrounding temperature where the projector is ceiling/wall mounted. If a heater is used,
the temperature around the ceiling/wall may be higher than expected.
• Read the user manual for the mounting kit about the range of torque. Tightening with torque
exceeding the recommended range may cause damage to the projector and subsequently falling off.
• Make sure the power outlet is at an accessible height so that you can easily shut down the projector.
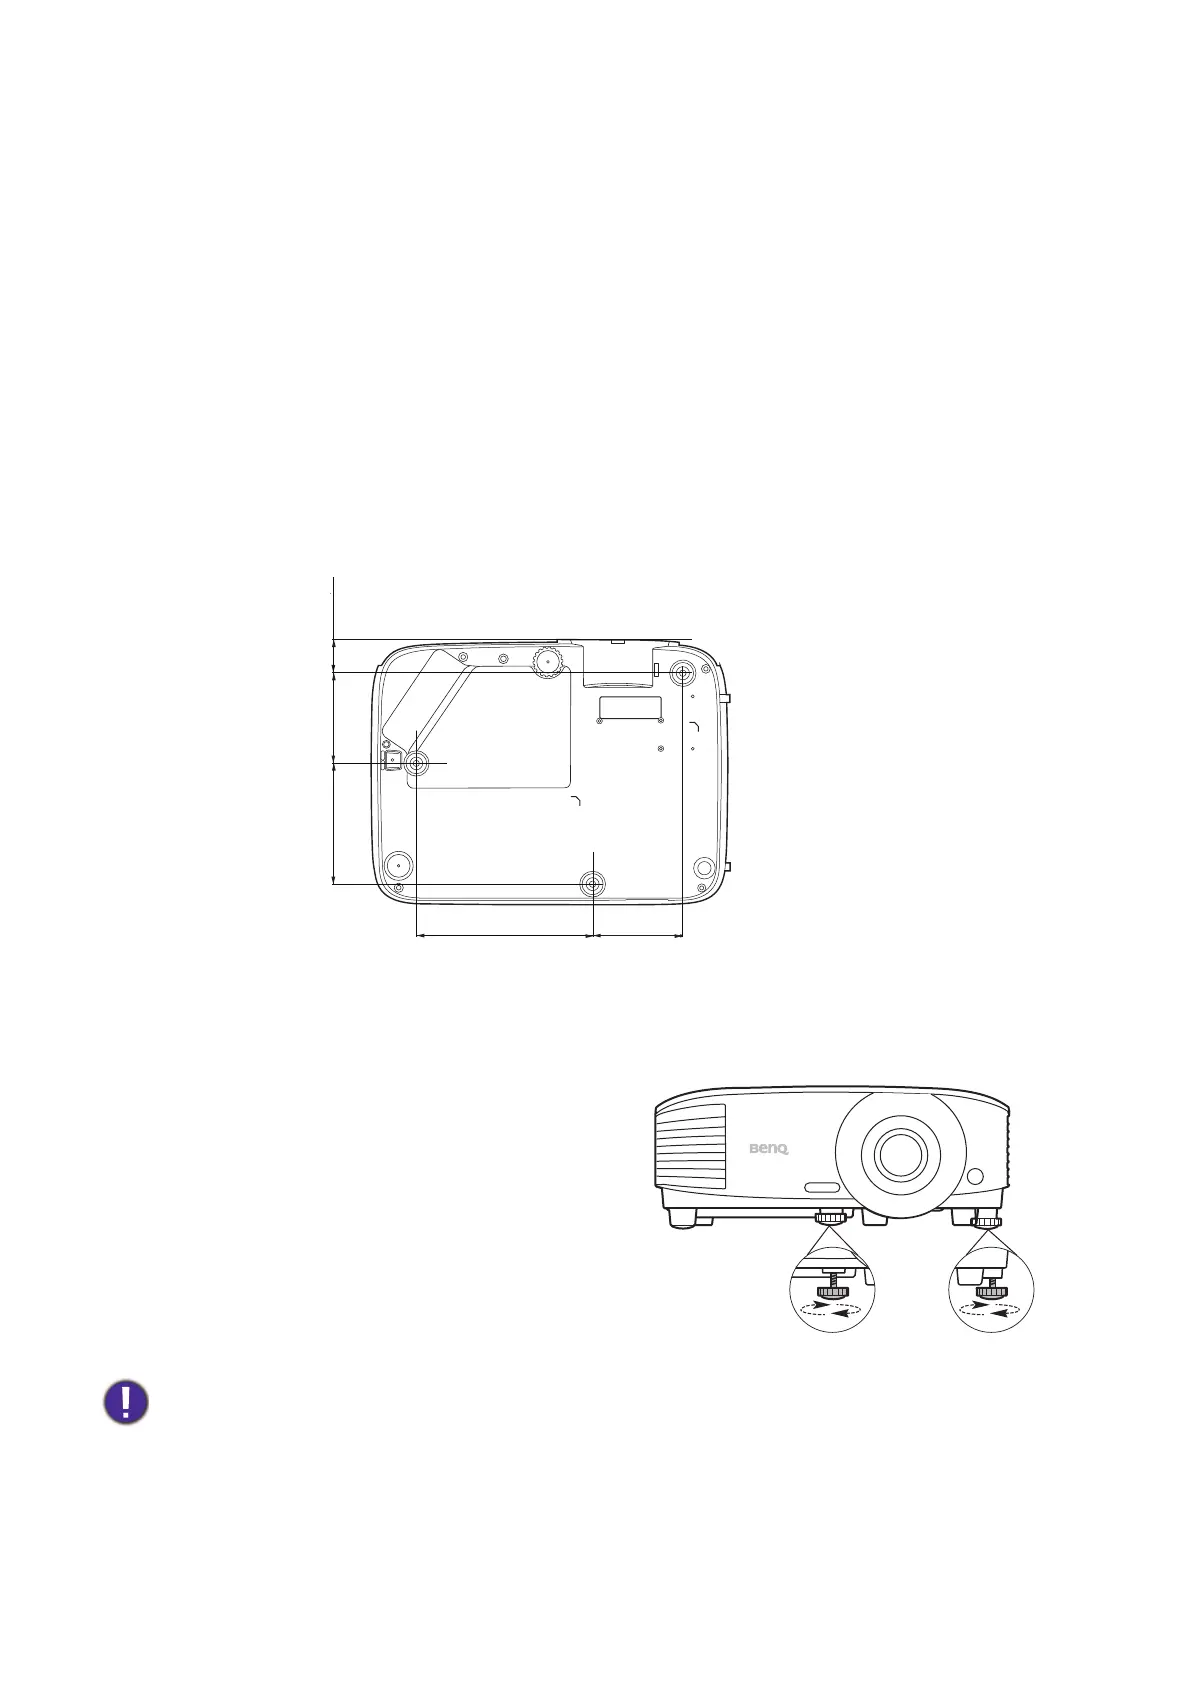
Ceiling/Wall mount installation diagram
Adjusting the projected image
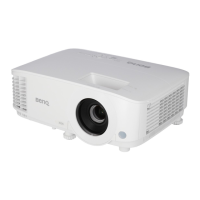
Adjusting the projection angle
If the projector is not placed on a flat surface or the
screen and the projector are not perpendicular to
each other, the projected image becomes
trapezoidal. You can screw the adjuster feet to
fine-tune the horizontal angle.
To retract the feet, screw the adjuster feet in a
reverse direction.
Do not look into the lens while the lamp is on. The strong light from the lamp may cause damage to your eyes.
Ceiling/Wall mount screw: M4
(Max L = 25 mm; Min L = 20 mm)
Unit: mm
75146
100
75 27