Positioning your projector18
Installing the new lens
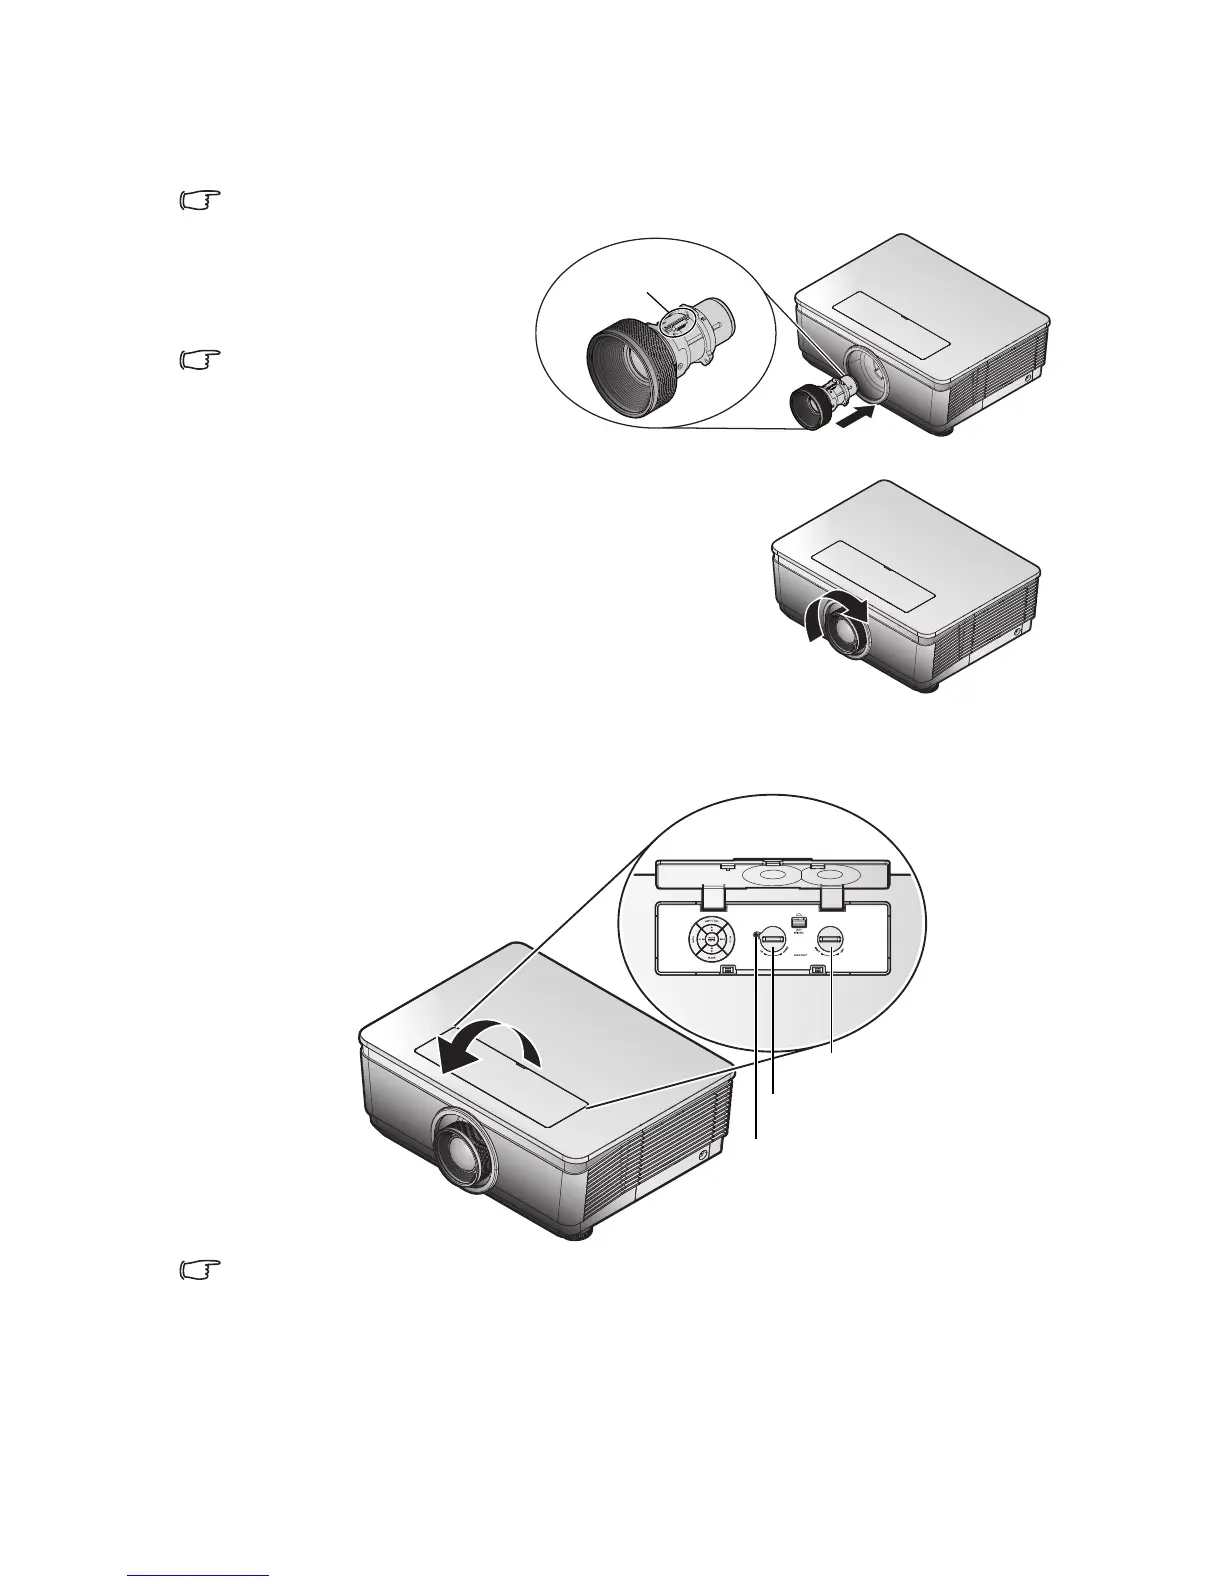
Remove both end caps from the lens.
Removal of the plastic body cap before inserting a lens for the first time.
1. Align the notches and
correctly position the
electrical contact pad as
shown in the picture.
Electrical contact pins should be
in the direction as shown in the
picture.
2. Rotate the lens clockwise until you feel it click
into place.
Adjusting projected image position using lens shift
Suggest to loosen the screw before lens shift adjustment and tighten up after finished
adjustment.
The Lens Shift function can be used to adjust the position of the projected image either
horizontally or vertically within the range detailed below.



 To Next Page