35 Menu operation
Sound
Display
Mute Temporarily turns off the sound.
Volume Adjusts the sound level.
Power On/Off
Ring Tone
Sets the ring tone for the projector On or Off.
Reset Audio
Settings
All of the adjustments you’ve done under the Sound menu return to the factory
preset values.
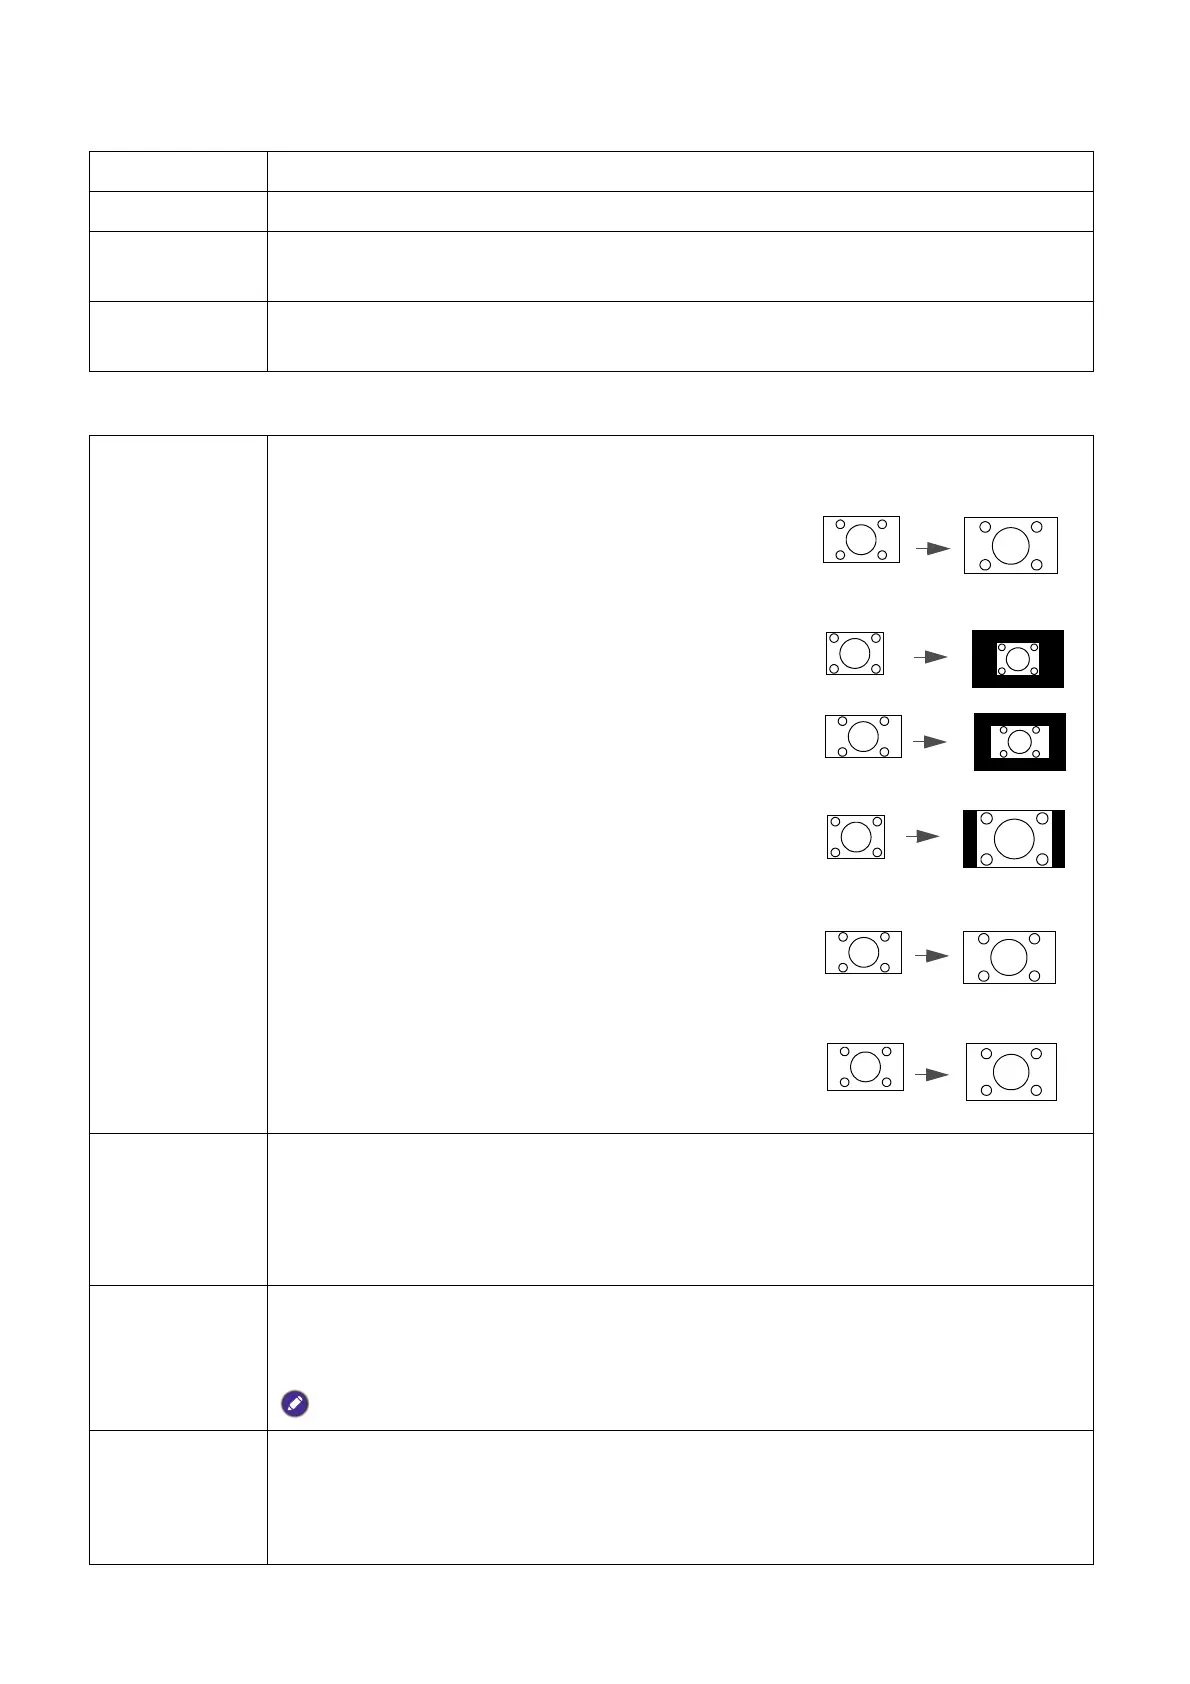
Aspect Ratio
There are several options to set the image's aspect ratio depending on your input
signal source.
• Auto: Scales an image proportionally to fit the
projector's native resolution in its horizontal or
vertical width.
• Real: Projects an image as its original resolution and
resizes it to fit within the display area. For input signals
with lower resolutions, the projected image will be
displayed in its original size.
• 4:3: Scales the picture so that it is displayed in the
center of the screen with a 4:3 aspect ratio.
• 16:9: Scales an image so that it is displayed in the
center of the screen with a 16:9 aspect ratio.
• 16:10: Scales an image so that it is displayed in the
center of the screen with a 16:10 aspect ratio.
Wall Color
Corrects the projected picture’s color when the projection surface such as a
painted wall which may not be white, the Wall Color feature can help correct the
projected picture’s colors to prevent possible color difference between the source
and projected pictures. There are several precalibrated colors to choose from:
Light Yellow, Pink, Green, and Blue.
Image
Position
Displays the Image Position window. You may use the directional arrow keys on
the projector or remote control to adjust the position of the projected picture.
The values shown on the lower position of the window change with every key press you made.
This function is only available when the PC signal is selected.
Overscan
Adjustment
Conceals the poor picture quality in the four edges.
The greater the value, the more portion of the picture is concealed while the
screen remains filled and geometrically accurate. Setting 0 means the picture is
100% displayed.