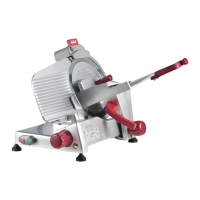
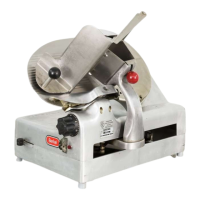
829A &839A OWNER/OPERATOR MANUAL • 5
1234567890123456789012345678901212345678901234567890123456789012123456789012345678901234567890121234567890123456789012345678901212345678
1
23456789012345678901234567890121234567890123456789012345678901212345678901234567890123456789012123456789012345678901234567890121234567
23456789012345678901234567890121234567890123456789012345678901212345678901234567890123456789012123456789012345678901234567890121234567
23456789012345678901234567890121234567890123456789012345678901212345678901234567890123456789012123456789012345678901234567890121234567
23456789012345678901234567890121234567890123456789012345678901212345678901234567890123456789012123456789012345678901234567890121234567
23456789012345678901234567890121234567890123456789012345678901212345678901234567890123456789012123456789012345678901234567890121234567
23456789012345678901234567890121234567890123456789012345678901212345678901234567890123456789012123456789012345678901234567890121234567
23456789012345678901234567890121234567890123456789012345678901212345678901234567890123456789012123456789012345678901234567890121234567
8
1234567890123456789012345678901212345678901234567890123456789012123456789012345678901234567890121234567890123456789012345678901212345678
1234567890123456789012345678901212345678901234567890123456789012123456789012345678901234567890121234567890123456789012345678901212345678
1
23456789012345678901234567890121234567890123456789012345678901212345678901234567890123456789012123456789012345678901234567890121234567
23456789012345678901234567890121234567890123456789012345678901212345678901234567890123456789012123456789012345678901234567890121234567
23456789012345678901234567890121234567890123456789012345678901212345678901234567890123456789012123456789012345678901234567890121234567
23456789012345678901234567890121234567890123456789012345678901212345678901234567890123456789012123456789012345678901234567890121234567
23456789012345678901234567890121234567890123456789012345678901212345678901234567890123456789012123456789012345678901234567890121234567
23456789012345678901234567890121234567890123456789012345678901212345678901234567890123456789012123456789012345678901234567890121234567
23456789012345678901234567890121234567890123456789012345678901212345678901234567890123456789012123456789012345678901234567890121234567
23456789012345678901234567890121234567890123456789012345678901212345678901234567890123456789012123456789012345678901234567890121234567
8
1234567890123456789012345678901212345678901234567890123456789012123456789012345678901234567890121234567890123456789012345678901212345678
WARNING
To avoid serious personal injury, properly
install slicer in adequate work area
• ALWAYS use a qualified technician for installation.
• ALWAYS install slicer in work area with adequate light and space.
• ONLY operate slicer on a solid, level support.
• NEVER bypass or alter switches or circuits.
• NEVER operate slicer without all guards installed.
• NEVER operate slicer without all warning stickers and wall charts posted.
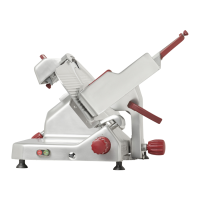
INSTALLATION
UNPACKING AND ASSEMBLY
1. When the slicer has been unpacked and removed from its shipping carton, it should be
checked carefully for any damage that may have occurred during shipment. Do not plug in
the power cord or attempt to operate the slicer prior to this examination.
2. Carefully check all slicer components such as the product table, pusher, sharpener, thick-
ness control knob, etc., to make certain they move freely and that there are no obstruc-
tions. Turn the thickness control knob as far right as possible. Lubricate the pusher slide
bar (on the product table) and the round rails (underside of slicer) with Berkel Food
Machine Oil. The oil ports for both rails can be located by referring to the diagram on page
4.
TESTING PRIOR TO OPERATION
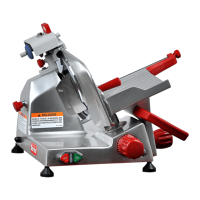
1. Make sure that the ON/OFF switch is rotated to the "O" position on the 829A slicer, and
the thickness control knob is turned as far to the right as possible. This positions the gauge
plate so the knife is not exposed during testing. If it is an 839A slicer, make sure the
manual/automatic knob is fully counterclockwise in the manual position.
WARNING
Use only USDA-authorized oil on this slicer. Non USDA-authorized oil may contaminate
this slicer and cause food poisoning and personal injury. Berkel Food Machine Oil is an
USDA-authorized oil for food processing equipment. Berkel Food Machine Oil can be
purchased in 2 oz. bottles (Part #4675-0182), 16 oz. bottles (Part #4675-0183) or gallons
(Part #4675-0184).