76
GB
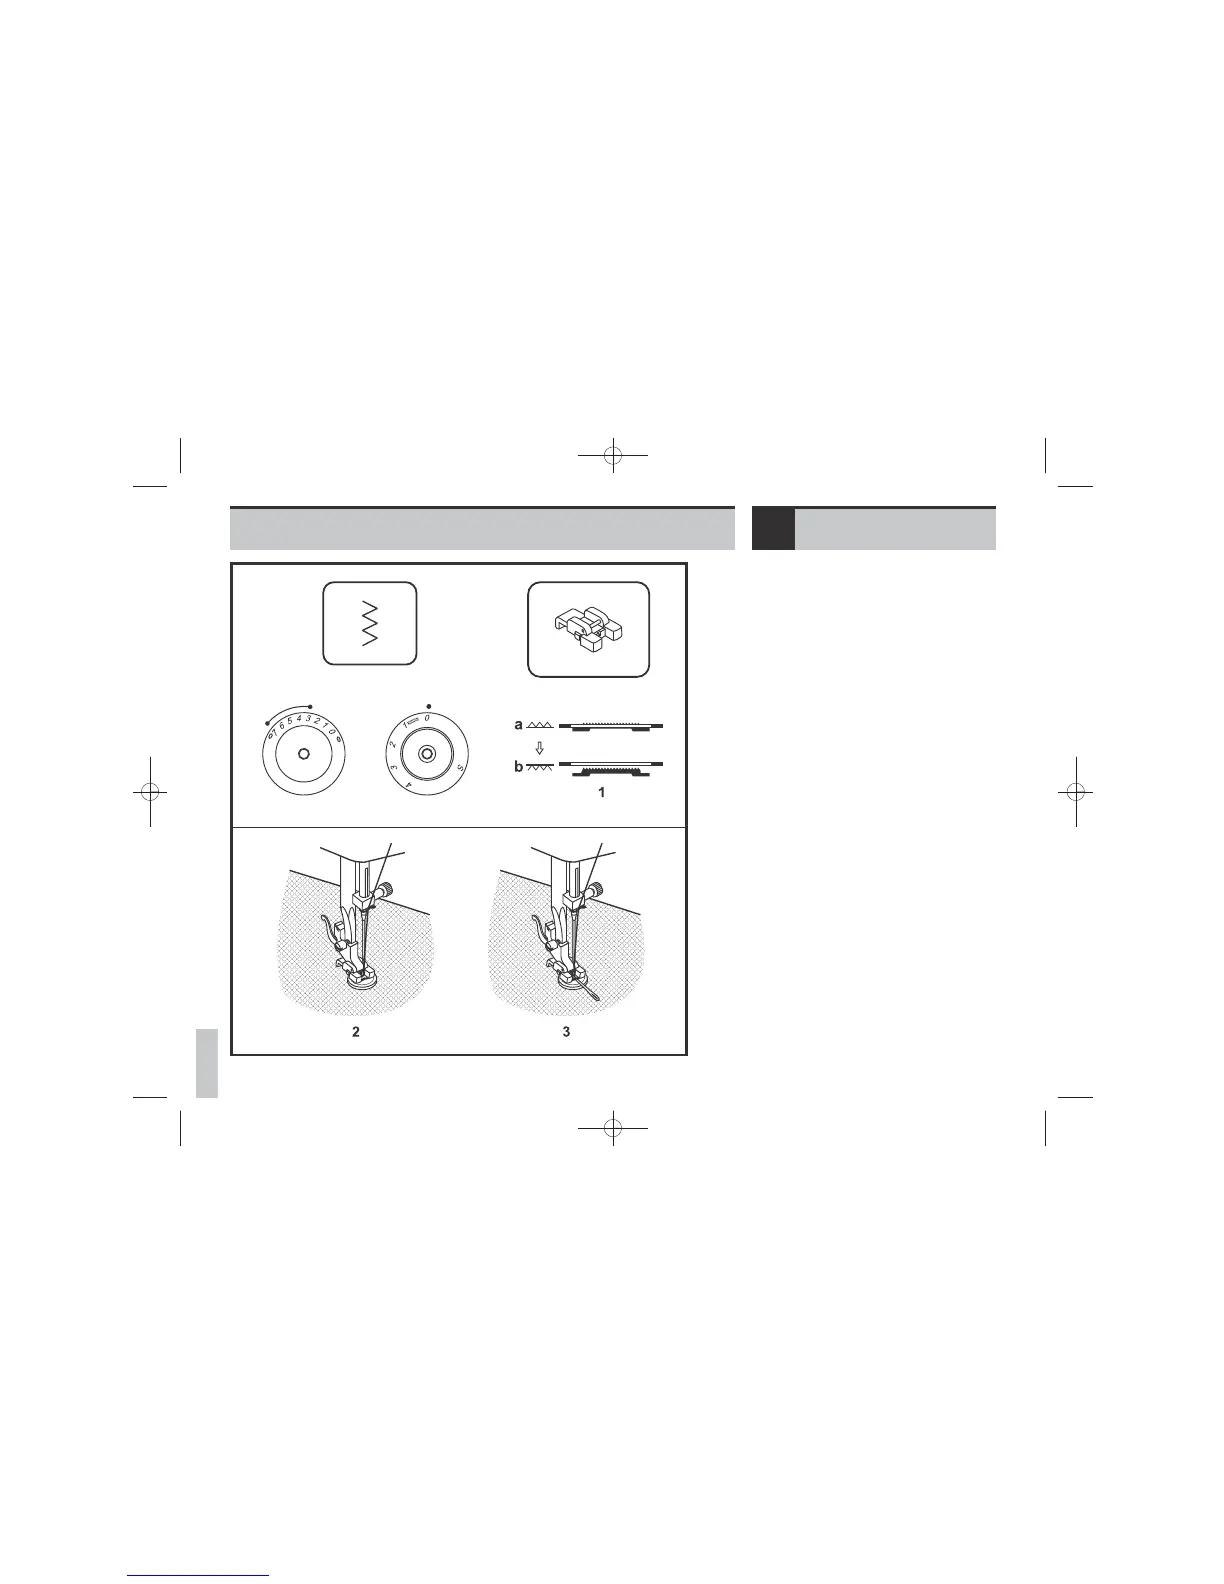
Move the drop feed control to right side to
lower the feed dogs. (1)
Change presser foot to button sewing foot.
Turn the stitch length dial to “0”.
Position the work under the foot. Place the
button in the desired position, lower the
foot. Set the pattern selector knob on zig
zag stitch. Adjust the stitch width between
“3” - ”5”(model -OSCOW), “3” -
“7”(model -OSCOW57) according
TOTHEdistance between the two holes of the
button. Turn the handwheel to check that
the needle goes cleanly into the left and
right holes of the button. Set the pattern
selector knob on straight stitch, and sew a
few securing stitches. Set the pattern
selector knob on zig zag stitch, and slowly
sew on the button with about 10 stitches.
Set the pattern selector knob on straight
stitch, and sew a few securing stitches.
If a shank is required, place a darning
needle on top of the button and sew. (3)
For buttons with 4 holes, sew through the
front two holes first (2), push work forward
and then sew through the back two holes
(3).
Move the drop feed control to left side for
normal use.
Please note:
No “S” marking is shown on the stitch
length dial by model -OSCOW.
Sewing on buttonsEN
E55-E82e_EN_DE_TR_EL_310309:07_55-90e_EN_ES_FR_PT.qxd 31.3.2009 14:36 Seite 76
 Loading...