EasyManua.ls Logo

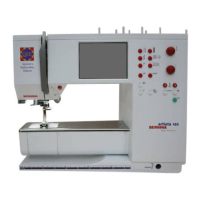
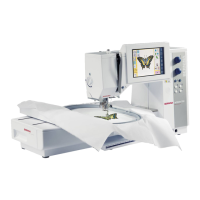
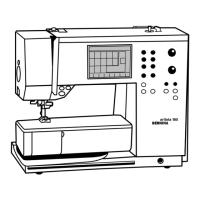
Bernina Artista 640 User Manual

Bernina Artista 640
168 pages
To Next Page IconTo Next Page
Page #1 background imageLoading...
Page #1 background image
1Safety Instructions
IMPORTANT SAFETY INSTRUCTIONS !
DANGER
To reduce the risk of electrical shock:
1. An appliance should never be left
unattended when plugged in.
2. Always unplug this sewing computer from
the electrical outlet immediately after
using and before cleaning.
WARNING
To reduce the risk of burns, fire, electric shock
or injury to persons:
1. Do not allow to be used as a toy. Close
attention is necessary when this sewing
computer is used by or near children and
infirm persons.
2. Use this sewing computer only for its
intended use as described in this manual.
Use only attachments recommended by
the manufacturer as contained in this
manual.
3. Never operate this sewing computer if:
it has a damaged cord or plug,
it is not working properly
it has been dropped or damaged,
it has fallen into water
Return the sewing computer to the
nearest authorized BERNINA dealer or
service center for examination, repair,
electrical or mechanical adjustment.
4. Never operate the sewing computer with
any air vents blocked. Keep ventilation
openings of the sewing computer and
foot controller free from accumulation of
lint, dust and fabric remnants and the like.
5. Keep fingers away from all moving parts.
Special care is required around the sewing
needle.
When using an electrical appliance, basic safety precautions should always
be followed, including the following:
Read all instructions before using this sewing computer. When the sewing
computer is not in use, it should be disconnected from the electricity supply
by removing the plug from the outlet.
6. Always use the BERNINA original stitch
plate. The wrong plate can cause needle
breakage.
7. Do not use bent needles.
8. Do not pull or push fabric while stitching,
which may deflect the needle, causing it
to break.
9. Turn power switch to «0» (off) when
making any adjustments in the needle
area, such as threading or changing the
needle, threading the bobbin or changing
the presser foot etc.
10. Always unplug the sewing computer from
the electrical outlet when removing
covers, lubricating or when making any
other user servicing adjustments
mentioned in this instruction manual.
11. Never drop or insert any object into any
openings on the sewing computer.
12. Do not use the sewing computer
outdoors.
13. Do not operate where aerosol (spray)
products are being used or where oxygen
is being administered.
14. To disconnect, turn all controls to the off
(«0») position then remove the plug from
the outlet.
15. Do not unplug by pulling on the cord,
instead, grasp the plug before pulling.
16. No responsibility will be taken on behalf
of BERNINA for any possible damage as
the result of misuse of the sewing
computer.
17. Under no circumstances should the
sewing computer be left unattended
when using the embroidery module.
18. This sewing computer is provided with
double insulation (except USA / Canada).
Use only identical replacement parts. See
instructions for servicing of double-
insulated machines.
SERVICING
DOUBLE-
INSULATED
PRODUCTS
In a double-insulated product, two systems of
insulation are provided instead of grounding.
No grounding means is provided on a double-
insulated product nor should a means for
grounding be added to the product. Servicing
a double-insulated product requires extreme
care and knowledge of the system and should
only be done by qualified service personnel.
Replacement parts for a double-insulated
product must be identical to those parts in the
product. A double insulated product is
marked with the words «DOUBLE
INSULATION» or «DOUBLE INSULATED».
The symbol may also be marked on the
product.
This sewing and embroidery computer is
intended for household use only.
SAVE THESE
INSTRUCTIONS!
031508.50.04_0601_a640_EN

Table of Contents

Other manuals for Bernina Artista 640

Question and Answer IconNeed help?

Do you have a question about the Bernina Artista 640 and is the answer not in the manual?

Bernina Artista 640 Specifications

General IconGeneral
TypeSemi-automatic sewing machine
InterfaceUSB
Control typeButtons, Lever, Rotary, Touch
Sewing speed900
Product colorBlue, Silver, White
Stitch length5 mm
Built-in lightYes
Number of programs14
Number of button holes8
Sewing machine functionsEmbroidery, Sewing
Number of stitch patterns302
Number of needle positions11
Number of embroidery designs90
Power supply typeElectromechanical

Summary

Important Safety Instructions

Danger - Electrical Shock Precautions

Precautions to reduce the risk of electrical shock when using the sewing computer.

Warning - General Safety Precautions

Precautions to reduce the risk of burns, fire, electric shock, or injury to persons.

Bobbin Operations

Winding and Threading the Bobbin

Step-by-step guide for winding and threading the bobbin.

Thread Management

Threading the Upper Thread

Detailed instructions for threading the upper thread.

Needle and Threading Assistance

Needle Threader Operation

Instructions for using the automatic needle threader.

Needle and Related Components

Changing the Needle

Steps for removing and inserting sewing machine needles.

Multi-Needle Threading

Threading the Double Needle

Instructions for threading the machine for double and triple needle use.

Thread and Needle Selection Guide

Important Facts About Thread and Needles

Guidelines for selecting appropriate thread and needles for optimal results.

Needle Compatibility

Needle/Thread Combination

Ensuring correct needle and thread compatibility for proper sewing.

Presser Foot Adjustments

Presser Foot Pressure Adjustment

How to adjust the presser foot pressure for different fabrics.

External Function Buttons

Sewing Function Details

Direct Entry Length/Measurement

Entering buttonhole length directly or measuring on screen.

Manual Buttonhole Steps

Sewing buttonholes manually in 4 or 6 steps.

Programming Buttonhole Length

Programming buttonhole length using quick reverse button.

Advanced Sewing Functions

Security Program

Using the security program for needle and stitch plate limitations.

Thread Tension Adjustment

Altering Thread Tension

Detailed steps for adjusting upper thread tension.

Practical Stitches Summary

More Practical Stitch Summaries

Adjusting Practical Stitches

Temporary Stitch Memory

Temporary Altered Stitch Memory

How temporary stitch alterations are automatically saved.

Returning to Basic Settings

Methods to delete altered stitch memory and return to basic settings.

Practical Stitches Applications

Decorative Stitches Summary

Decorative Stitch Applications

Combining Decorative Stitches

Combining Decorative Stitches and Functions

Creating effects by combining decorative stitches and functions.

Combining Stitches in Combi Mode

Using Combi Mode for Stitch Combinations

How to combine practical and decorative stitches in Combi Mode.

Lettering and Alphabets Summary

Lettering Combination and Editing

Advanced Lettering Modifications

Combining Lettering with Functions

Combining lettering with functions like mirroring and pattern extend.

Buttonhole Types Summary

Buttonhole Programming

Direct Entry Buttonhole Length/Measurement

Entering buttonhole length directly or measuring on screen.

Important Buttonhole Information

Buttonhole Interfacing and Cord

Interfacing and Stabilizers for Buttonholes

Using interfacing and stabilizers for best buttonhole results.

Using Cord for Buttonholes

How to use cord for reinforcing and enhancing buttonholes.

Buttonhole Balance Adjustments

Balance for Buttonholes

How to balance buttonholes for correct stitch formation.

Automatic Buttonhole Operation

Automatic Buttonhole - Direct Entry Length

Using direct entry or screen measurement for automatic buttonholes.

Programming Automatic Buttonholes

Programming Automatic Buttonholes with Quick Reverse Button

Using the quick reverse button to program automatic buttonholes.

Saving Buttonholes Long Term

Buttonhole in Long Term Memory

Saving buttonhole programs long term.

Manual Buttonhole Sewing

Manual 4 or 6 Step Buttonholes

Instructions for sewing manual buttonholes in 4 or 6 steps.

Quilt Stitches Overview

Quilting Techniques Overview

Quilting Stitch Applications

Freehand Quilting

Instructions for performing freehand quilting.

Freehand Quilting with BSR

BSR Function Overview

Explanation of the BERNINA Stitch Regulator (BSR) function.

BSR Function with Straight Stitch

Using BSR with the straight stitch for free-motion quilting.

BSR Function with Zig-zag Stitch

Using BSR with the zig-zag stitch for embellishment.

BSR Operation Warning

Important safety warning regarding BSR operation.

BSR Mode Functions

Preparation for BSR Use

Steps to prepare the machine and foot for BSR operation.

Using BSR Mode Functions

Functions available within BSR mode: Needle Stop, Securing, etc.

Activating/Deactivating BSR Function

How to activate and deactivate the BSR sewing function.

Beeper Settings for BSR

Beeper Deactivation/Activation

How to turn the beeper sound on or off.

Selecting BSR Sound in Setup Program

Selecting sound options for BSR in the setup program.

Selecting BSR Sound on the BSR Screen

Selecting sound options directly on the BSR screen.

BSR Sewing Function Control

Activating BSR with Foot Control/Start-Stop Button

Methods to activate the BSR sewing function.

Deactivating BSR Function

How to deactivate the BSR function.

Holding Fabric for BSR

Tips for holding fabric correctly for best BSR results.

Personal Program for Custom Stitches

Programming Screen for Personal Stitches

Setting up a custom screen with frequently used stitches.

Managing Personal Program Stitches

Selecting Stitches in Personal Program

How to select stitches from the personal program.

Deleting Stitches from Personal Program

How to remove stitches from the personal program.

Altering Stitches in Personal Program

Altering Stitches in Personal Program

How to modify stitch settings within the personal program.

Saving and Deleting Stitch Combinations

Programming and Saving Stitch Combinations

Steps for creating and saving stitch combinations in memory.

Stitch Combination Management

Programming Stitches by Number

Saving stitch combinations using stitch numbers.

Clearing the Stitch Altering Area

Methods for clearing the stitch altering area.

Viewing and Managing Saved Combinations

Drawer Content Overview

Viewing saved stitch combinations within drawers.

Opening Saved Stitch Combinations

How to open and view saved stitch combinations.

Correcting Stitch Combinations

Correcting Stitch Combinations

Methods for correcting stitch combinations.

Deleting Last Programmed Stitch

Deleting the most recently programmed stitch.

Deleting Stitches Within a Combination

Deleting individual stitches from a combination.

Inserting Stitches into Combinations

Inserting new stitches into existing combinations.

Altering Stitch Combinations

Making alterations to stitch combinations.

Managing Stitch Combinations

Mirroring Entire Stitch Combinations

Mirroring entire stitch combinations horizontally.

Combination Sub-divider

Using the sub-divider function to separate combination sections.

Deleting Drawers

Options for overwriting or deleting saved drawers.

Setup Program Overview

Setup Program Introduction

Personalizing the touch screen settings.

Display Settings Configuration

Sewing and Embroidery Settings

Sewing Settings Adjustment

Adjusting motor speed and thread tension for sewing.

Embroidery Settings Adjustment

Adjusting settings for embroidery mode.

Embroidery Settings Details

Embroidery Settings 1: Reference Position

Calibrating the needle position for embroidery hoops.

Embroidery Settings 2: Speed and Tension

Adjusting motor speed and thread tension for embroidery.

Touch Screen Calibration

Touch Screen Sensibility Setup

Calibrating the touch screen sensitivity.

Display Messages and Audio Settings

Audio System Settings

Configuring audio feedback for stitches, functions, and BSR.

Information and Updates

Display Messages and Monitoring Functions

Configuring display messages and monitoring functions.

Computer Updates and Dealer Information

Updating Sewing and Embroidery Computer

Instructions for updating the computer's software.

Factory Reset Procedures

Reset to Factory Settings

Steps to reset the sewing computer to factory defaults.

Factory Reset and Data Deletion

Factory Reset Options

Choosing to reset sewing, embroidery, or all settings.

Deleting Personal Data

Options for deleting personal data like designs or settings.

Stitch Balance Adjustment

Balance Function Overview

Explanation of the balance function for stitch correction.

Balance Corrections for Stitches

How to adjust stitch balance to correct distortions.

Cleaning and Lubrication

Troubleshooting Common Issues

Upper Thread Break Issues

Causes and solutions for upper thread breaks.

Removing Trapped Thread

Steps to remove thread trapped in the take-up lever area.

Lower Thread Break Issues

Causes and solutions for lower thread breaks.

Skipped Stitches Troubleshooting

Causes and solutions for skipped stitches.

Needle Break Issues

Causes for needle breaks.

Unsatisfactory Stitch Formation

Troubleshooting poor stitch quality.

Cannot Sew Thick Fabric Solutions

Solutions for sewing thick fabrics.

Computer Performance Issues

Troubleshooting slow or unresponsive computer operation.

Defective Sewing Light

Information regarding a defective sewing light.

Update Error Handling

Steps to take if an update process fails.

On-Screen Messages Explained

System Messages and Notifications

Hardware and System Error Messages

Messages regarding needle position, hoop, and motor failure.

Update and Data Transfer Messages

Update Process Messages

Messages related to update file completion and success.

Personal Data Restoration Messages

Messages regarding missing or failed personal data restoration.

Memory Stick and Update Errors

Messages for missing memory stick or failed updates.

Setting Up the Embroidery Computer

Standard Embroidery Accessories

Optional Embroidery Accessories

Attaching the Embroidery Module

Free Arm Embroidery Adapter

Preparing for Embroidery

Hooping Fabric for Embroidery

Fabric Hooping Procedure

Steps for centering and hooping fabric correctly.

Embroidery Stabilizers Guide

Important Embroidery Information

Embroidery Threads and Bobbins

Selecting Embroidery Motifs

Embroidery Computer Motif Selection

Selecting built-in motifs from the computer.

USB Stick Motif Selection

Selecting motifs from a USB stick.

Selecting Alphabets for Embroidery

How to select alphabets for embroidery.

Selecting Embroidery Motifs

How to select motifs from the available library.

Selecting Personal Designs

How to select saved personal embroidery designs.

Starting the Embroidery Process

Attaching the Embroidery Hoop

Steps for attaching the hoop to the embroidery arm.

Starting Motif Embroidery

How to start embroidering a selected motif.

Embroidery Control and Operations

Starting Embroidery with Foot Control

Starting embroidery using the foot control.

On-Screen Embroidery Functions

Editing Embroidery Motifs

Motif Editing Tools

External Embroidery Functions

Starting Embroidery with Start-Stop Button

Starting embroidery using the start-stop button.

Embroidery Motifs Information

Motif Positioning and Embroidery

Embroidering a Motif

Steps to start and embroider a motif.

Positioning Motifs in the Hoop

Moving and positioning motifs within the embroidery hoop.

Motif Editing Tools

Checking Motif Position

Checking motif position using Check and Motif Center functions.

Altering Embroidery Motifs

Altering Motif Size

Enlarging or reducing motif size proportionally.

Stitch Properties Modification

Changing Stitch Properties

Modifying stitch type and density.

Convert Stitches Function

Convert Stitches (Split Stitch)

Converting embroidery motifs to long or straight stitches.

Stitch Density and Motif Combination

Altering Stitch Density

Adjusting stitch density for motifs.

Combining Motifs

Combining multiple motifs to create new designs.

Creating and Editing Motif Combinations

Creating Motif Combinations

Steps for creating motif combinations.

Lettering for Embroidery

Combining Letters for Lettering

Combining letters to create words and phrases.

Embroidering Letters with Alterations

Embroidering letters with modifications.

Altering Lettering

Scaling Lettering Proportionally

Enlarging or reducing lettering size proportionally.

Combining Lettering with Motifs

Combining Different Words

Putting together and positioning multiple words.

Motif Color Adjustments

Motif Color Management

Changing and reallocating motif colors.

Embroidering with Color Options

Embroidering Motifs in One Color

How to embroider motifs using a single color.

Embroidering Lettering in Multi Colors

Embroidering lettering with different colors per letter.

Manual Color Sequence Adjustment

Manually adjusting color sections for special effects.

Saving Embroidery Motifs

Saving Motifs to Embroidery Computer

Saving motifs to the computer's internal memory.

Saving Motifs to USB Stick

Saving Motifs to BERNINA USB Stick

Saving motifs to a BERNINA USB stick.

Overwriting Embroidery Motifs

Overwriting Saved Motifs

How to overwrite existing motifs on the computer or USB stick.

Deleting Saved Embroidery Motifs

Deleting a Saved Motif

Deleting individual saved motifs.

Deleting All Saved Motifs

Deleting all motifs from 'My Designs' or USB stick.

Deleting User Data

Deleting User Data Options

Deleting personal designs or memory stick data.

Embroidery Tutorial

Embroidery Support and Troubleshooting

Handling Thread Breakage During Embroidery

Steps for dealing with thread breakage.

Resuming Embroidery After Interruption

How to resume embroidery after an interruption.

Embroidery Failure Prevention and Remedies

Troubleshooting Thread Issues

Resolving upper and lower thread breaks.

Troubleshooting Skipped Stitches and Needle Issues

Resolving skipped stitches and needle break issues.

Troubleshooting Stitch Formation and Computer Performance

Resolving poor stitch quality and computer performance issues.

Update Error Resolution

Steps to resolve errors during software updates.

Embroidery On-Screen Messages

System and Service Messages

Service and Cleaning Notifications

Notifications for cleaning, lubrication, and service requirements.

Hardware and Hoop Error Messages

Messages for incorrect hoop attachment or needle position.

Embroidery Hoop and Module Error Messages

Hoop Size and Module Attachment Errors

Messages for incorrect hoop size or missing embroidery module.

Data Transfer and Mega-Hoop Messages

Messages related to data transfer and Mega-Hoop positioning.

Motor Failure Message

Message indicating main motor failure.

Optional Accessories

Embroidery Accessories

BERNINA artista Embroidery Software

Embroidery Software Overview

Introduction to the BERNINA artista PC software.

Connecting PC to Embroidery Computer

Steps for connecting the PC to the embroidery computer via USB.
Stitch Summary

Related product manuals