Cleaning the inside of the coffee
maker
1. Check regularly (about once a week) that the
inside of the appliance is not dirty. If neces-
sary, remove coffee deposits with a sponge.
2. Remove the residues with a vacuum cleaner
(fig. 30).
Cleaning the brewing unit
The brewing unit must be cleaned at least once a
month.
Important!
The brewing unit (A5) must
not be removed when the appliance is on. Do not
use force to remove the brewing unit.
1. Make sure the machine is correctly turned off
(see "Turning the appliance off").
2. Open the service door (fig. 16).
3. Remove the drip tray and waste coffee con-
tainer (fig. 17);
4. Press the two red release buttons inwards
and at the same time pull the brewing unit
outwards (fig. 31).
Important!
Do not use washing up liquid
to clean the brewing unit. It would remove the lu-
bricant applied to the inside of the piston.
5. Soak the brewing unit in water for about 5
minutes, then rinse.
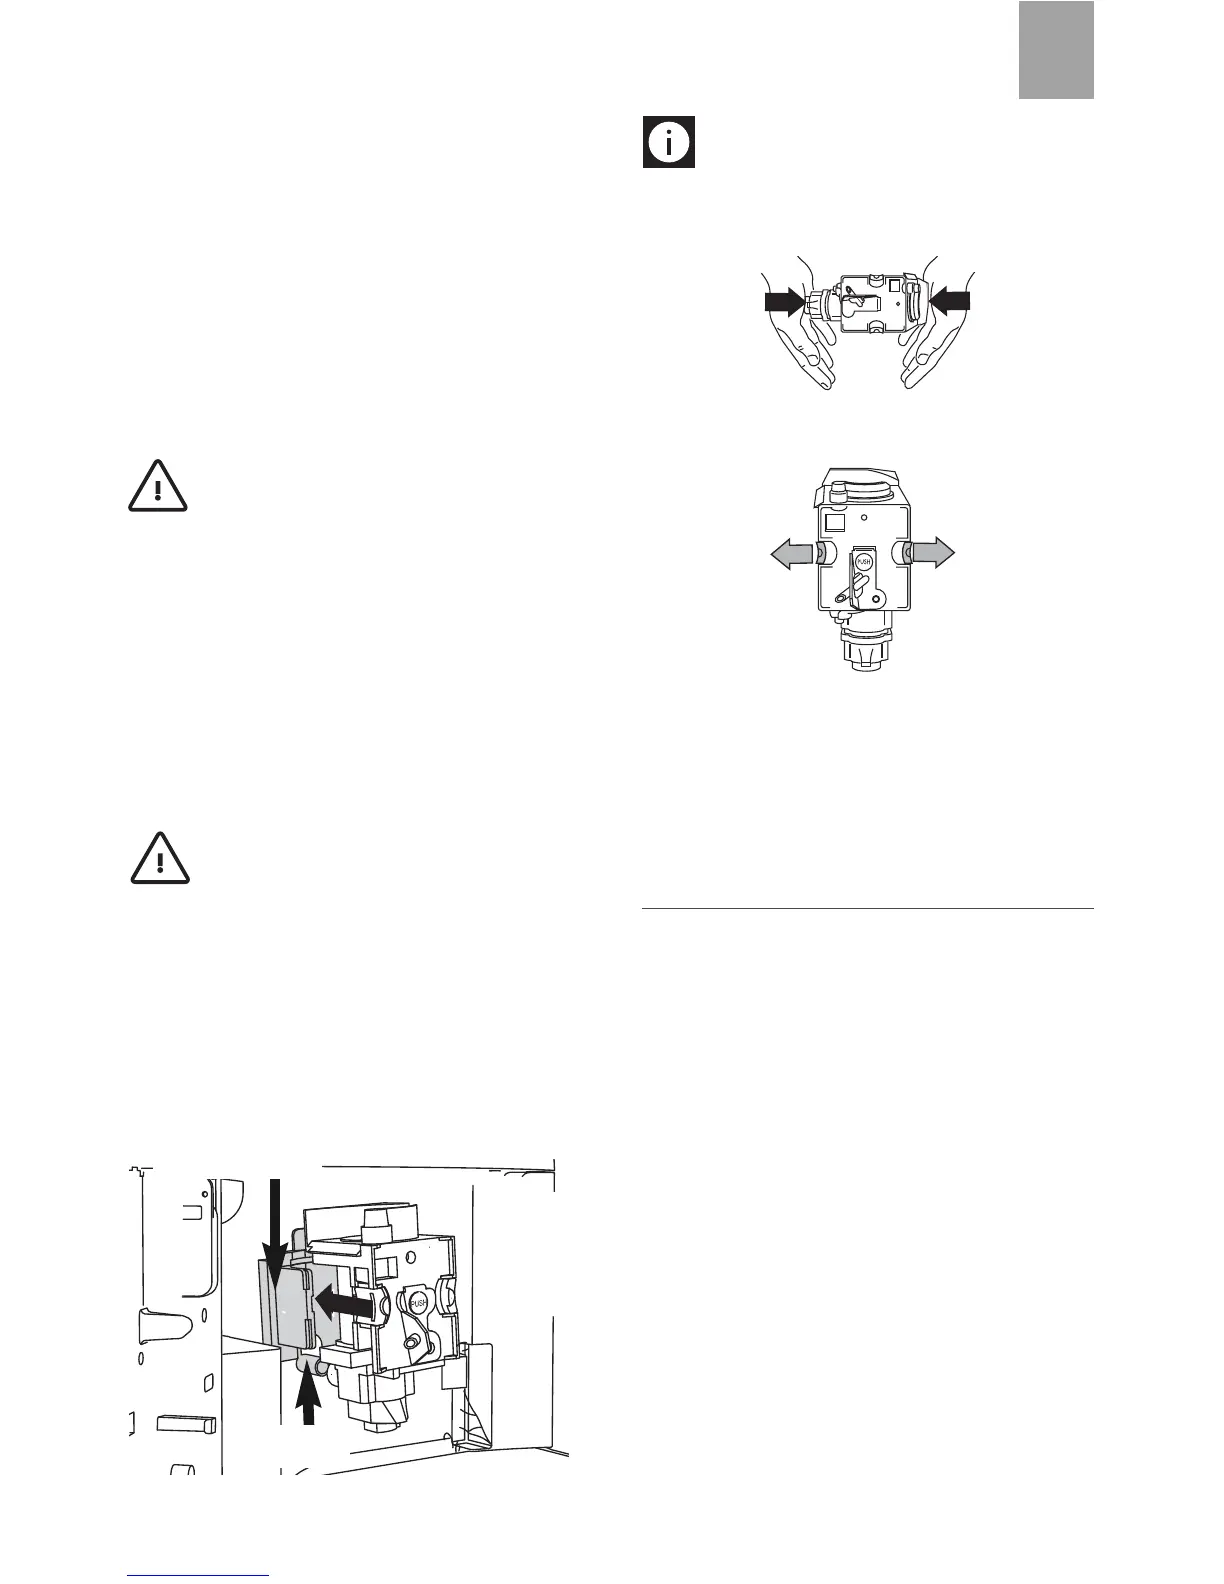
6. After cleaning, replace the brewing unit (A5)
by sliding it onto the internal support and pin
at the bottom, then push the PUSH symbol
fully in until it clicks into place.
N.B.!
If the brewing unit is difficult to in-
sert, you must first adapt it to the right dimen-
sions by pressing it forcefully from the bottom
and top as shown in the figure.
7. Once inserted, make sure the two red buttons
have snapped out.
8. Replace the drip tray and waste coffee con-
tainer.
9. Close the service door.
CHANGING AND SETTING
MENU PARAMETERS
When the appliance is ready, you can use the in-
ternal menu to modify the following parameters
and functions:
• Choose language
• Rinsing
• Shut-off time
• Set clock
• Start time
• Auto-start
• Temperature
• Water hardness
• Program coffee
• Program jug
• Program water
• Descale
• Reset to default
• Statistics
• Install filter
• Reset filter
18
GB
Pin
Support