EasyManua.ls Logo

Bestar 88420-1169-1269 User Manual

Bestar 88420-1169-1269
32 pages
To Next Page IconTo Next Page
Page #1 background imageLoading...
Page #1 background image
30
TC40B
70
17
71
43
34
75
34
75
76
MODEL MODÈLE MODELO
CHOCOLATE : CHOCOLAT : CHOCOLATE
WWW.BESTAR.CA : 1-888-8BESTAR (1 888 823-7827)
88420-1169-1269
Certified/Certifié/Certificado
ISO 9001
RIGHT ASSEMBLY
INSTRUCTIONS
INSTRUCTIONS
DASSEMBLAGE DROIT
INSTRUCCIONES DE
ENSAMBLAJE DERECHO
Question and Answer IconNeed help?

Do you have a question about the Bestar 88420-1169-1269 and is the answer not in the manual?

Bestar 88420-1169-1269 Specifications

General IconGeneral
BrandBestar
Model88420-1169-1269
CategoryIndoor Furnishing
LanguageEnglish

Summary

BESTAR Customer Service and Warranty

How to Contact BESTAR Customer Service

Information on how to contact BESTAR for assistance and warranty claims.

Bestar Product Parts List

Assembly Tools and Personnel Needs

Details on necessary tools, caution with electric tools, and required number of people.

Bestar Hardware Identification

Hardware Handling and Preparation Tips

Guidance on grouping hardware for each assembly step.

BESTAR Assembly Guidance and Important Notices

Using the Self-Adhesive Sticker

Guidance on completing and retaining the self-adhesive sticker.

Main Hardware System Overview

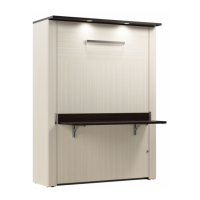
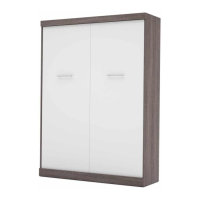
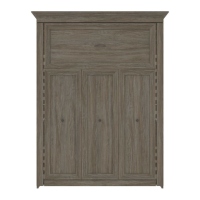
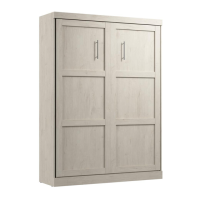
Details on the main hardware system and initial installation steps.

Desk Assembly: Step 1 Hardware Installation

Installing Desk Drawer Slides

Detailed instructions for installing drawer slides (CO-249, VE-244) and related hardware.

Desk Assembly: Step 2 Pre-Assembly

Assembling Desk Panels and Cams

Instructions for assembling desk panels using cams and ensuring proper tightening.

Desk Assembly: Step 3 Hardware Installation

Attaching Desk Panels with Screws and Brackets

Detailed steps for installing hardware (PA-844, VR-210, EQ-143) to desk panels.

Desk Assembly: Step 4 Pre-Assembly (Upside Down)

Connecting Desk Components Upside Down

Instructions for assembling desk components in an upside-down position.

Desk Assembly: Step 5 Hardware Installation

Installing Desk Side and Back Panels

Steps for attaching panels 33, 72, and 41 using specific hardware.

Desk Assembly: Step 6 Pre-Assembly (Upside Down)

Securing Desk Frame Components

Instructions for assembling desk frame parts in an inverted position.

Desk Assembly: Step 7 Final Assembly

Finalizing Desk Structure and Connections

Connecting main desk panels using specific screws and hardware.

Hutch Assembly: Step 8 Hardware Installation

Attaching Hutch Panels and Decorative Moldings

Steps for installing hardware and decorative moldings onto hutch panels.

Hutch Assembly: Step 9 Pre-Assembly

Assembling Hutch Frame Components and Moldings

Instructions for assembling hutch frame parts with decorative moldings.

Hutch Assembly: Step 10 Hardware Installation

Installing Hutch Shelves and Support Brackets

Steps for attaching shelves and supports (45, 75, 20) using specific hardware.

Hutch Assembly: Step 11 Pre-Assembly

Assembling Hutch Back Edge Panels

Instructions for assembling the hutch on its back edge with specific hardware.

Hutch Assembly: Step 12 Hardware Installation

Installing Hutch Glass Panels and Frames

Steps for attaching glass panels (42, 82) using hardware and supports.

Hutch Assembly: Step 13 Pre-Assembly

Assembling Hutch Frame on Back Edge

Instructions for assembling the hutch frame on its back edge.

Hutch Assembly: Step 14 Upright Assembly

Installing Hutch Back Panel and Supports Upright

Steps for installing the back panel and supports for the hutch in an upright position.

Hutch Assembly: Step 15 Door Installation

Fitting and Adjusting Hutch Doors

Instructions for installing and adjusting the hutch doors.

Desk Assembly: Step 16 Base Hardware Installation

Attaching Desk Base Components

Steps for installing hardware and components to the desk base.

Desk Assembly: Step 17 Keyboard Shelf Installation

Mounting the Keyboard Shelf Unit

Instructions for installing the keyboard shelf (41) using specific hardware (TC40C).

Hutch Assembly: Step 18 Pre-Assembly

Assembling Hutch Side Panels

Instructions for assembling the hutch side panels on the back edge.

Hutch Assembly: Step 19 Pre-Assembly

Connecting Hutch Components

Steps for connecting hutch components using hardware.

Hutch Assembly: Step 20 Final Installation

Finalizing Hutch Structure and Connections

Instructions for completing the hutch assembly and final connections.

Drawer Assembly: Step 21 Hardware Installation

Assembling Drawer Sides and Hardware

Steps for installing hardware and assembling the sides of the drawers.

Drawer Assembly: Step 22 Drawer Box Assembly

Assembling Drawer Box Components

Instructions for assembling the main drawer box components.

Drawer Assembly: Step 23 Drawer Filing System

Installing Drawer Filing System Components

Steps for assembling drawer components and installing filing system parts.

Drawer Assembly: Step 24 Final Installation and Adjustment

Finalizing Drawer Installation and Front Adjustment

Instructions for installing drawers, adjusting fronts, and tightening screws.

Final Assembly Steps and Product Care

Installing Plastic Caps and Leg Levelers

Instructions for installing plastic caps and using leg levelers for furniture adjustment.

Product Care and Maintenance Guidelines

Guidelines for cleaning, dusting, and maintaining the furniture.

Bestar Product Troubleshooting and Solutions

Troubleshooting Missing Hardware

Advice on missing H-36 bolts and checking installation.

Troubleshooting Drawer and Door Alignment Issues

Solutions for crooked drawers/doors and uneven spacing.

Bestar Product Information, Warranty, and Resources

Brand Resources and Warranty Overview

Details on BESTAR's website, logo meaning, and product warranty.

Related product manuals