LaserSpeed 9000 Operator Guide
LaserTrak Software
Part No. 93296 / Drawing No. 0921-01419 Page 13 of 16 Revision F (Feb 2013)
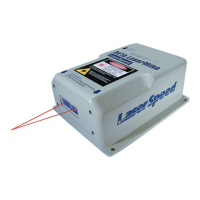
3) Check status lights on the gauge. The power light should be on and the
Laser on light should be on. This indicates that power has been applied
to the gauge and the Interlock is closed so the Laser power can be
applied.
4) Click on the LaserTrak Icon to start the LaserTrak Software.
a) The LaserTrak software should search all COM ports on the
computer and find the COM port that the gauge is connect to.
Check the LS4000-3 Instruction Handbook for more information
if the software does not find the gauge.
b) Once communication has been established between the
LaserTrak software and the gauge, the software will display the
Chart Recorder screen.
c) Click on “Tools” then “LaserSpeed Configuration” to go the
configuration screen.
d) Change the configuration settings to correspond to your
application.
e) Click Close and update the setting to the gauge.
f) The gauge is now ready to start measuring.
 Loading...