5
Notes on handling batteries
•
If your skin or eyes come into contact with battery fluid, rinse the
affected areas with water and seek medical assistance.
•
Choking hazard! Small children may swallow and choke on batter-
ies. Store the batteries out of the reach of small children.
•
Observe the plus (+) and minus (-) polarity signs.
•
If a battery has leaked, put on protective gloves and clean the battery
compartment with a dry cloth.
•
Protect batteries from excessive heat.
•
Risk of explosion! Never throw batteries into a fire.
•
Do not charge or short-circuit batteries.
•
If the device is not to be used for a relatively long period, take the bat-
teries out of the battery compartment.
•
Use identical or equivalent battery types only.
•
Always replace all batteries at the same time.
•
Do not use rechargeable batteries.
•
Do not disassemble, split or crush the batteries.
Repair and disposal
•
Batteries do not belong in domestic refuse. Used batteries should be
disposed of at the collection points provided.
•
Never open the instrument. If these instructions are not heeded, the
warranty will be null and void.
•
Never attempt to repair the instrument or adjust it yourself. We can no
longer guarantee perfect functioning if you do.
•
Repairs may only be performed by Customer Service or authorized
dealers. However, always check the batteries and replace them if nec-
essary prior to making any complaint.
•
Please dispose of the device in accordance with EC Directive –
WEEE (Waste Electrical and Electronic Equipment).
If you have any questions, please contact the local authorities
responsible for waste disposal.
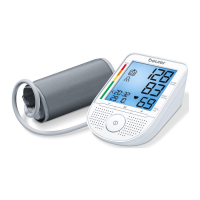
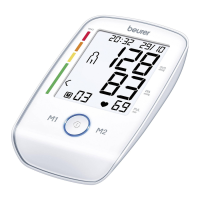
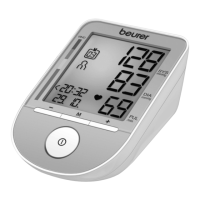
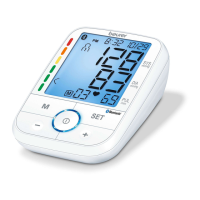
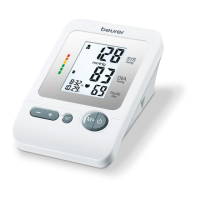
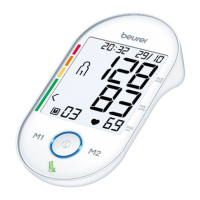
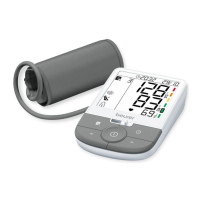
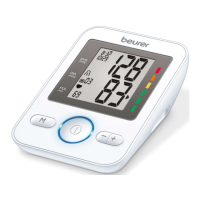
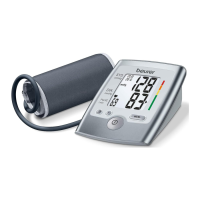
3. Unit description
1. Cuff
2. Cuff line
3. Cuff connector
4. Display
5. Connection for mains part
6. Memory button
7. START/STOP button
8. Function buttons
9. Risk indicator
10. Connection for cuff connector
2
1
3
10
9
8
7
6
4
5