©2013 DELTA T CORP. ALL RIGHTS RESERVED. 003927 REV. I
3
HAIKU
®
by BIG ASS FANS
HAIKU WALL CONTROL (CONT.)
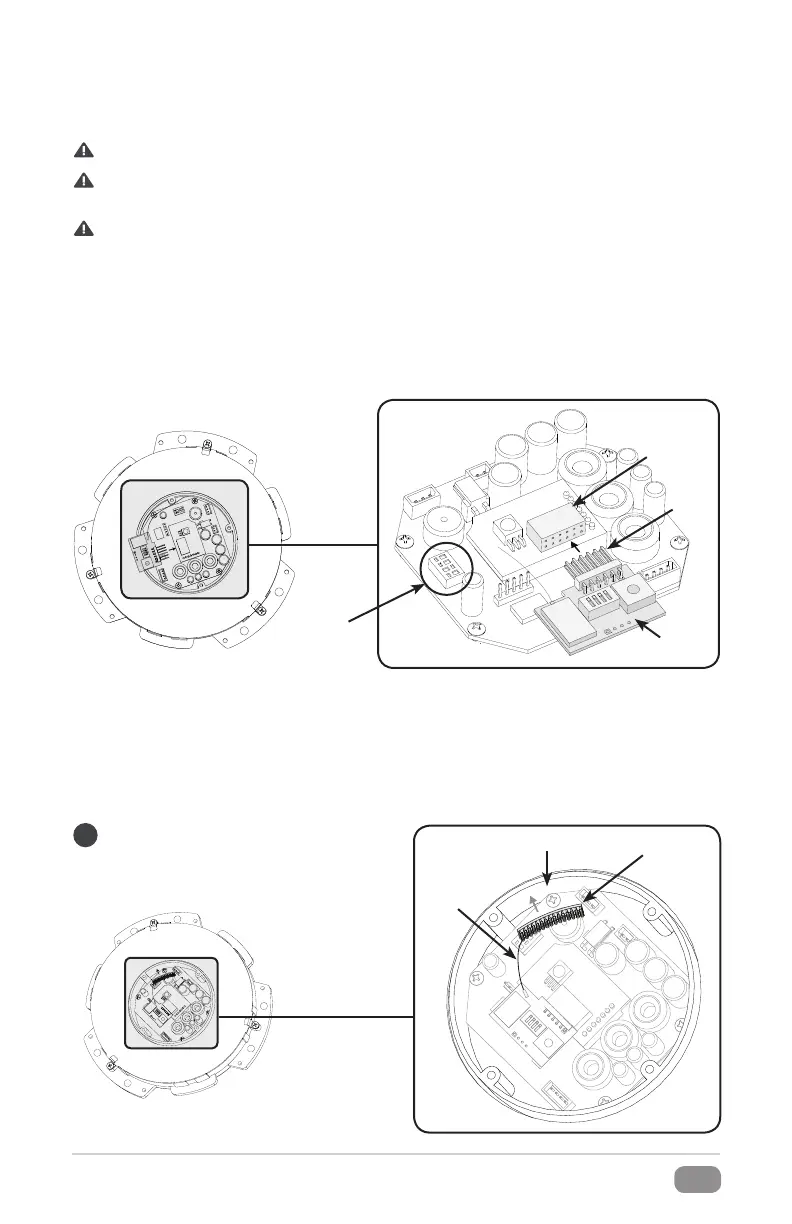
Step 4. Install RF board
CAUTION: Do not touch the fan electronics during installation unless necessary!
CAUTION: Do not adjust the DIP switch settings on the fan’s circuit board! Adjust only the
DIP switches on the RF board(s) that will be plugged into the fan(s).
WARNING: Ensure power is disconnected at the fuse/breaker before installing the wall control and
the fan!
Install the RF board in the fan circuit board as shown below. If linking multiple fans, install an RF board in
each fan circuit board.
If the fan’s circuit board has one row of female connectors (blue), install the lower set of six (6) RF board
prongs into the circuit board. If the fan’s circuit board has two (2) rows of female connectors (black), install all
twelve (12) RF board prongs into the circuit board.
Step 5. Install antenna retainer
Secure the antenna to the antenna retainer, and then peel the adhesive backing o the retainer.
Attach the sticky side of the retainer to the inner side of the hub wall as shown. Make sure the antenna is
straight and snug in the retainer, and that the retainer is far enough inside the hub that the lower cover will
not rub against it. Reinstall the lower cover.
Underside of Fan Hub
RF Board
Female
connectors
(two rows)
Prongs
Do NOT
adjust these
DIP switches!
Underside of Fan Hub
Antenna
Antenna
Retainer
If the fan does not respond to commands from the
wall control, adjust the position of the antenna in
the retainer until the fan responds.
tip!
Hub Wall
 Loading...