48
Dealing with a flat tyre
20.6.2 Fitting the rear wheel
20.6.2.1 FLYER with chain gears
Place the chain in the smallest sprocket.
Take the rear derailleur in your hand at the
parallelogram and pull it backwards.
Now pull the wheel into the dropouts until it
touches the end.
Close the quick release or tighten the wheel
nut with the required torque (see chapter 33.3).
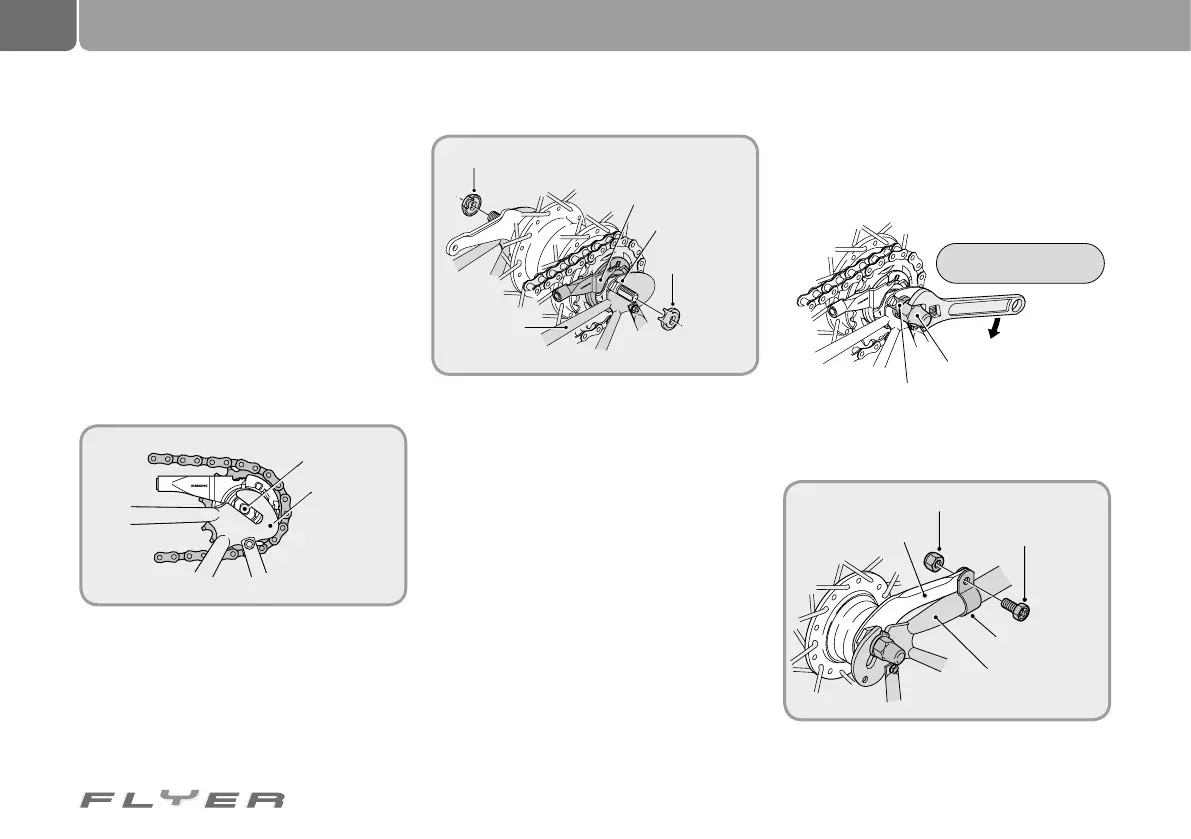
20.6.2.2 FLYER with hub gears
Step 1: Place the chain on the sprocket and
thread the hub axle into both dropouts.
Step 2: Attach the lock washers to both sides
of the hub axle. Turn the gearshift arm so that
the teeth of the lock washers mesh with the
slots in the dropouts. In this case the gear-
shift arm can be mounted almost parallel to
the frame fork.
• The protruding part of the lock washer has
to be located on the open side of the drop-
outs.
• Insert the lock washers in such a way that
the teeth precisely fit into the dropout slots
on the front and rear side of the hub axle.
Step 3: Tense the chain by pulling the rear wheel
backwards and attach this as centrally as pos-
sible in the rear fork with the axle nut using the
required torque.
Step 4: Position the brake arm with its clamp
bracket correctly on the chain stay.
C
J
-
N
X
1
0
J
A
P
A
N
L
O
C
K
7
R
Source: Shimano
®
techdocs
Hub axle
Dropout
Lock washer (left side)
Open side of
the dropout
Cap nut
Clamp bracket nut
Clamp bracket screw
Brake arm
clamp bracket
Brake arm
Frame fork
Lock washer
Lock washer
(right side)
Gear shift arm
Frame fork
Torque: 30 - 45 Nm
CJ-NX10
JAPAN
C
J
-
N
X
1
0
J
A
P
A
N
L
O
C
K
7R