OVERSEEDER/POWER RAKE Owner’s Manual
Part No 350412 350412_E_HI
OPERATION
NOTE: Items in ( ) can be referenced in the Parts Illustration and Parts list on pages 11-16.
SLICING OPERATION
NOTE: NEVER PARK THIS UNIT ON A SLOPE OF ANY KIND. Always keep the reel in
the up position when parking the unit.
BLADE POSITION & DEPTH CONTROL LEVER: The blades can be raised or lowered into the
ground by height adjustment lever on the engine base. The height adjuster lock lever must be
pushed back against the adjustment lever in order to lower the blades into the ground. The
resulting blade depth can be adjusted higher or lower.
ADJUSTING BLADE DEPTH: The blades can be raised or lowered by rotating the knob on the
top of the adjustment lever. The blades are lowered by rotating the knob clockwise, and raised
by rotating the knob counter-clockwise. The relative depth of the blades can be gauged by using
the depth scale located on the right front corner of the engine base. With new blades installed
the depth can be estimated as follows: 2.5 on the scale is even with the ground, 3 is equal to
0.25" deep, and 3.5 is equal to 0.5" deep.
FOLDING HANDLE: This unit is equipped with a folding upper handle for easier storage and
transportation. The handle can be folded by sliding the handle lock loops (item 28) up. This
releases the upper handle, allowing it to be folded over the unit.
RAKING OPERATION-FLAIL REEL (See Fig. 4)
NOTE: Must have the flail reel assembly (350112) for this operation.
SET DEPTH: With engine off, set the raking depth so that the blades just touch on a flat surface (i.e.
driveway, or sidewalk).
ENGAGE BLADES: Pull back on the bail on the operators handle. NOTE: When engaging the blades
in heavy load conditions (i.e. heavy thatch, or very uneven turf), push down on the operators handle
lifting the front wheels slightly. Engage the blades. Slowly lower the unit into the turf.
RAKE: Rake a small test area and examine the results. Thatch should be removed and deposited on
top of the healthy grass. If excessive damage occurs to healthy grass, adjust the blade depth to
decrease damage. Continue raking the yard, working in one direction (i.e. north-south, or east-west).
NOTE: If a large drop in engine RPM occurs, or the unit pulls you forward and bounces during
operation the blade depth is set too low.
REMOVE THATCH: After raking, a layer of thatch will be deposited over the top of the lawn. This
thatch must be removed prior to any fertilizing, seeding, or watering of the lawn. We suggest the use
of a lawn vacuum or wheeled blower for collection and removal of the thatch.
clockwise to
lower blades
counter clockwise
to raise blades
blades up
transport
blades up
transport
blades down
running
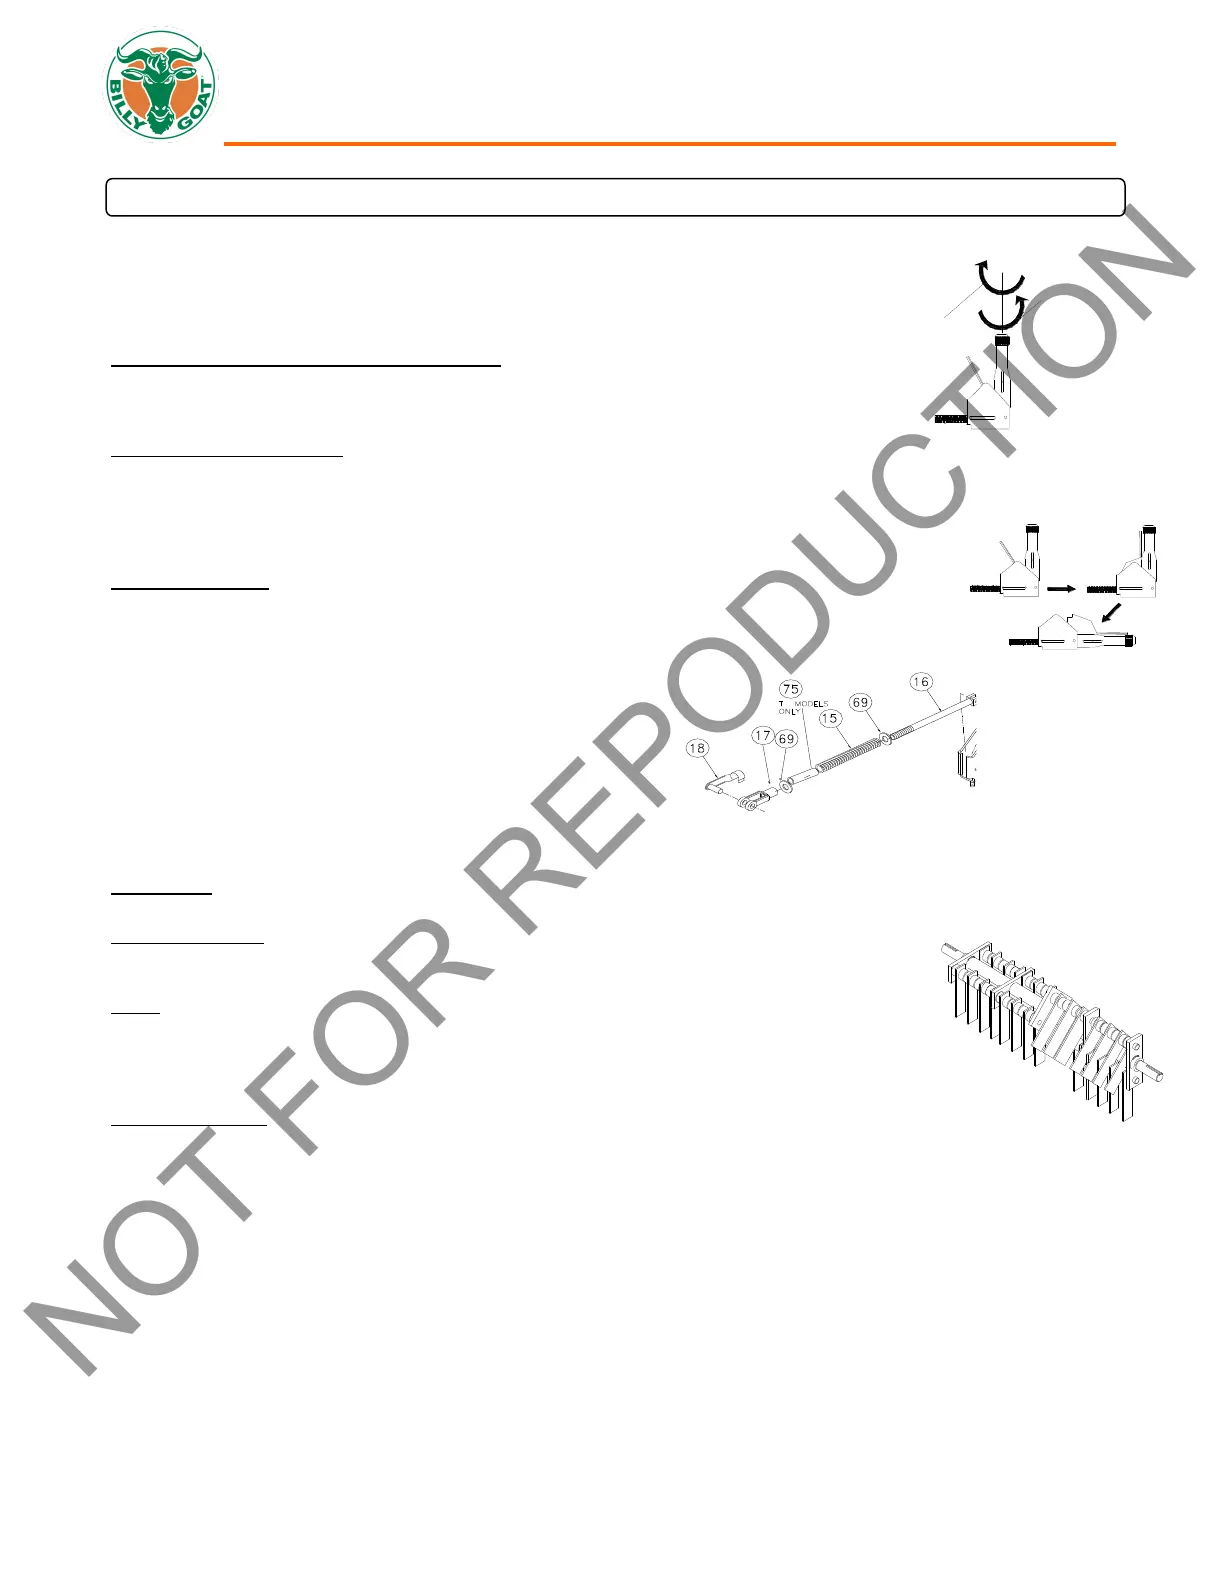
SPRING TINE CONVERSION
If you are converting your Power Rake to a spring tine reel, you will
need to replace the spacer on the control lever to accommodate for
the tine. First remove the clip (item 18), then unscrew the yoke (item
17), remove the washer (items 69) and insert the spacer (item 75) in
front of the spring. Reassemble in reverse order.
 Loading...