MENU
SCAN
V O X
DCM
MIC
Your MR620 includes one battery pack
for each handset.
To remove the belt clip
It is easier to fit the batteries without the belt clip
in place.
Pull the tab forward(away from the handset)
to release the belt clip. Then lift the belt clip
off.
1.Fitting the batteries
Insert your
fingernail
behind the tab
Lift the belt
clip off
Battery meter
The battery meter is located in the left corner of the LCD panel. It looks
like a battery with three bars inside. These indicate the amount of
power available. As the power is used the bars will disappear. When the
battery level reaches its minimum level, the handset will emit two beep
tones and automatically turn OFF the power.
_
Important read these
Safety Warning before
you charge the batteries
When placing the handset in the charger, use only the
rechargeable battery pack supplied with the MR620.
Don't try to recharge non-rechargeable batteries.
Make sure the battery compartment cover is securely locked in
place when you are charging the batteries.
Dispose of used batteries safely and in a way that will not harm
_
the environment never try to burn them or put them anywhere, they
could get burnt or punctured.
Don't leave dead batteries in your handset.
They might leak if you do.
2.Charging the batteries
Connect the main power
lead to the charger
socket.
Plug the mains adaptor into
a 230V AC ,50Hz main socket
with the switch on the socket
set to OFF.
Then switch on the main socket.
Place the handsets in the
charging cradle.
It takes about 10 hours to recharge the batteries fully if they've
become completely run down. New batteries take up to 14 hours to
charge fully.
The charge light comes
on when a handset is put
on charge.
To fit the belt clip
Slide the belt clip down into the slot until it clicks
into place.
Transmitting range
The talk range depends on environmental and terrain. It will be
greatest (up to about 3km or 1 3/4 miles) in wide open spaces,
without obstructions such as hills or buildings. Don't try to use two
PMR handsets which are less than 1.5m (5feet)apart.If you do, you
may get interference.
Important safety warning
To reduce radio frequency exposure when you're using your MR620,
hold the handset at least 5cm(2inches)from your face.
Never use your MR620 outdoors in a thunderstorm.
Don't use the MR620 in the rain.
If your MR620 ever gets wet, turn it off and remove the batteries. Dry
the battery compartment and leave the cover off for a few hours. Don't
use the handset until it is completely dry.
Keep the MR620 out of the reach of babies and young children.
To switch your PMR ON&OFF
To switch the PMR ON.
Press and hold the ON/OFF button until the channel number is
displayed & you hear a beep.
To switch the handset OFF
Press and hold the ON/OFF button until the display goes
blank.
You hear a musical tone each time to confirm.
Battery life
The MR620 has a built in power saver feature to make the batteries
last longer. But when you are not using the handset, it's better to
switch it off to save the battery power.
3.Using the Personal Mobile Radio(PMR)
Volume control
To adjust the loudspeaker volume
Press the UP or DOWN button.
Changing the channels and sub-channels
MR620 has eight channels, numbered 1to8. To communicate with
other PMR users within range, you must all have your PMR tuned
to the same channel.
Press the MENU button once
The current channel number flashes on the display
Press the UP or DOWN buttons to go to the channel you want
Press the TALK button to confirm the channel setting.
Each channel also has 38 sub-channels(sometimes call CTCSS codes)
letting you set up groups of users within the same channels, for more
private communication. If you have set sub-channel, you can
The volume level is shown by the bars on the display. You can
change the volume either while you're using your MR620
handset, or while the handset is idle (switched on but not in
Use).
communicate only with other users tuned to the same channel and
sub-channel.
To turn the sub-channel function off, simply set the sub-channel to
0 (zero).Then you can communicate with any PMR user on the same
channel who also turned off sub-channel operation(or whose PMR
handset does not have the feature).
Press the MENU button twice
The current sub-channel number flashes on the display.
Press the UP or DOWN button to go to the sub-channel you want
Press the TALK button to confirm the sub-channel setting.
TALK
1
2
3
TALK
1
2
3
Transmitting and Receiving.
_
MR620 transmission is 'one way-at-a-time' while you are
speaking, you can not receive a transmission.
_
MR620 is an open-license band always identify yourself when
transmitting, as other people may be communicating on the same
channel.
To speak to another handset user
Press and hold the TALK button so that the Transmitting
symbol ( ) appears on the LCD panel.
Speak clearly into the microphone, in a normal tone - don't
shout
When you're finished speaking, release the TALK button.
TALK
1
2
3
To listen to another handset user
Make sure you are not pressing the TALK button
Receiving symbol ( ) is shown on the display when the other
person is speaking. Don't try to transmit until they have finished.
Monitoring the current channel
Normally the MR620 will not pick up very weak signals. But you can
monitor the current channel for all sounds.
To activate monitoring feature
Press and hold the MENU and DOWN buttons at the same time.
The receiving symbol ( ) appears on the display.
Your handset will pick up any signals on the current channel,
including background noise.
Press the TALK button to stop monitoring.
VOX(voice activated transmission)mode
In VOX mode your handset will transmit whenever it detects your
voice (or other noise) without the TALK button having to be pressed.
It will transmit for 2 seconds even if you stop talking.
The level of VOX sensitivity is shown by Numbers on the display. At
the highest level, the handset will pickup softer noise(including
background noise); at the lowest level, it will pick up only quite loud
noise.
To turn VOX mode ON and OFF:
Press the MENU button Three times
VOX icon is displayed and OF flashes on the LCD panel.
Press the UP button to set the level of sensitivity.(3 maximum)
If you press the DOWN button until OF appears on the display,
vox is turned off.
Ring tone
You can send ring tone to other handsets within range and tuned to
the same channel,(and sub-channel if applicable), to alert them you
want to communicate with them.
Press and release the CALL button
You will hear a ring tone for about two seconds, while the
transmitting symbol( ) appears on the LCD panel. Any other
handset within range and tuned to the same channel will
hear Ring tone, and may decide to transmit to you.
Selecting Call-Ring tones
Press the MENU button four times, the unit will enter
CA
Call-Ring setting mode. The LCD will display 1 while 1
is flashing.
Press the UP or DOWN button to change the Call-Ring tone.
(5 different tones),the different Call-Ring tones can be heard
during changing.
Press the TALK button to confirm your setting after you select
your desired Call-Tone.
Setting Call-Ring off
If you don't want to hear the call tone, you can set Call-Ring mode
to OFF. In this stage, you can send the Call-Ring(default Call-Ring
number 1) to the other party, but you will not hear the tone.
Press the TALK button to confirm the setting.
As long as the handset is in VOX mode, VOX is shown steadily
on the display.
TALK
1
2
3
TALK
1
2
3
TALK
The PMR must be charged using the mains
adaptor provided. Using any other adaptor will
result in non-compliance with EN60065 and will
invalidate any approvals & warranty.
1.Open the locking latch
and take off the battery
compartment cover.
3.Replace the cover and
close the latch.
2.Insert the battery pack
making certain that the
arrow is showing & pointing
towards the top of the handset.
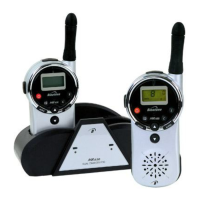
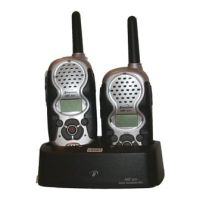
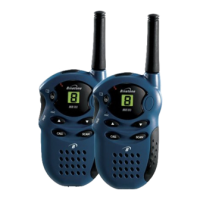
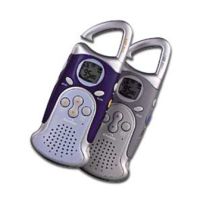
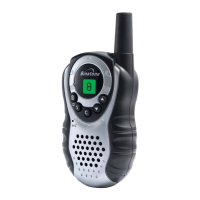
Personal Mobile Radio(PMR)
With twin charger
call button
Press to send Ring
tones to other
handsets
TALK button
Press and hold while
you' re transmitting
ON/OFF button
What' s on the display
MENU button
Press to change
Channels and
sub-channels, and
to switch between
modes
MR620
User Guide
Lock button
Press and hold to
Lock and unlock
the buttons
Microphone
Up and Down
buttons
Press to change
the speaker
Volume. Press
after menu button
to change the
channels
Channel number(1to8)
Sub-channel number(0 to 38)
Battery change level. when the bars reduce,
the battery needs charging
Shown when you are transmitting the signal
Dual watch-shown when you are monitoring
two channels at once.
Shown when the unit is in VOX (voice activated
mode)
Shown when the unit is scanning all channels
Shown when the buttons are locked
Volume level
Shown when you are receiving the signal
Flash Light button
Press for flash light
Socket for hands-
free kit(Socket)*
under the hinged
cover
Flash Light
VOX
DCM
SCAN
VOX
DCM
SCAN
SCAN
V OX
DCM
MENU
VOX
DCM
SCAN
VOX
DCM
SCAN
SCAN
VOX
DCM
MENU
MENU
MENU
MENU
MENU
MENU
Binatone Help Line: 0845 345 9677 Binatone Help Line: 0845 345 9677
To fit the batteries
Do not remove the sleeve from
the battery pack.