OPERATING INSTRUCTIONS
Unpacking Equipment
1. Open the shipping box and li the device up and out of the box.
(Maintain shipping box for future use. Equipped with a special fold-up handle for
ease of use).
2. Remove the protecve end caps from the sides of the device.
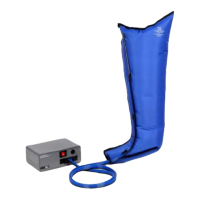
3. Remove the garment from the plasc bag and unroll both tubing secons.
Unfold the garment and spread it at.
Preparing for Treatment
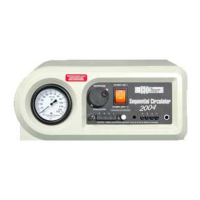
4. Place the device on a at and sturdy surface in close proximity to the paent.
5. Plug the power cord into a safe electrical outlet. A grounded outlet is not required.
6. Locate the Latch Connector Bars, numbered 1-4, at the end of the garment tubing.
7. Hold in one hand with numbers facing upward. Squeeze the sides of the Latch
Connector Bar and insert receptor ports into the corresponding numbered air supply
ports. There shall be an audible ’click’ once fully engaged.
8. If two (2) garments are being used simultaneously, remove the Blocker Bars, and
aach the Latch Connector Bars to the corresponding numbered auxiliary ports.
Axing the Compression Garments
Cauon: Do not wear garments directly on bare skin. Always wear light clothing,
light bandages, clean hosiery or stockinees underneath garments for hygienic pur-
poses and to prevent skin irritaon. Clothing must be free of zippers, buons and
other items that could rub and chafe the skin or damage the compression garment.
9. Leg Garments - Carefully unzip the garment fully without separang the zipper at the
end. Place foot at boom end of garment and use garment straps to guide garment
onto the leg. Once garment is fully in place, pull zipper up to secure garment around
the leg.
10. Arm Garments - Slide arm through the internal cavity of the garment.