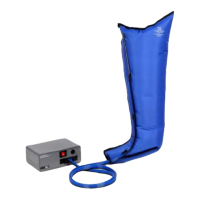
GARMENT SPECIFICATIONS
MATERIAL:
#306 Royal Blue, 200 DenierNylon
3.0 oz. Poly-Ether-Urethane Coating
Antimicrobial ● Water Repellent
Stain Resistant ● Fire Retardent.Cal.#117
TUBING:
The garment tubing is manufactured by the Freelin-Wade Co. and is produced in pleural form consist-
ing of two groups of 4 Tubes bonded together and color coded with 3 tubes in blue and 1 tube in black.
This color coding prevents attachment of both tubing bundles to the pump is reverse order.
The tubing is 80A durometer PVC with each tube measuring .281 x .187 with a Tolerance of +/-.005.”
The tubing has been tested to withstand pressures of up to 15 PSI which well exceeds the highest operat-
ing pressure or capability of the pumps maximum output pressure.
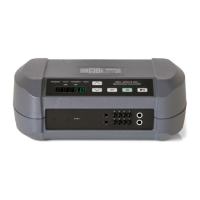
END OF TREATMENT
When your treatment time is completed, press the PUMP SWITCH (#1) down to the “OFF” position.
As noted earlier, although the pump shuts off, the switch may remain lighted until the timer completes
its cycle, at which time it will automatically shut off. Unplugging the power cord at this point will cut
total power to device.
Once the light has shut off, it is also safe should you desire, to remove the garment.
1. Pull the left and right LOCKING PINS (#8) outward away from pump.
2. Grasp four tubes in hand just above TUBING PLUG (#8) and pull outward away from pump to
remove.
3. First gently bend your arm or leg (depending where garment is located) to partially release some
air from chambers.
4. Continue to assist the evacuation of air from garment, working downward from top to bottom.
5. Once the garment feels loose enough, you can unzip the garment all the way down to bottom-stop
and remove.
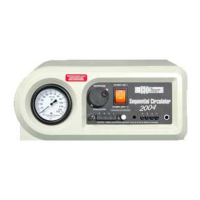
MODEL # 3004 ONLY
ADJUSTING GRADIENT PRESSURES
1. Model #3004 Sequential Circulators provide total Calibrated Gradient Pressure.
2. All gradients have been carefully calibrated at the factory resulting in the highest pressure in
chamber #1 graduated down to the lowest in chamber #4.
3. The main PRESSURE ADJUSTMENT KNOB (#2) sets the pressure for section one (lowest sec-
tion) of the sleeve. As it is adjusted, it will also raise or lower in proportion, the remaining sections.
4. In the unlikely event you would wish to change the gradient settings calibrated at the factory, it is
possible to do so by using the “over-ride” adjustments (#7) on the underside of the pump.
5. We described earlier how the Pressure Gauge responds to filling pressures with a brief “dip” before
raising back up to the actual pre-set pressure.
9