11
WATER DRAINGE METHODS
This product has a self-evaporative system. The condensing water
will recycle to cool the condenser. This water-cooled mode can not
only improve cooling efficiency and decrease noise, but also save
energy for you.
* When in cooling mode, the water from the evaporator will flow into a inside
pan. When the water reaches the low level, the water pump will work until
the water is under the low level. When the water reaches the high level, the
compressor will stop working, and the water pump, lower fan motor and
upper fan motor will work on all the time.
* When in heating mode, the water pump won't work.
* When the water is full, the water full indicator will light and the compressor
will stop working. The buzzer will buzz 10 times every 5 minutes until the
water is below the high level or drained by hand. When the alarm stops and
after three-minutes restart delay, the unit will
work normally.
* You can drain the water out with a drain pipe. It
is included in the accessory. But first you
should put some vessel like pan under the
hose, then take out the plug on the drain mouth,
thus the water will flow into the vessel and
won't make the floor wet. (Fig.13) If the
drainpipe is shorter than you need, you can
purchase a pipe (9mmI.D.). Then connect it to
the drainpipe with the drainpipe kit we supply.
* Move the unit gently when the water is high. If
not , the water may spill from the inside of the unit.
* When the water in the cave is not enough for pumping, the pump will stop
working. At the same time, the Water Injection indicator on the control panel
will illuminate ( ), you had better inject some water into the water draw
carefully. In order to avoid the water flooding from the under pan, you should
inject water not more than 1800ml (three cups). This operation helps save
20%-30% energy for you.
MAINTENANCE
Cleaning
Switch the unit OFF and pull the plug from the socket before any cleaning or
maintenance.
Clean the surface of the unit with a damp, soft cloth. Do not use harsh
detergents, solvents, abrasives or chemicals.
Cleaning the Air Filters
If the air filter is dirty, the efficiency
of the unit reduces. It is
recommended to clean the filters every
two weeks.
1)
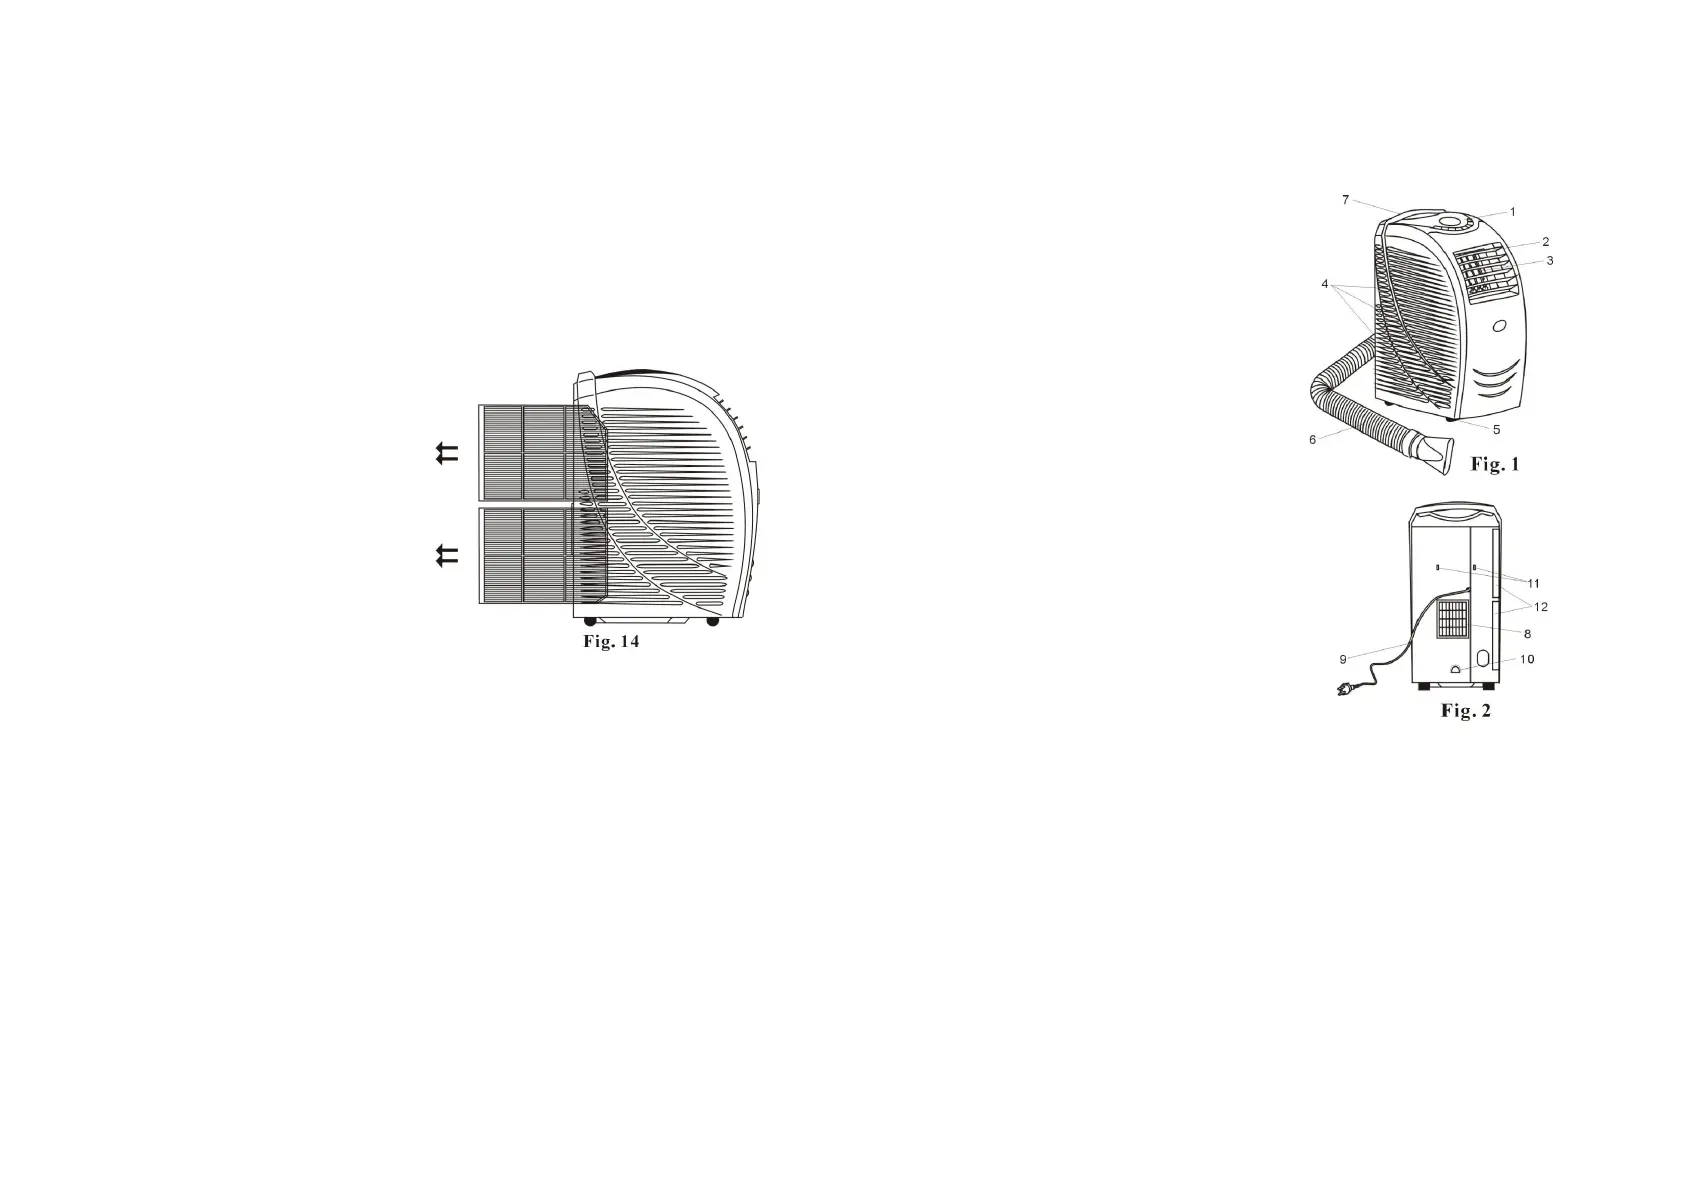
Pull out the air filters (Fig.14).
2)
Wash the filters in warm (under 40°
C or 104°F) water, with a neutral
detergent, then rinse and allow to dry
in a shaded area.
3) Push the air filter back into the
original position.
Storage
1.
Drain the unit, then run the fan at low speed for 6 to 8 hours to dry the
inside of the unit.
2.
Switch the unit OFF and disconnect the electrical cable from the power
supply.
3. Remove the air exhaust ducting. Be careful not to kink or distort it.
4. Cover the unit and keep it in a dry place.
5. Remove the batteries from the remote control.
4
PARTS LIST
1. control panel
2. horizontal louver
3. vertical louver
4. air inlet grille
5. castor
6. exhaust duct
7. handle
8. air outlet grille
9. power cord and plug
10. water injection port
11. power and hook
12. air filter
 Loading...