7
REMOTE CONTROL
Power Press this button to turn/off the unit.
Timer Press this button to set the timer.
Swing Press this button to make the vertical
louver swing automatically
Vary from Celsius degree to Fahrenheit
degree.
Cool Pre
ss this button to choose Cool mode.
Heat Pre
ss this button to choose Heat mode.
Dry Pre
ss this button to choose Dry mode.
Fan Press this button to choose Fan mode.
Up Pre
ss Up or Down button to set temperature
Down or adjust the time in Timer mode.
High Press this button to select high fan speed.
Med Pr
ess this button to select middle fan speed.
Low Press this button to select low fan speed.
Econ Pre
ss this button to a set energy saving mode only in Cool and
Heat mode. The set temperature is 27℃ in cool mode and
23℃ heat mode The fan speed is low. These data can’t be
changed.
OPERATION
Timer Mode
Auto-Off Timer - Press the Timer
button when the unit is ON. The LED will
flash “_ _” 5 Times. During this period, press Up or Down buttons to adjust
the set time from 0.5h to 24h. It will vary by 0.5 hour each time for the first 3
hours, then by 1 hour each time hereafter. The set time will flash 5 times
after being set, then the temperature will display again. Once the set time
elapses, the unit switches OFF automatically.
Auto-ON Timer - Press the Timer button when the unit is OFF, then set the
timer as per Auto-Off mode. Same as timer-off set. Once the set time
elapses, the unit switches ON automatically.
Changing the Timer - When timer is on, you can check remaining time by
pressing the Timer button - the value will flash 5 times. At this point, use Up /
Down to adjust the timer. The timer can also be cancelled - press the Timer
button while the remaining time is flashing to cancel the timer.
Cooling / Heating and Dehumidifying Operation
Cooling and Heating - Use the Mode button to select Cool or Heat mode.
Use the Up / Down buttons to set the desired room temperature. The range
is 18 to 30°C (64 to 86°F). Use the Fan Speed button to select the fan speed.
Set louvre swing and position as required.
Dehumidifying - Use the Mode button to select Dry mode. The fan speed
automatically is set to low (cannot be changed), and the display shows the
current room temperature.
NOTE:
•
In Cool mode, if the Water Empty indicator lights, you must add
water through the injection port (not more than high level) to
continue cooling operation.
•
You should drain water from the unit when using Heat and Dry
modes. The unit will stop operating if the water exceeds the high
level.
•
Do not use the air exhaust duct when in Dry or Fan modes.
8
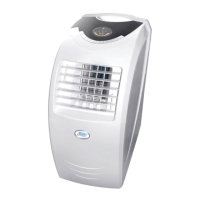
INSTALLATION
1.
Place
the unit on a flat, level and dry
surface.
2.
Leave at least 50cm space around the unit
(when the hose is not connected) (Fig. 5).
3.
Fix the square end of the exhaust duct to
the exhaust port of the unit (Fig. 6).
4.
Place the other end (discharge) of the
exhaust duct to the nearest window. Leave at
least 50cm space around the duct outlet. See
Ducting Examples.
NOTE:
• The length of the exhaust duct is
variable - it is recommended keep the
length of the exhaust ducting as short
as possible to help minimise energy
consumption.
• Do NOT use extensions or other hoses/
ducts etc as this may lead to malfunction.
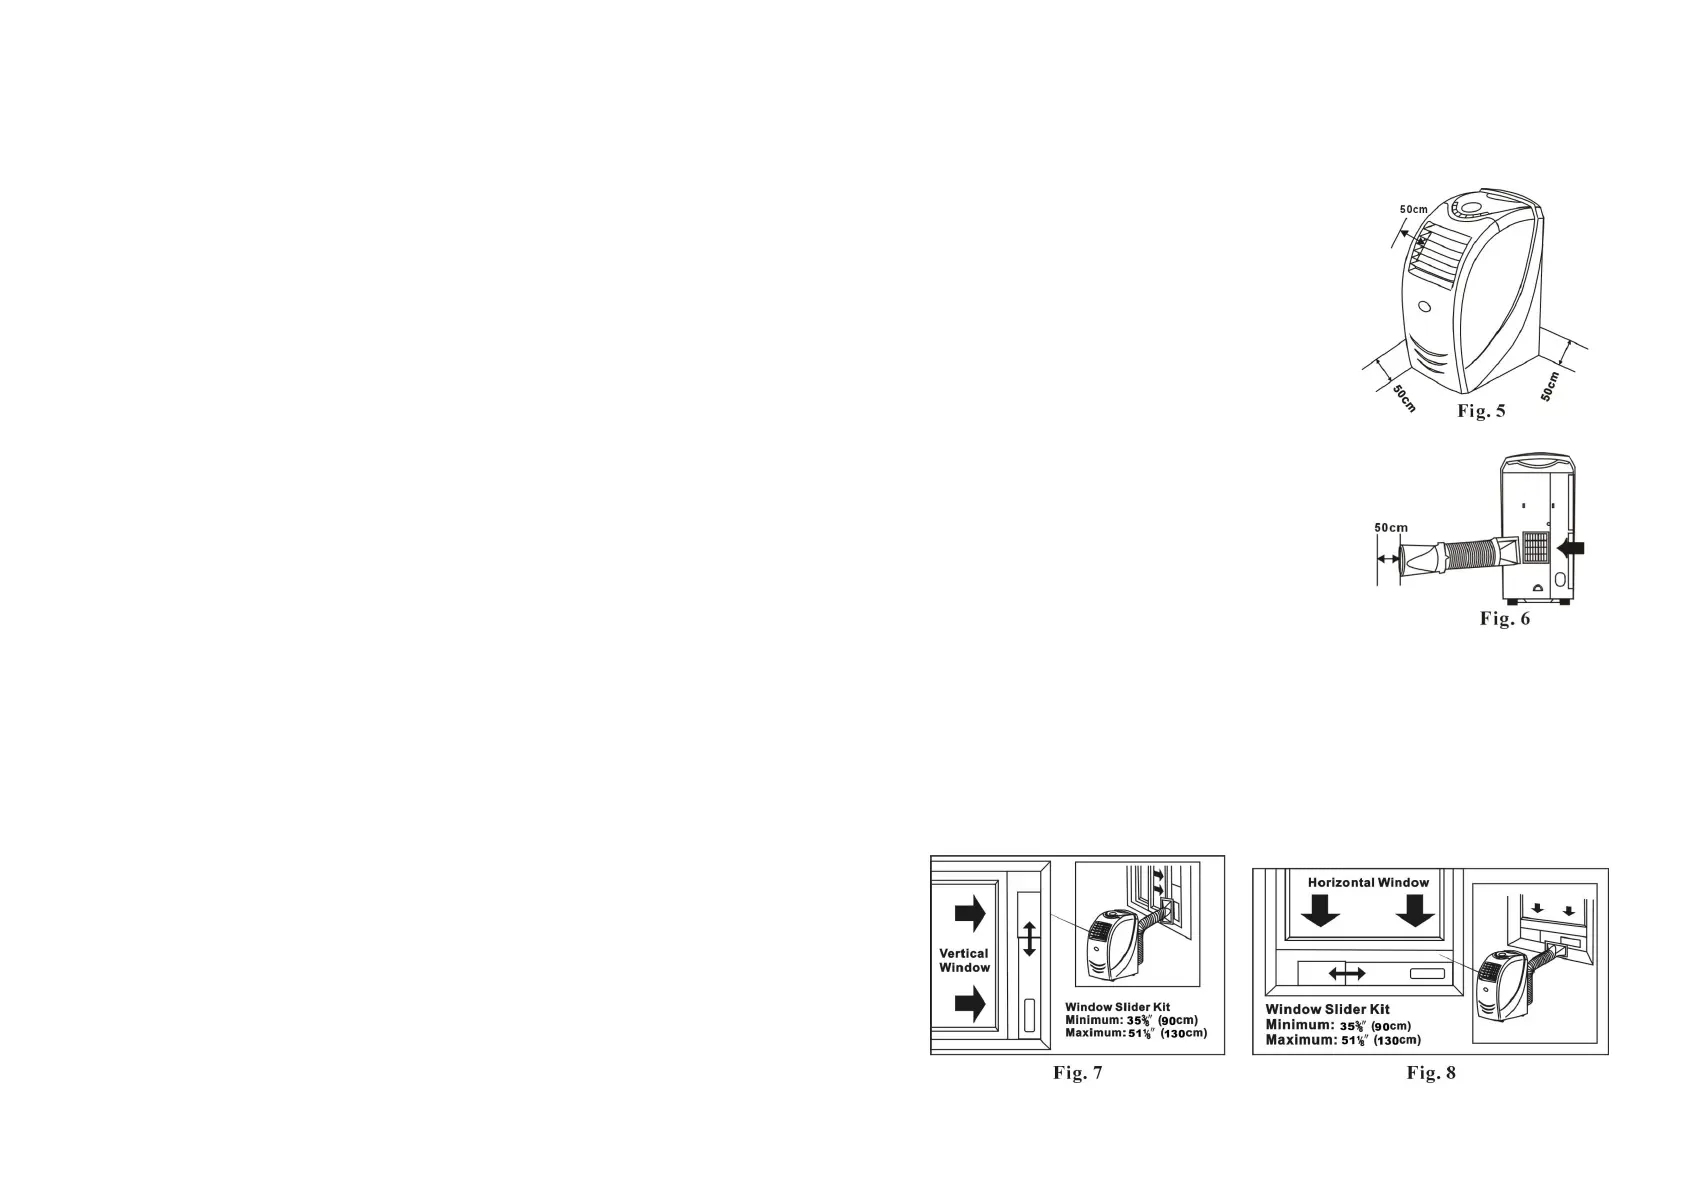
Window Kit
The window kit is designed to fit most standard vertical and horizontal
windows. It may be necessary, however, for you to modify some aspects of
the installation procedure for certain types of windows, as per Fig. 7
and Fig. 8.
 Loading...