SECTION 5. INSTRUMENT SET-UP
1. After unpacking the instrument, be sure that all the parts listed on the shipping papers are present.
You should find a bag with 3 allen wrenches, 2 cannula, a marker and a round level. There is also an
SD card and SD card reader. The SD card has all the programming files and manuals for backup. It is
not needed to run the Gradient Master
2. This Gradient Master was shipped with a direct drive MagnaBase steel plate that fits directly on the
rotate motor shaft. If it is not installed, follow these instructions to install the plate.
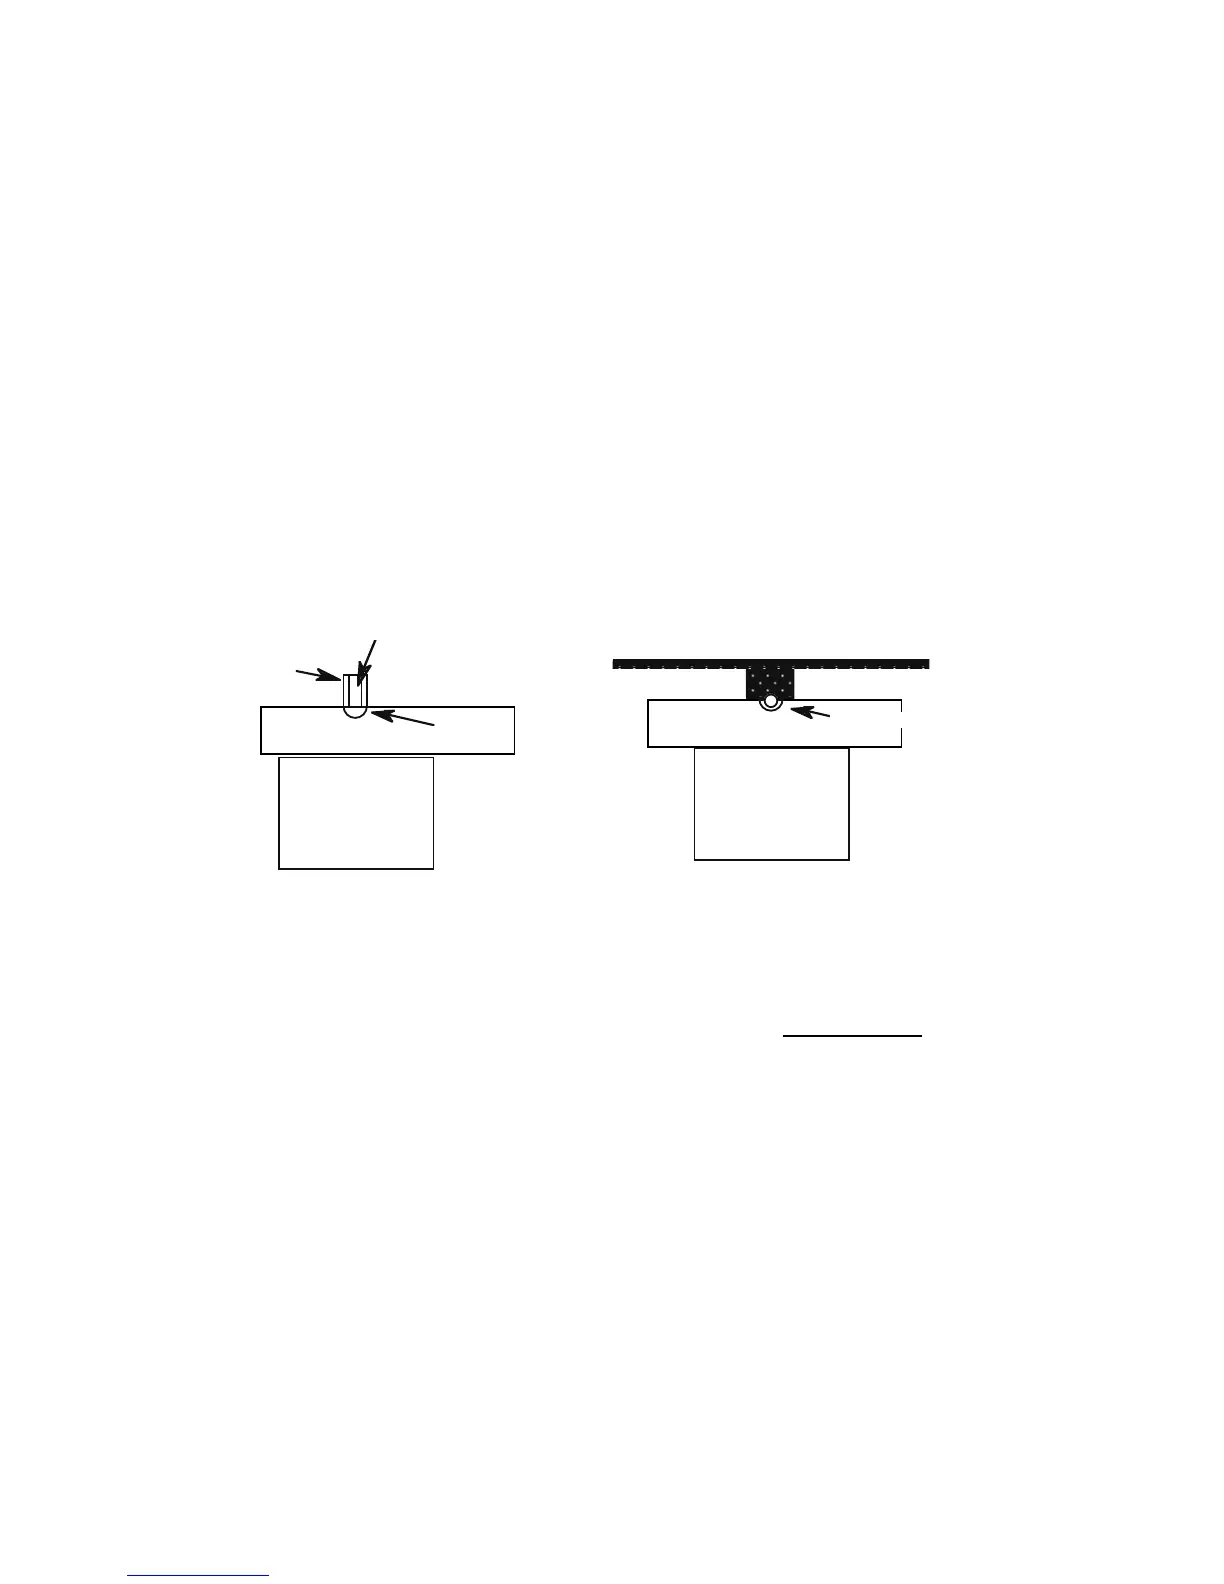
a. Locate the thin allen wrench (3/32") in the Gradient Master accessory kit.
b. Check the drive shaft on the rotate motor. It should have its flat facing the groove in the motor support block. An arrow
on the top of the shaft should be pointing toward the groove. If the shaft is is not properly positioned, follow the
manual instructions to turn the motor on and slowly bring the shaft around.
c. Place the plate onto the rotate motor shaft with the set screw facing the groove (see B. below). It is far enough down when
the set screw lies in the center of the groove. Tighten the set screw, holding the short end in a pair of pliers to increase
the torque applied. To insure that the set screw is exactly perpendicular to the flat, rotate the plate slightly back and
forth as you tighten so the set screw can "find the flat". If the plate ever loosens during use, repeat this procedure.
3. Locate the plug for the rotate motor wrapped around the tilt platform and plug it into the socket on
the back of the box. Note the red lines on one side of the plug. This side faces AWAY from the white
back. Be sure to match the pins with their holes and push the plug all the way in.
4. Locate the 24 VDC power supply in the box and plug it into the wall with the proper prongs for your
voltage inserted into the slot on the back of the wall unit. Insert the power plug into the socket on the
back of the Gradient Master. Now, turn the power switch on. The display will transiently show
nothing and then
Level the plate
DOWN UP DONE
Place the round bubble level on the plate and use the keypad to center the bubble front to back. Use
the levelling screw on the right edge of the unit to level the unit side to side. When the plate is
completely level, press DONE.
5. Place the MagnaBase tube holder in the CENTER of the steel plate. You are now ready to use the
instrument.