EasyManua.ls Logo

Biocomp GRADIENT STATION 153 - User Manual

Default Icon
15 pages
Print Icon
To Next Page IconTo Next Page
Loading...
MODEL 153
GRADIENT STATION
Manual version 3.3
SD Card Memory System
Fractionator software version 8.03
Gradient forming software version 5.3
OPERATOR'S MANUAL
© 2013 BioComp Instruments, Inc.
650 Churchill Row, Fredericton
New Brunswick, Canada E3B 1P6
Ph: (800)561-4221; (506)454-6410;
Fx: (506)455-6157; Email: dhc@biocompinstruments.com
Home Page: <http://www.biocompinstruments.com>
Question and Answer IconNeed help?

Do you have a question about the Biocomp GRADIENT STATION 153 and is the answer not in the manual?

Summary

Section 1. Introduction

1.1 Warranty and Service

Details the product warranty, claims process, and reporting of transit damage.

1.2 Maintenance

Specifies that user maintenance is limited to tightening screws and cleaning spills.

1.3 Electrical Surge Protection

Recommends using surge protectors to safeguard the instrument from voltage spikes.

1.4 Goods Damaged in Transit

Provides instructions for reporting and handling shipments that arrive damaged.

1.5 Instrument Overview

Describes the combined functionalities of BioComp's premier gradient instruments.

Section 2. Specifications

2.1 Physical Measurements

Details shipping weight, dimensions, operating temperatures, and power input requirements.

2.2 Commercially Available Parts

Lists part numbers for key components like stepper motors, power supply, and pumps.

2.3 Performance Characteristics

Outlines gradient forming and fractionation parameters like tilt angle and piston speed.

Section 3. Parts Diagrams

3.1 The Gradient Station

A labeled diagram illustrating the main components of the Gradient Station unit.

3.2 Gradient Forming Attachment

A labeled diagram showing the components of the gradient forming attachment.

Section 4. Ordering Information

4.1 Base Unit

Lists catalog numbers for the Gradient Station base unit with different voltage inputs.

4.2 Gradient Forming Accessories

Details accessories for gradient forming, including cannula and bubble level.

4.2.1 Tube Holders

Lists various tube holders compatible with different rotors and tube sizes.

4.3 Gradient Fractionation

Lists accessories included with the gradient fractionation system.

4.3.1 Tube Holders

Specifies tube holder sizes and their corresponding Seton PolyClear tube compatibility.

4.3.2 Tubes

Lists the Seton PolyClear tubes required for use with the fractionator.

4.3.3 Spares

Lists various spare parts, including piston tips, check valves, and tubing.

Section 5. Instrument Set-up

5.1 Inspect the Shipping Box

Instructions for inspecting the shipping box and unpacking the instrument safely.

5.2 Assemble the Left Wing

Procedure for attaching the left wing to extend the working area.

5.3 Assemble the Gradient Forming Attachment

Steps to attach the gradient forming attachment and connect motor plugs.

5.4 Attach the Reservoir

Instructions for connecting the 60 cc syringe reservoir with filtered water or buffer.

5.5 Assemble the Computer Panel

Procedure for connecting the front panel, motor plugs, and circuit board connectors.

5.6 Install the Power Plug

Steps to connect the external power supply and prepare the unit for power-up.

Section 6. Gradient Forming - Station

1.1 Levelling the Plate: A Critical First Step

Guides on leveling the plate using a bubble level for accurate gradient formation.

Overview

The BioComp Model 153 Gradient Station is a versatile laboratory instrument designed for both gradient formation and fractionation, combining the functionalities of BioComp's Gradient Master and Piston Gradient Fractionator. This device is controlled by a computer with Gradient forming software Version 5.3 and Fractionation software Version 8.03.

Function Description:

The Gradient Station performs two primary functions: gradient formation and gradient fractionation.

Gradient Formation:

Gradient formation is achieved using the patented "tilted tube rotation" method. This involves layering two end-point solutions in a centrifuge tube, capping it, and then rotating the tube for a predetermined time at a specific angle. The rotation of the tube wall smears the interface between the light and heavy solutions, thereby forming the desired gradient. The Gradient Master component, embodied by a tilting and rotating disk on the right wing of the Piston Gradient Fractionator, facilitates this process.

Gradient Fractionation:

Gradient fractionation is performed by the Piston Gradient Fractionator (PGF). A piston is forced into the centrifuge tube from above, sealing against the inside wall and expelling the gradient layer by layer. The size of each fraction is determined by the length of the piston stroke. The device incorporates a "Trumpet Tip™" piston design, which converts horizontal bands of particles into vertical tubes as they travel up the outlet tubing, effectively doubling peak height and halving peak width compared to standard needle puncture devices.

The instrument also features an exquisitely sensitive band visualization system, developed by Dr. David Coombs. This system allows for the visualization of particles like T4 phage at >10^8 phage/ml and ribosomal subunits with the naked eye. This is achieved by scattering light from a 20W halogen spot shining underneath the tube, which is viewed against the black background of the tube holder. Filling the tube holder with water before inserting the tube minimizes background light scattering by matching the refractive index, making even faint bands visible. The system is designed for future UV sensitivity for particles that do not scatter visible light.

A key feature for sensitive fractionation is the ability to clean the tubing between fractions using air or buffer. This prevents smearing of proteins, lipids, or radioactivity from the top of the gradient into lower fractions by injecting air and/or buffer directly into the system at the piston tip.

Important Technical Specifications:

Physical Measurements:

  • Shipping Weight: 52 lbs.
  • Dimensions: 19.25"W x 16.5"D x 20"H (piston down), X 27" (piston up).
  • Operating Temperatures: Ambient (Can be used in a cold room if left on for 1 hour after returning to room temperature to prevent condensation).
  • Input Power: 90-240VAC, 0.4A, 50-60Hz.

Commercially Available Parts:

  • Stepper Motors: All Hurst (Princeton, Indiana). Fractionator: TS -20 reduction cat no. SP3885. Tilt PBS: -150 reduction, 3208-002. Rotate PBS: -20 reduction 3208-009.
  • Power Supply: 12VDC, 5A ASTEC LPS63.
  • Air Pump: GAST (Benton Harbor, MI) #10D1-101-KGB.
  • Water Pump: Greylor (Cape Coral, FL) #PQ-12DC.
  • Liquid Crystal Display: Excel Technologies (Belle Meade, NJ) # LCM 2420 SFBL.

Performance Characteristics:

Gradient Forming:

  • Tilt Angle: 0-90° in 0.1° increments.
  • Rotate Speed: 0-60RPM.

Fractionation:

  • Piston Speed: 0.1-6.5 mm/sec downward, 6.5 mm/sec upward.
  • Fraction Size: 0.01 mm - full tube length.
  • Number of Fractions: 1-99 in each of 10 sections per gradient.
  • Band Illumination System: 20W halogen spot with dichroic reflector.
  • Rinse Capability: Programmable with up to 9 events between each fraction, including:
    • Continuous air to section outflow (with air bubbles during fractionation).
    • Air on demand or automatically between fractions (15 msec to 9 sec).
    • Water/Buffer on demand or automatically (15 msec to 9 sec).
    • Delay (a programmed interval between fractions) (15 msec to 9 sec).
    • Pause (an indefinite pause between fractions, broken by pressing START).
    • Fraction Advance (a contact closure to signal a connected fraction collector) (15 msec to 9 sec pulse).

Usage Features:

The software is designed for simplicity. The piston's downward movement at the start of a run is controlled by a dial. Users manually bring the piston tip into the tube, observing the outlet tubing for the first drop to leave, which defines the "TOP" of the gradient. Pressing the RESET key zeros the device at this position for accurate fractionation.

The device includes 20 user memories, each capable of performing automatic fractionation of a specific gradient. Each memory can store up to 10 different segments, with user-defined values for piston speed, distance per fraction, number of fractions, and rinse settings.

The "Macro Record" feature allows the device to reproduce a manual run if it is recorded. This recorded run can then be saved as one of the 20 user memories and can be edited.

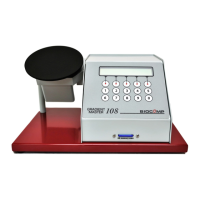
The front panel features an LCD display and a keypad. Below the display are "smart" keys whose functions are indicated by words above them. An "X" beneath a word signifies that its smart key has been pressed. Dedicated keys in the second row are for fractionation functions:

  • AIR: Turns on the air pump for air into the collection tubing.
  • RINSE: Activates the water pump.
  • PROG. RINSE: Executes a saved series of rinse events.
  • FRAC. ADV.: Closes a contact to advance a connected fraction collector.
  • START/STOP: Starts, stops, or pauses programmed activity. This also serves as the "PANIC BUTTON."

Maintenance Features:

Beyond tightening loose screws and cleaning spilled gradient solutions, no user service is required. The instrument contains a computer, and in the event of computer failure, BioComp will ship a new printed circuit board with simple installation instructions.

Users are strongly encouraged to use a surge protector for the instrument to prevent damage from voltage spikes and power surges, which can harm sensitive computer chips. Turning the unit off when not in use is also recommended to reduce exposure to such events.

Ordering Information (Accessories):

The Gradient Station includes various accessories:

  • Gradient Forming Accessories: 2 cannula, 1 bubble level.
  • Tube Holders: Available for various tube sizes (25mm, 16mm, 14mm, 13mm, 11mm) and rotor types (SW28, SW28.1, SW41, SW40, SW55, SW60, TLS55). Each tube holder comes with a marker block and 6 or 12 caps.
  • Gradient Fractionation Accessories: Manual, 60cc syringe rinse reservoir, 4 feet, set of 6 Allen wrenches, 8 spare check balls, 2 sizes of o-rings, cursor for each tube holder, spare light bulb, spare valve assembly, valve cleaning needle, 1m of spare Teflon tubing, 2 fine markers, left wing for extended working area, front panel keypad/LCD display/computer, fraction collector advance cable, Phillips screwdriver, tubing terminator, 2 sets of assembly screws for computer panel and wings, water level adjust cannula with stop, power cord, 12VDC 6.6A transformer, SD card with PDF manual and backup files, SD card reader with USB cable, SD LEXAR card reader with USB cable.
  • Tubes: Seton PolyClear™ tubes are required for fractionation, available in various sizes (e.g., 25x89mm for SW28, 16x102mm for SW28.1, etc.).
  • Spares: Piston tips with seals, 12V 20W spotlight, check valve assemblies (for different tip sizes), mist filter discs, stainless balls and silicone o-rings for check valve assembly, replacement tubing for piston and rinse system.

Setup Procedure:

  1. Inspect Shipping Box: Check for damage and contact BioComp immediately if found. Save the shipping carton for potential returns.
  2. Unpack Instrument: Remove foam, pull out the instrument from the carton (attached to plywood), and remove the 4 bolts securing it to the plywood.
  3. Install Feet: Screw the 4 feet (from the accessory pack) into the holes left by the bolts.
  4. Level Instrument: Use the feet to level the instrument on the bench.
  5. Assemble Left Wing: Attach the D-shaped black plate to the top plate using flat head screws and a 1/8" hex wrench to extend the working area for tube racks.
  6. Assemble Gradient Forming Attachment: Attach the Gradient Forming attachment to the right wing position using three flat head screws. Ensure motor plugs are securely connected to the sockets on the right side of the instrument, with red stripes facing outwards.
  7. Attach Reservoir: Connect the 60cc syringe (with plunger pulled out) to the luer-loc connector on the blue tubing on the right side of the box. Slide the syringe barrel flanges under the screw heads on the right wing. Fill the reservoir with filtered water or buffer.
  8. Assemble Computer Panel: Connect the green multi-wire plug and the two white 4-wire motor plugs (labeled "tilt" or "rotate") to their respective sockets on the circuit board, ensuring red stripes face OUT. Then, push the green connector firmly into the green socket on the back edge of the circuit board.
  9. Secure Front Panel: Attach the front panel to the main unit by inserting its leading edge under the bent edge of the front panel and resting the two flanges on the pre-installed screw heads. Secure with additional 8-32 screws.
  10. Install Power Plug: Insert the 12VDC Powergate transformer plug into the socket on the right rear corner of the instrument. Ensure the power switch is off (0) before plugging the power cord into a wall receptacle.

Levelling the Plate (Gradient Forming):

This is a critical first step.

  1. Upon power-up, the display shows "GRADIENT STATION v1.03 FRAC GMST X". Press GMST.
  2. The display will then show "Reset KNOB to 0 position Position = 29". Turn the knob until the indicator line is at 12 o'clock, and the display reads "LEVELLING, TURN KNOB DONE".
  3. Place the bubble level (from the accessory kit) on the center of the plate, first front-to-back, and adjust the instrument's feet until centered. Then, turn the level side-to-side and adjust the knob to level the plate. Press DONE when level. This step is essential as the device uses the leveled plate (0°) to calculate all tilt angles.
  4. To level the plate during use, press EXIT until the display shows the Main Menu: "GRADIENT MASTER ver5.3 GRAD SYST X". Refer to the Gradient Master Manual for full instructions.

Biocomp GRADIENT STATION 153 Specifications

General IconGeneral
BrandBiocomp
ModelGRADIENT STATION 153
CategoryLaboratory Equipment
LanguageEnglish

Related product manuals