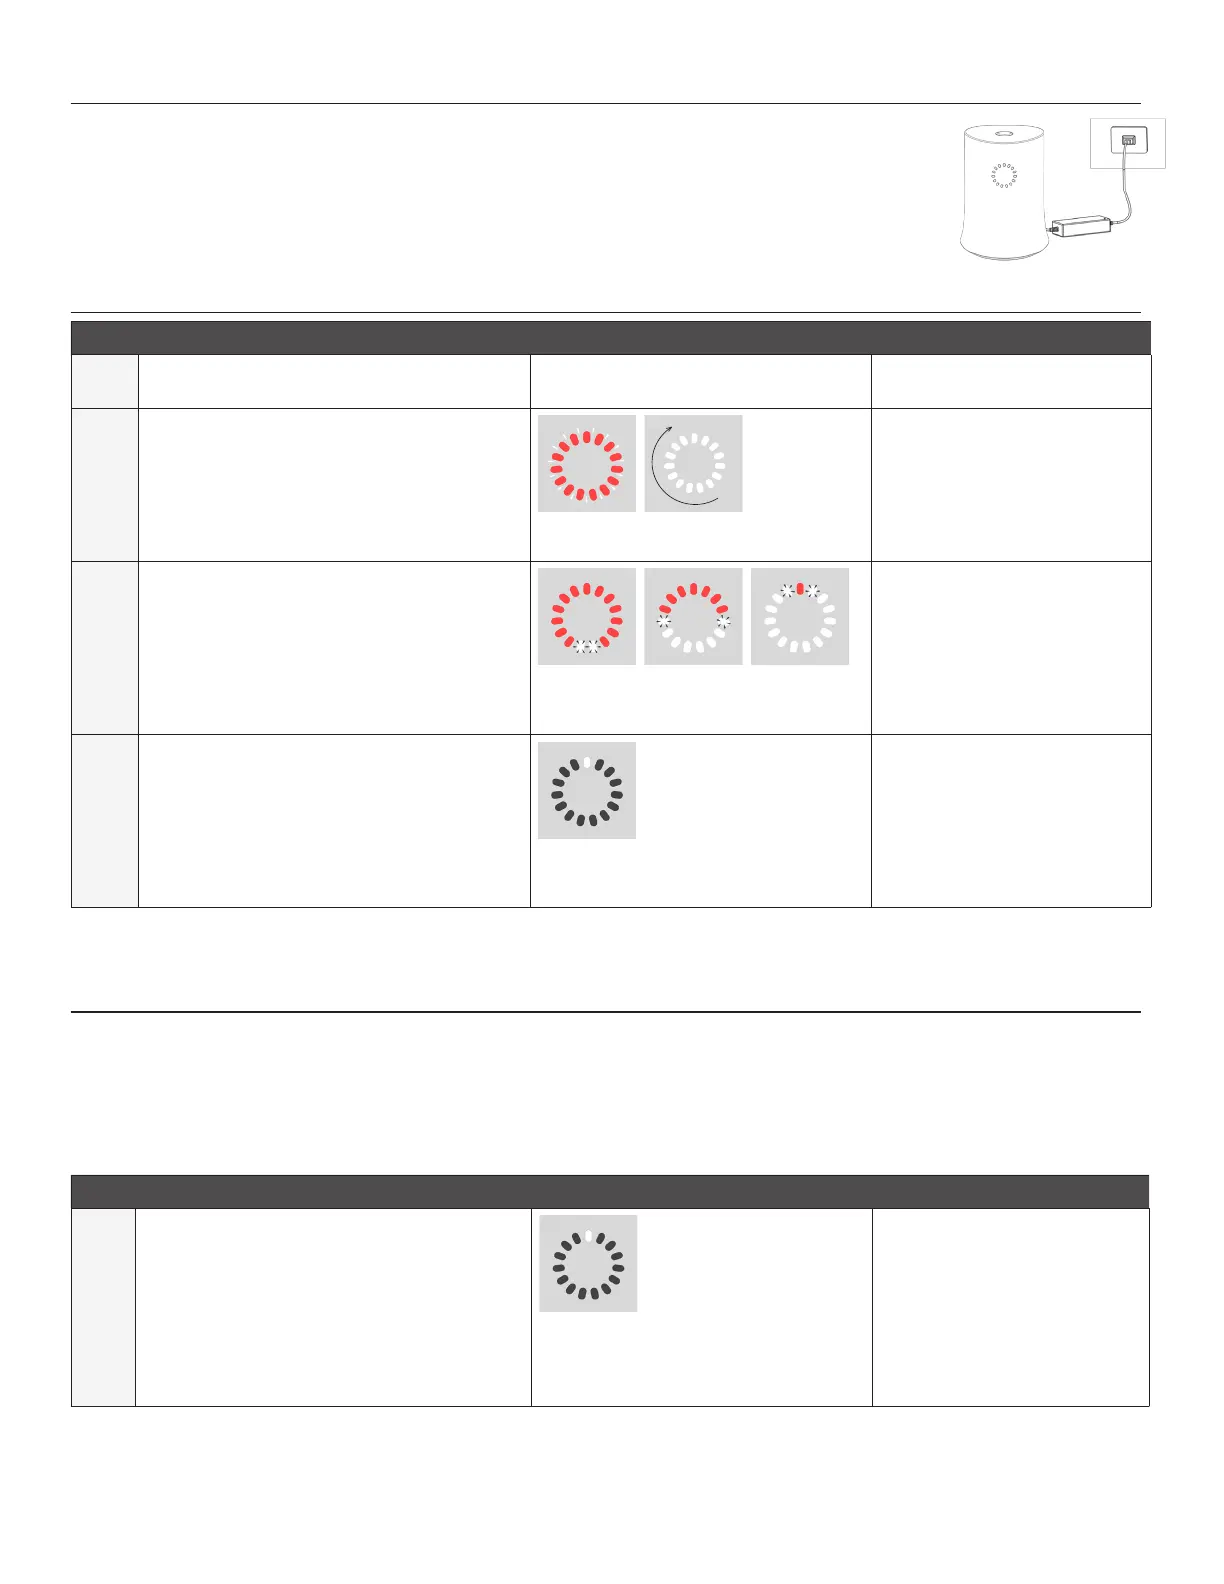
2. Instrument Assebly
Plug the power supply into the port in the back of the ThawSTAR
®
Automated Cell Thawing System and attach
the appropriate power cord (US, UK or EU) to the power supply.
3. Instrument Start-Up
Step Action Light Sequence Sound
3A. Check to ensure that assembled unit is plugged
into an electrical outlet
N/A N/A
3B. Turn on unit using the rocker switch above
the unit’s power source connection port,
ensuring that the side of the switch labeled “I” is
depressed.
Front: Red light ash, then full circle light
chase, one cycle
Two-tone, descending
3C. Allow up to 5 minutes for unit to warm up
Front: Rising symmetric semicircle in red
background
Base: Slow pulsing pattern
N/A
3D. The unit will shift into “ready” state
Front: Top light of light circle will be
illuminated
Base: Not pulsing
Single tone at transition to ready
Note: If unit does not reach a “ready” state within 10 minutes of powering up and the power supply was properly connected to the unit and
plugged into an electrical outlet with a provided cable, please contact BioLife customer service.
4. Operating Instructions
Note: Use of the ThawSTAR
®
CFT2 Transporter (Item No. AST-602) is recommended to keep samples below -70°C during sample transport
and holding time to ensure sample integrity and provide a standardized starting vial and thaw temperature. Use of a ThawSTAR
®
Conrmation
Vial, frozen and handled under the same conditions as biospecimens to be thawed, to evaluate and log unit thaw performance at least once
daily before thawing biospecimens, is recommended. Initial time to warm up, thawing time of ThawSTAR Conrmation Vial, vial lot number,
vial expiration date, ambient room temperature, ambient humidity level, unit serial number, evaluation start time and date are data which
could be logged.
Step Action Light Sound
4A. Carefully insert a clean, tightly capped frozen 1.8
- 2.0 mL cryogenic vial (below -70°C) containing
1.0 mL volume into the opening on the top of
the unit and allow vial to drop into place.
Tip: Before freezing, cap cryogenic vial tightly
after lling to avoid leaks and clean exterior
of vial with 70% alcohol wipe or sprayed 70%
alcohol.
Front: Top light of light circle will be
illuminated
Base: Not pulsing
N/A