Project Type
Instructions
Date: October 30 2020
Customer: Thermor Ltd
Job Number: TH4674
Item Number: BD201
Designer: Natalia Sigenza
PO: 24797-00
Revision: A
Artwork is not to be amended or scaled. If any changes
are required please send through Thermor oce with
instructions, and we will amend here and resend artwork
through. PLEASE RETURN WITH SIGNATURE
Contact: Graphic’s Department
graphics@thermor-ins.com
Colour Breakdown
Reason For Project:
New Item:
New Branding:
Design Update:
N/A: X
UPC (For Reference Only)
2. After pressing the MEM button, the YEAR digits will flash, you can at this time set the time and date
(see section 3.2) or press the MEM button 6 times to exit out of the setup.
3. 3X Averaging takes 3 measurements in succession and calculates the result and displays it as a single
average measurement.
4. Each measurement will be displayed on the screen for a few seconds after it has been taken. After
each measurement there will be 60 seconds resting time in-between each measurement. The monitor
will count down from 60 seconds.
NOTE: If one of the measurements causes an error message, it will be repeated. If any additional error
occurs the monitor will continue to take measurements until a good reading has been taken.
Single Mode
1. If you would like to take a single mode measurement, press and hold the MEM button until you see
“tHr” on the screen. Press the START/STOP button to switch to single mode, you will see “nor” on
the screen. Press the MEM button to confirm.
NOTE: The blood pressure monitor default is set to “nor” (single mode measurement) when first powered
up.
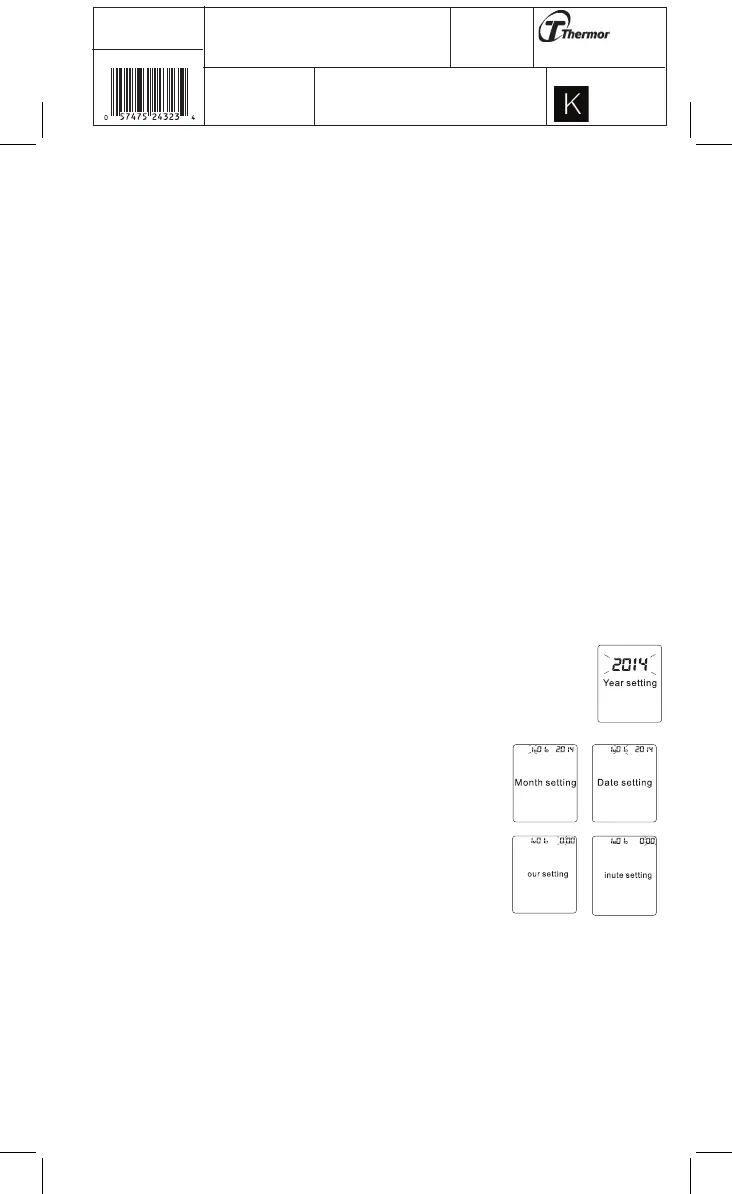
3.2 Setting the Time, Date and Year
NOTE: Setting the year, month, date and time is one sequential process.
1. Press and hold the MEM button until you see “nor” on the screen. Let go of the MEM
button and then press it once, you will see the YEAR digits flash. Use the START/STOP
button to choose the year and press MEM to store in the memory.
2. Repeat the same process to set the MONTH by using the START/STOP button.
Press the MEM button to store it in the memory.
3. The same process is repeated to set the DATE. The date will flash and
can be changed with the START/STOP button. Afterwards, HOURS will
begin to flash.
4. TIME; hours, and then minutes can be set following the same procedure
by using the START/STOP buttons. Finish the process by pressing the
MEM button and the YEAR, MONTH, DATE, HOUR and MINUTES will all
be stored in the products memory.
5. Next, you will see “CL” on the display, press the MEM button to exit out
of the setup or see section 3.10 on how to Clear Measurements from
Memory.
NOTE: In order to change any setting you must repeat the process and confirm each setting by pushing
the MEM button.
3.3 Obtaining Accurate Measurements
Your blood pressure can vary based on numerous factors, physiological conditions, and your surroundings.
Follow these guidelines to obtain accurate and error-free measurements of your blood pressure and pulse
rate.
H