2.2 Activation
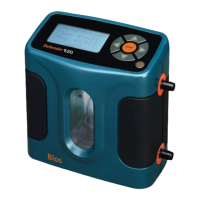
Turning your Defender on and off
Simply press the power button.
• PresstheOn/Off button for 1 second to turn on your Defender.
• Whenrstturnedon,yourDefenderdisplaysanopening
screen showing the product name, model number and
flow range.
• PresstheOn/Off button for 3 seconds to turn your
Defender off.
2.3 Connections
Attaching your Defender to a device
Connect device to be calibrated to the appropriate Defender port.
Use 1/4 inch diameter tubing.
• Connecttooutletattop(suctiontting)whenadevicedraws
air (such as sampler).
• Connectiontubingtobottominletfordevicesthatpushairin
(pressure devices).
2.1 Battery
Charging, installing and monitoring your
Defender battery
Your Defender battery is charged at the factory, but we
recommend that you make sure it is fully charged before
initial use.
• ConnecttheACpoweradaptertotheDefender’s
Charging Jack (DC In).
• PlugtheACpoweradapterintoanACoutlet.
Initial charging should take about eight (8) hours.
After the initial charge:
• YoumaycontinuetochargeyourDefenderindenitely
simply by leaving it connected to the AC power adapter.
• Besuretochargethebatteryatleasteverythree(3)months,
to maintain battery life.
ThebatterysymbolontheLCDdisplayindicatesyourDefender’s
battery charge condition. A shaded battery icon indicates a full
charge. As the battery voltage drops, the indicator will empty
in 20% increments.
2.0 Operation
2.0
 Loading...