EasyManuals Logo

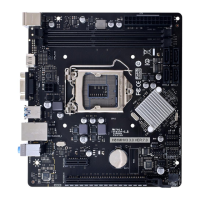
Biostar H81MHV3 2.0 User Manual

Biostar H81MHV3 2.0
110 pages
To Next Page IconTo Next Page
To Previous Page IconTo Previous Page
Page #19 background imageLoading...
Page #19 background image
Chapter 3: UEFI BIOS & Soware | 19
H81MHV3 2.0
5. If there is a new BIOS version, the ulity will
ask you to download it. Click “Yes” to proceed.
6. Aer the download is completed, you will be
asked to program (update) the BIOS or not. Click
“Yes” to proceed.
7. Aer the updang process is nished, you
will be asked you to reboot the system. Click
“OK” to reboot.
8. While the system boots up and the full screen logo shows up, press <DEL> key to enter BIOS
setup.
Aer entering the BIOS setup, please go to the <Save & Exit>, using the <Restore Defaults>
funcon to load Opmized Defaults, and select <Save Changes> and <Reset> to restart the
computer. Then, the BIOS Update is completed.
BIOS Update Ulity (through a BIOS le)
1. Installing BIOS Update Ulity from the DVD Driver.
2. Download the proper BIOS from hp://www.biostar.com.tw/
3. Launch BIOS Update Ulity and click the “Update
BIOS” buon on the main screen.
4. A warning message will show up to request your
agreement to start the BIOS update. Click “OK” to
start the update procedure.

Table of Contents

Questions and Answers:

Question and Answer IconNeed help?

Do you have a question about the Biostar H81MHV3 2.0 and is the answer not in the manual?

Biostar H81MHV3 2.0 Specifications

General IconGeneral
Form FactorMicro ATX
ChipsetIntel H81
CPU SocketLGA 1150
Memory Slots2 x DIMM
Maximum Memory16GB
USB Ports2 x USB 3.0, 6 x USB 2.0
AudioRealtek ALC662 6-Channel HD Audio
Video Outputs1 x VGA, 1 x HDMI
Power Connector24-pin ATX, 4-pin ATX 12V
Memory StandardDDR3 1600/1333 MHz
Storage Interface2 x SATA 6Gb/s, 2 x SATA 3Gb/s
LANRealtek RTL8111G - 10/100/1000Mb/s
Expansion Slots1 x PCIe 2.0 x16, 2 x PCIe 2.0 x1

Related product manuals