4
10. If you have an acrylic Backboard (T), attach the previously assembled Backboard Mounting Angles (I) to
the Backboard (T) with the Acrylic Hardware Package (V) and follow the instructions provided with that
kit. If your Backboard (T) is not acrylic attach the Backboard Mounting Angle (I) to the Backboard (T)
with the 5/16” x 2 1/2” Carriage Bolts (P), 5/16” Flat Washers (Q) and 5/16” Flange Nuts (X). Tighten
when all components are level and flat. See Figure F.
Figure D
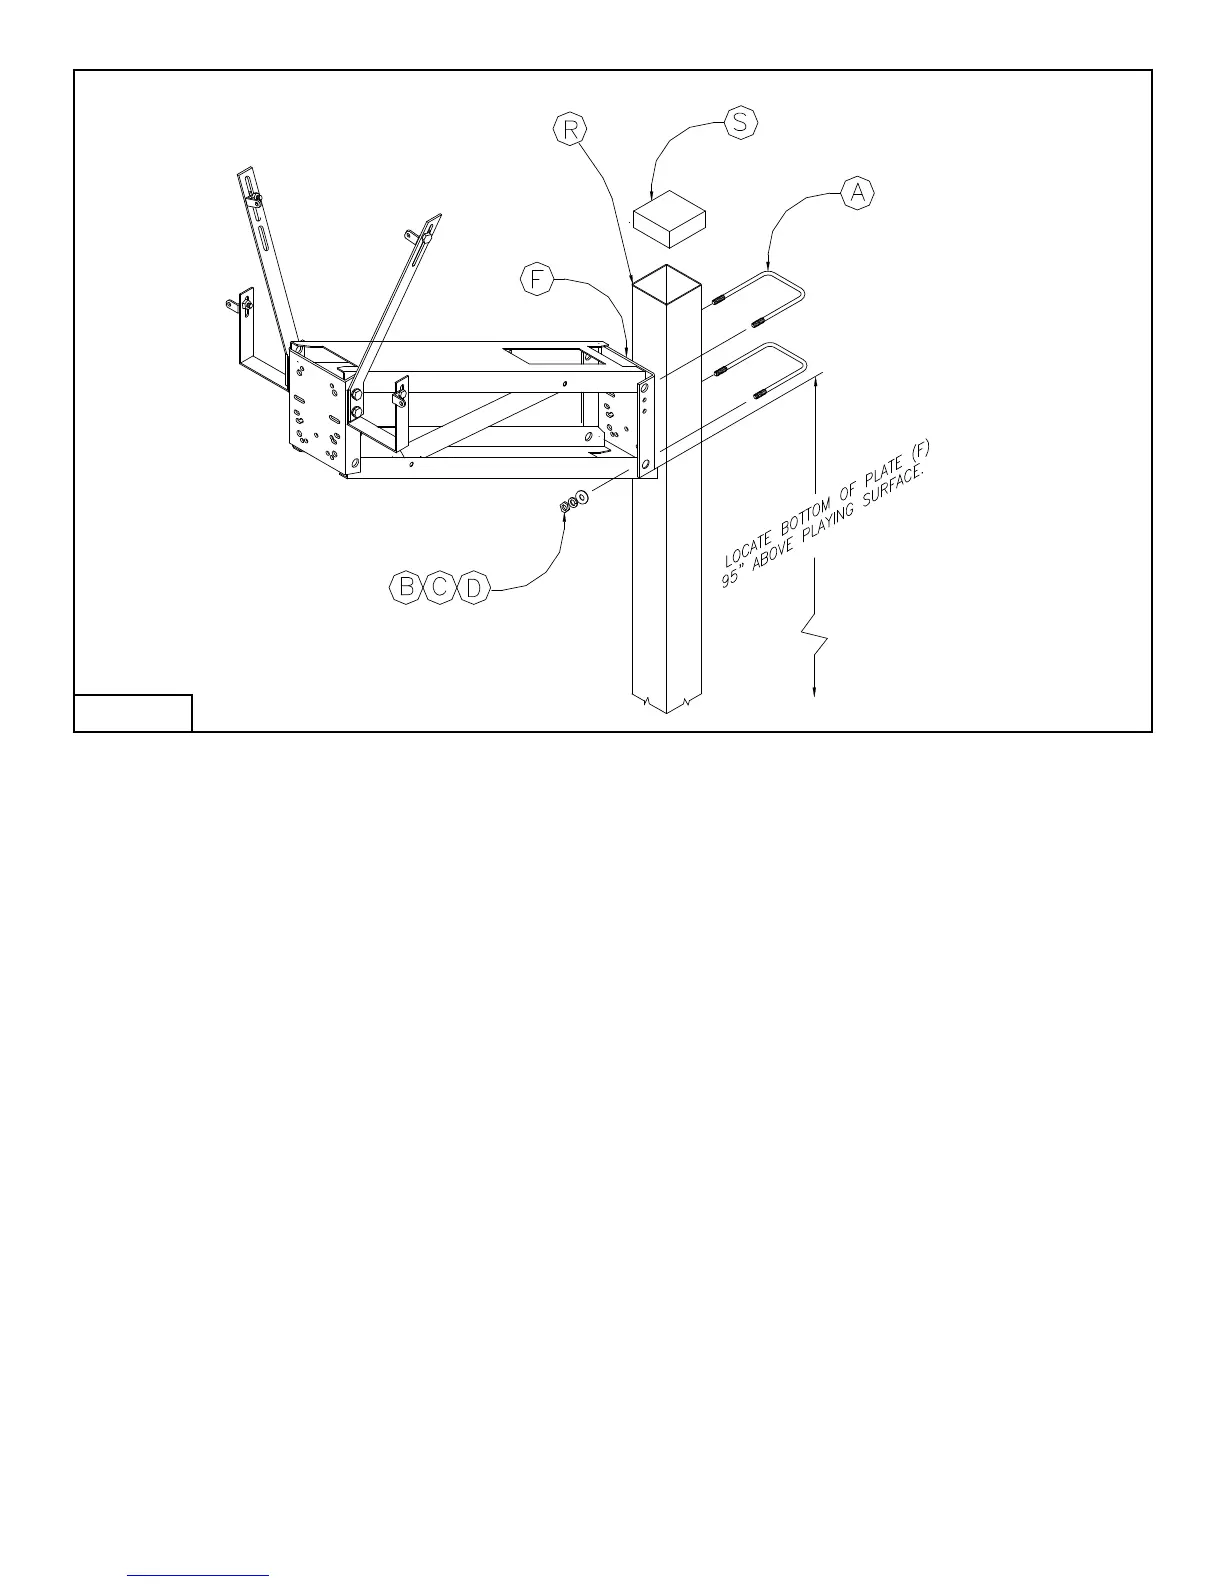
11. Raise the Rim (U) to the upper most position and measure the distance from the top of the Rim (U) to the
playing surface. If necessary adjust to the official 10' playing height by loosening 1/2” Hex Nuts (D) on the
U-Bolts (A) then slide the entire unit up or down the 4” Square Pole (R). USE CAUTION NOT TO
DROP UNIT DOWN THE 4” SQUARE POLE (R) AND RISK PERSONAL INJURY OR DAMAGE
TO THE POWDERCOATED FINISH ON THE POLE. Retighten 1/2” Hex Nuts (D) once you have
achieved 10'.
12. Place Pole Cap (S) on top of the 4” Square Pole (R) to keep out water. Install net.
13. Drill an 1/8"-1/4" hole thru one wall in the bottom of your 4” Square Pole (R) opposite the playing surface
to insure no water builds up inside of pole. This is not required if you choose to fill the pole with concrete.
14. If your QWIK-CHANGE mechanism becomes difficult to adjust, lubricate all pivot points and the area
in and around the height adjustment mechanism release cup with a light machine oil (i.e.. sewing
machine oil or WD-40).