HOIST INSTALLATION
1. The hoist comes already filled with oil. No oil needs to be added inside the hoist
during installation.
2. Be sure that the hoist is mounted to or from a structure that can support the hoist
and its rated load.
3. Using the power cord, either connect the hoist to your plug or a junction box.
4. To start the hoist, release the red emergency stop button on the controller by
twisting the red knob clockwise till it pops out and then press the start or on
button (if applicable).
5. Once the emergency stop button has been released and the start/ on button has
been pressed you should instantly hear a click in the hoist as the main contactor
comes in. You can now test the hoist directions.
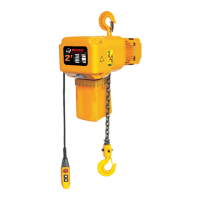
6. If you have wired your hoist to the power supply and the hoist is not functioning it
may be because your phases are reversed. This can be checked by opening the
front cover of the hoist. There you will find a small white relay with led lights on it.
If the fault light is on you must swop any 2 of the 3 power cables at your plug or
junction box.
7. Before proceeding to operate the hoist, check that the hoist directions are
correct, that the emergency stop button works and that the limit switches work.
8. Apply the oil provided to the chain for easier operation and to prolong the
lifespan.
9. To attach the chain bag/ container run the hoist until the hook is fully extended
(DOWN) and then fasten the bag/ container to the hoist. Once the bag is
securely fastened feed the slack chain (non-load bearing) into the bag/ container.
Then run the hoist in the reverse motion (UP), guiding the slack chain into the
bag/ container (only applicable for those models supplied with the bag/
container).
FASHING FAULT
LIGHT = PHASES
ARE REVERSED
 Loading...