Do you have a question about the BK Medical bk5000 and is the answer not in the manual?
Introduces the user to each part of the monitor display and the first steps for imaging.
Explains how to select the transducer that will be used for imaging from the drop-down menu.
Describes how examination types configure the monitor for imaging, consisting of Pro Packages and presets.
Explains how to enter patient information after selecting the transducer and exam type.
Provides information about using the Document Browser for reviewing and managing documents.
Details on making and using measurements, and working with images and workflow tabs.
Explains how workflow tabs follow the examination, displaying relevant controls and opening as needed.
Describes the keyboard control keys and typing special letters or accents using the Accent key.
Explains how to select the imaging plane (T, S, or E) using transducer buttons or the Scanning Plane key.
Details on pressing the Freeze key to freeze all images and the appearance of a snowflake icon.
Describes partial freeze in Doppler and 2D modes, and how to toggle between states using the Update key.
Explains how to split the screen horizontally or vertically to display two views side by side.
Discusses how two views in a split screen can be imaging simultaneously.
Explains the Linked Split/Dual function that automatically transfers parameters between screens A and B.
Covers adding annotations (labels and bodymarks) to archived images and clips.
Provides information on placing text labels, adding multiple labels, and auto-completion.
Describes bodymarks as small bitmaps depicting body parts, and how to place them on images.
Explains the Cine function for reviewing recorded B-mode, B+Color, B+M-mode, or B+Doppler images.
Details on using the Cine function, including setting start/stop markers and playing clips.
Explains how cine activation in M-mode or Doppler mode displays a vertical cine cursor.
Covers displaying images on an auxiliary monitor and selecting video output modes.
Explains viewing two images simultaneously: an ultrasound image and a video image.
Describes how the video image appears in a window that covers the ultrasound image.
Explains how to change video setup to determine how the video image looks.
Explains that Pro Packages contain measuring tools for different aspects of the ultrasound image.
Provides general instructions for using various measuring tools, noting the image must be frozen.
Describes how to make measurements such as distance, angle, circle, ellipse, polygon, and freehand shapes.
Explains how measurements in Doppler mode differ from B-mode/Color mode due to the time dimension.
Describes the four types of documents: Images, Clips, 3D data sets, and Reports.
Explains HIPAA standards for handling patient data and ensuring privacy and security.
Details the requirement of a patient ID to capture images and clips.
Explains how to save a 2D image or video clip to the local patient archiving system.
Describes two ways to capture video clips when the image is not frozen (Forward Capture ON/OFF).
States that 3D data sets are automatically saved to the patient archiving system.
Instructs to click Save in the report to save it to the patient archiving system.
Describes the system containing patient and examination information, and saving documents directly into it.
Explains the use of the Document Browser to review and manage images and other documents.
Details how the Document Browser displays thumbnails and includes icons for document information.
Explains how archived or exported documents from external media can be viewed on the ultrasound system.
Provides information on viewing exported images and video clips on a computer.
Covers copying and archiving documents to store them outside the system.
Explains how to preserve patient confidentiality when copying patient data without identifying information.
Details copying documents associated with a patient to a CD/DVD or USB storage device.
Explains archiving documents to a CD/DVD or network drive for permanent record keeping.
Lists restrictions about copying and archiving to a CD/DVD.
Describes the staging area where documents are moved before burning to a CD/DVD.
Provides instructions for burning archives or copies to a CD/DVD.
Explains how to examine and delete documents within the staging area using the Burn CD window.
Explains copying to a USB storage device and the process for removing it safely.
Covers setting up a network drive for archiving and accessing it via network username and password.
Describes using the Archive window with the document browser to manage documents in the patient archiving system.
Explains how to edit current patient details and start or discontinue examinations.
Details how to start a new examination from the Archive window and enter patient data.
Explains the process of pausing an exam and resuming it later with the first patient.
Covers password-protecting the patient archive database with user-specific IDs and passwords.
Explains that the system hard disk has limited capacity and notifies the user when it is getting full.
Defines reports for each Pro Package, containing patient and measurement information.
Describes how to create a report by clicking the Report option on the Documentation tab.
Explains how to edit a report before saving it, including deleting measurements.
Details how to print a report by pressing the Print key and navigating pages.
Instructs to save a report to the local patient archiving system by clicking Save on the report.
Covers printing documents on a local or DICOM printer, and setting up an office printer.
Explains how to print thumbnail images without opening them, or after opening and printing.
Details how to print an image displayed on the monitor and customize the Print key.
Describes how to set up a transducer button as a user-defined key for printing.
Introduces the various imaging modes available on the bk3000 and bk5000 systems.
Guides on checking and setting appropriate TI settings for tissue type and limit.
Describes B-mode as real-time 2D information about anatomical structure of soft tissues.
Explains how ultrasound images are focused sharply within a selected zone, using single or multiple focal zones.
Details how to adjust the focus range by selecting 1, 2, or Auto for focus zones.
Describes Tru-Focus enhancement that provides full focus in the entire depth of the image.
Explains how to control overall gain by turning the mode key or clicking Gain.
Defines TGC (Time Gain Compensation) curve for variable amplification applied to echoes from different depths.
Describes Auto Gain, where a preset defines brightness for scans, ensuring consistent brightness across patients.
Explains how to zoom in or out on an area of interest by adjusting the Zoom box.
Details how to adjust depth in B-mode to cut out parts below the area of interest, changing image magnification.
Explains how to select gray scales for displaying B-mode or M-mode images to clarify aspects.
Describes B-mode combinations like B+Color, B+M-mode, and B+Power.
Explains Tissue Harmonic Imaging for reducing noise and improving ultrasound image clarity.
Describes contrast imaging using microbubbles injected into the patient for enhanced visualization.
Highlights the advantage of using simultaneous split-screen imaging with contrast for better visualization.
Explains how to start and stop the timer to track elapsed time after injecting a contrast agent.
Describes the Bubble Burst function that emits an ultrasound pulse to burst remaining bubbles for contrast injection.
Explains X-Shine uses ACI and improved focusing to help visualize needles during interventional procedures.
Provides step-by-step instructions to activate X-Shine Imaging.
Covers adding X-Shine keys and Needle Strength sliders/toggles to monitor controls for better needle visibility.
Describes Color mode (CFM) for flow direction/velocity and Power mode for amount of flow.
Lists the three submodes available in Color mode imaging: Velocity, VFI, and Tru-Color.
Explains how frequencies of reflected ultrasound waves show velocity and direction of blood flow, displayed in color.
Covers independent steering of PW Doppler and CFM using the Sync Steer screen key.
Describes the color box superimposed on B-mode images in Color/Power mode to outline tissue with flow information.
Explains how to select various color scales for displaying Color mode, Power mode, or Doppler spectrum.
Defines elastography as a mode using manual tissue compression to evaluate tissue stiffness.
Explains how strain ratio measurements quantify relative stiffness between a region of interest and surrounding tissue.
Describes comparing elastography diameter of an ROI to the B-mode diameter.
Introduces VFI as an option using ultrasound pulses in axial and lateral directions for flow visualization.
Details how VFI can ease workload in determining peak systolic velocity or calculating volume flow rate.
Explains assisted Doppler gate placement using VFI data to select optimal Doppler gate position.
Describes estimating flow angle at the Doppler gate position and displaying it in real-time.
Explains how VFI data is used to select appropriate Doppler steering, updated dynamically.
Covers automatic inversion of the Doppler spectrum when gate steering changes from right to left.
Explains adjusting Scale/PRF using VFI data if manually specified values are too low or high.
Details assisted volume flow rate estimation using VFI data and Pulsed Wave Doppler (PWD).
Explains how the asymmetric Doppler gate cross places the POI at highest velocity and adjusts gate to vessel size.
Describes Doppler mode imaging displaying information about flow velocity spectrum over time.
Explains M-mode (motion mode) ultrasound produced by sweeping a line of a B-mode image across the monitor.
Guides on how to save a changed setup as a new preset.
Introduces CW Doppler mode, transmitting ultrasound along a line and analyzing returns for velocity.
Guides on checking TI settings for CW Doppler mode appropriateness.
Explains how to adjust the maximum allowed MI (mechanical index).
Details the requirement to turn CW Doppler on and position the line before turning on the CW spectrum.
Describes CW Doppler information acquired along the full length of the CW Doppler line superimposed on B-mode.
Explains how to adjust the volume of the CW Doppler signal's audio output.
Covers adjusting Doppler mode image parameters like Doppler indicator, gate, and trace.
Explains automatic calculation and display of curves tracing mean or peak Doppler spectrum values.
Describes how the system automatically adjusts Baseline and Scale to prevent aliasing and optimize Doppler spectrum.
Details adjusting the gain of the CW Doppler mode image.
Explains how to vary the scale of the displayed spectrum in CW Doppler mode.
Covers changing how smooth the displayed spectrum looks in CW Doppler mode.
Explains how to set the cutoff frequency for the wall filter in CW Doppler mode.
Describes how to invert the spectrum on the monitor in CW Doppler mode.
Explains repositioning the baseline in CW Doppler mode to overcome aliasing problems.
Details adjusting sweep speed to change cycles of the spectrum displayed on the full time axis.
Recommends familiarity with working with images, measurements, and documentation.
Advises reading warnings in the Puncture and Brachytherapy section of the Safety chapter.
Defines a Pro Package as a pre-defined configuration for monitor layout and user interface.
Explains presets as pre-defined setups optimizing images for specific imaging types.
Describes Pro Packages containing sets of measurements and calculations appropriate for specific examinations.
Explains Doppler measurements and fitting curves to spectra automatically or manually.
Details stenosis measurement using vessel areas to calculate the degree of stenosis.
Explains VF calculation by multiplying time average mean velocity (TAM) by cross-section.
Defines TAM and TAMX as average values over time of mean and maximum frequencies in the Doppler spectrum.
Explains RI and PI based on peak systolic and end-diastolic velocities for assessing vascular resistance.
Covers measurements made and displayed in real time, continually updated during imaging.
Explains how to reduce noise (high frequency disturbances) to improve accuracy of automatically traced curves.
Lists carotid velocities used to calculate stenosis extent in carotid vessels.
Mentions that calculation formulas and accuracies are in the Technical Data (BZ2100).
Describes the Brachy Pro Package for ultrasound-guided brachytherapy and prostate cancer cryotherapy.
Explains planimetry using parallel B-mode images to draw structure outlines for volume estimation.
Advises verifying the correct puncture guide number and its position for accurate needle path indication.
Details Pro Packages for obstetrical and gynecological ultrasound applications.
Explains calculation of gestational age (GA) and expected date of confinement (EDC).
Describes special fields in the Patient window for OB, Gyn, and Gyn Follicles Pro Packages.
Refers to detailed instructions for using measuring tools starting on page 39.
States that nuchal translucency measurements require special training.
Provides general information on measuring tools for GA, fetal weight, and EDC.
Explains that obstetrics reports contain clinical calculations and measurement-based calculations.
Discusses how reports include reference curves based on previous measurements or last menstrual period.
Lists key areas covered: Peripheral arteries, Peripheral veins, and Carotid measurement information.
Recommends reading about basic controls, transducer guides, care, cleaning, and system usage.
Lists the sections covered in the Vascular Pro Package chapter.
Explains selecting the appropriate preset after choosing a transducer for Vascular Pro Package.
Details the requirement of a patient ID to save images and how to enter data in the Patient window.
Covers B-Mode (2D) imaging, gain adjustment, TGC curve adjustment, and split screen functionality.
Explains that imaging starts in B-mode and how to return to B-mode alone.
Describes how to use Color mode, including color box adjustment and color gain.
Introduces VFI as a technology using axial and lateral pulses for flow visualization.
Explains how to use Doppler mode, including sample gate movement, gain, angle control, and advanced settings.
Covers using Auto to adjust baseline and PRF automatically for Doppler mode.
Explains that labels and bodymarks are activated from the Measure and Mark tab when the image is frozen.
Details how to select, type, edit, remove, and align labels on the image.
Lists available vascular bodymarks and explains how to place and move them on the image.
Provides information on measurement abbreviations and using the Calculation Package for 2D measurements.
Guides on choosing a vessel and measuring its diameter and other parameters.
Details Doppler measurements for Leg Veins and Leg Arteries presets.
Explains how to set up, make, and print reports, and how comments from the Patient window appear.
Covers Cine Review, Capturing Frozen Images, Capturing Clips, and Copying/Archiving.
Provides examples of customizing the system, including saving new presets and setting default Pro Packages.
Lists relevant chapters and appendices for further information on system controls and features.
Lists key areas: Basic Cardiac imaging and Emergency medicine cardiac imaging (FATE).
Recommends reading Getting Started, transducer guides, care, cleaning, and system user guide.
Lists the sections covered in the Cardiac Pro Package chapter.
Explains selecting the Cardiac preset after choosing a transducer for the Cardiac Pro Package.
Details the requirement of a patient ID to save images and how to enter data in the Patient window.
Covers B Mode (2D) imaging, gain adjustment, TGC curve adjustment, and M-Mode.
Explains that imaging starts in B-mode and how to return to B-mode alone.
Describes transducer orientation for the 5P1 transducer (Sag and Trans).
Explains M-mode tabs have an On/Off function and how to use M-mode.
Details how to use Color mode, including color box adjustment and color gain.
Explains how to use Doppler mode, including sample gate, gain, angle control, and advanced settings.
Covers using Auto to adjust baseline and scale (PRF) automatically for Doppler mode.
Describes Pulsed Wave Doppler (PW) as the primary Doppler mode.
Details pressing the Update key to get a live spectral Doppler tracing.
Explains that labels and bodymarks are activated from the Measure and Mark tab when the image is frozen.
Details how to select, type, edit, remove, and align labels on the image.
Describes bodymarks and how to place, move, and set default positions on the image.
Covers basic cardiac measurements like LVV, EF, PFV, PG, VTI, MPG, and HR.
Lists basic cardiac measurements: LVV, EF, PFV, PG, VTI, MPG, and HR.
Explains how to measure Left Ventricular Volume using M-mode and B-mode.
Details PFV and VTI measurements for aortic and mitral valves, and HR measurements.
Guides on measuring Peak Flow Velocity for various valves and calculating PFV and PG.
Explains measuring Velocity Time Integral for aortic and mitral valves, and calculating ET and VTI.
Details measuring Heart Rate in M-mode and Doppler mode, averaged over selected beats.
Explains measuring Cardiac Output by measuring LVOT diameter and ET AV, VTI LVOT, and HR.
Covers making and printing reports, including comments and saving the report.
Explains Cine Review, Capturing Frozen Images, and Copying/Archiving images and clips.
Provides examples of customizing the system, including creating custom M-mode keys and customizing labels/bodymarks.
Defines FATE as specialized cardiac imaging for emergency medicine use.
Lists relevant chapters for further information on system controls and features.
States the package provides information for urology and prostate imaging.
Recommends reading Getting Started, transducer guides, care, cleaning, and system user guide.
Lists the sections covered in the Urology Prostate Pro Package chapter.
Explains selecting appropriate presets for transducers within the Urology Prostate Pro Package.
Details the requirement of a patient ID to save images and how to enter data in the Patient window.
Covers B Mode (2D) imaging, gain adjustment, and TGC curve adjustment.
Explains that imaging starts in B-mode and how to return to B-mode alone.
Explains how to split the screen for two images and transfer parameters between screens.
Describes three ways to change transducer planes: Plane key, transducer buttons, or Current Plane selection.
Details how to display a puncture line on the image for biopsy guidance.
Covers how to use Color mode, including color box adjustments.
Explains that labels and bodymarks are activated from the Measure and Mark tab when the image is frozen.
Details how to select, type, edit, remove, and align labels on the image.
Guides on customizing labels and bodymarks using Advanced Mode, including autocompletion and quick redefinition.
Lists available bodymarks for Neuro Pro Package and explains how to place and move them.
Covers distance measurements and freehand measurements for area and circumference.
Details how to measure distance by positioning two cursors.
Explains how to measure area and circumference by drawing a freehand shape.
Describes calculating volume using height, width, and length measurements from multiple images.
Covers making and printing reports, including comments and saving the report.
Explains Cine Review, Capturing Frozen Images, Capturing Clips, and Copying/Archiving.
Provides examples of customizing the system, including saving new presets and setting default Pro Packages.
Lists relevant chapters for further information on system controls and features.
States that this chapter is specifically for the bk5000 system.
Lists key areas: surgery measurements.
Recommends reading Getting Started, transducer guides, care, cleaning, and system user guide.
Lists the sections covered in the Surgery Pro Package chapter.
Explains selecting appropriate presets for transducers within the Surgery Pro Package.
Details the requirement of a patient ID to save images and how to enter data in the Patient window.
Covers B-Mode (2D) imaging, gain adjustment, TGC curve adjustment, and split screen functionality.
Explains that imaging starts in B-mode and how to return to B-mode alone.
Explains how to split the screen for two images and transfer parameters between screens.
Details how to display a puncture line on the image for biopsy guidance.
Covers how to use Color mode, including color box adjustments.
Explains how to use Doppler mode, including sample gate, gain, angle control, and advanced settings.
Covers using Auto to adjust baseline and PRF automatically for Doppler mode.
Refers to Elastography section in Chapter 7 for details.
Explains that labels and bodymarks are activated from the Measure and Mark tab when the image is frozen.
Details how to select, type, edit, remove, and align labels on the image.
Explains how to place, move, and set default positions for bodymarks on the image.
Covers distance measurements and freehand measurements for area and circumference.
Details how to measure distance by positioning two cursors.
Explains how to measure area and circumference by drawing a freehand shape.
Describes calculating volume using height, width, and length measurements from multiple images.
Covers making and printing reports, including comments and saving the report.
Explains Cine Review, Capturing Frozen Images, Capturing Clips, and Copying/Archiving.
Provides examples of customizing the system, including saving new presets and setting default Pro Packages.
Lists relevant chapters for further information on system controls and features.
States that this chapter is specifically for the bk5000 system.
Lists brain imaging types: Burr-hole, Craniotomy, Spinal Cord, and Imaging with Brainlab.
Recommends reading Getting Started, transducer guides, care, cleaning, and system user guide.
Lists the sections covered in the Neuro Pro Package chapter.
Explains selecting appropriate presets for transducers within the Neuro Pro Package.
Details the requirement of a patient ID to save images and how to enter data in the Patient window.
Covers B Mode (2D) imaging, gain adjustment, TGC curve adjustment, and split screen functionality.
Explains that imaging starts in B-mode and how to return to B-mode alone.
Explains how to split the screen for two images and transfer parameters between screens.
Details how to display a puncture line on the image for biopsy guidance.
Covers how to use Color mode, including color box adjustments.
Explains how to use Doppler mode, including sample gate, gain, angle control, and advanced settings.
Covers using Auto to adjust baseline and PRF automatically for Doppler mode.
Refers to Elastography section in Chapter 7 for details.
Explains that labels and bodymarks are activated from the Measure and Mark tab when the image is frozen.
Details how to select, type, edit, remove, and align labels on the image.
Lists available Neuro bodymarks and explains how to place and move them on the image.
Covers distance, freehand area/circumference, and volume measurements.
Details how to measure distance by positioning two cursors.
Explains how to measure area and circumference by drawing a freehand shape.
Describes calculating volume using height, width, and length measurements from multiple images.
Covers making and printing reports, including comments and saving the report.
Explains Cine Review, Capturing Frozen Images, Capturing Clips, and Copying/Archiving.
Provides examples of customizing the system, including saving new presets and setting default Pro Packages.
Lists relevant chapters for further information on system controls and features.
Explains the basic concept of collecting 2D images and reconstructing them into a 3D volume.
Lists modes compatible and incompatible with 3D imaging.
States that the 3D function requires a license from BK Medical.
Explains that 3D system use requires login if patient archiving is password protected.
Covers transducer movement using system-controlled devices or untracked freehand.
Describes making measurements on reconstructed 3D volumes using system-controlled positioning devices.
Allows freehand movement for acquisitions but warns that combinations may not produce sensible volumes.
Explains selecting the imaging direction icon for correct 3D volume reconstruction.
Warns that measurements on untracked freehand 3D data sets may not be accurate.
Outlines the steps of the 3D imaging process: Preparations, Adjust Settings, Acquisition, Viewing, Working with image, Save/Capture/Close.
Covers checking connections, choosing presets, and optimizing the 2D image before 3D acquisition.
Details adjusting ROI, 3D Capture Settings, and Mover/Imaging Direction.
Explains 3D ROI markers indicating the area captured in the 3D data set.
Covers setting spacing, extent, and untracked options for 3D capture.
Explains setting imaging direction for movers and the importance of correct orientation.
Details how to start and stop a 3D acquisition, noting disabled controls during the process.
Describes viewing the acquired volume and using tools to enhance the image.
Covers using options like Brightness, Contrast, Hue, Zoom, and Presets to enhance the 3D volume appearance.
Explains changing the monitor layout using options on the 3D Misc. tab.
Details manipulating the volume using trackball and Select key for rotating, slicing, and tilting planes.
Covers rotating, moving planes, tilting planes, and moving the volume.
Explains 'slicing' the volume by moving a plane to display a cut plane.
Describes tilting a plane to see views not parallel to original faces, creating additional planes.
Details how to move the volume by holding Shift and Select keys.
Explains how to make the volume rotate automatically forward and back using the 3D Misc. tab.
Covers turning the volume, deleting a cut plane, or splitting a plane to create a tilted cut plane.
Explains how to annotate a 3D view with labels or arrows, and save the annotated image.
Describes saving enhanced and annotated 3D views as User Views.
Lists the six different ways to view the 3D data set.
Defines Cube View as a texture-mapped representation of the volume, the default view.
Explains measuring length, area, and volume of pathology in a Cube view using system-controlled positioning.
Provides instructions to delete a measurement or all measurements using Undo or Clear All.
Explains measuring volume by drawing polygons around areas of interest on slices.
Describes Render View as improving 3D visualization, useful for detail in soft tissues.
Covers changing Render view appearance by adjusting settings like Photo, Opac, Thick, and Filter.
Explains sculpting tools to remove unwanted data from a Render view, usable only on gray scale volumes.
Defines MIP View, emphasizing pixels with highest intensity, useful for flow jets and vascularization.
Describes Transparency rendering for adjusting relative transparencies of color and gray scale parts.
Describes the 4-Up view with three orthogonal planes and a view of intersecting planes.
Details the 6-Up view containing Cube view and the sixth most recently displayed view.
Lists three options after viewing a 3D data set: Save, Capture, and Close.
States DICOM is not installed by default and requires setup to match DICOM system and procedures.
Explains retrieving a worklist of patients and selecting a patient for DICOM system setup.
Covers filenames of documents exported in DICOM format.
Explains how to archive images and clips to a PACS if DICOM is installed.
Mentions the possibility of exporting DICOM Structured Reports.
Describes DICOM status indicators (Green, Yellow, Red) appearing by display values.
Notes that documents in a queue to be sent to a DICOM device cannot be deleted.
Explains how to discontinue an examination if an MPPS server is configured.
Provides explanations of terms and abbreviations appearing in the user guide or on the monitor.
Lists measurement abbreviations and their corresponding explanations.
Notes that configuration requires system familiarity and default settings are optimized for transducers.
Explains how to configure on-screen information, keys, input fields, etc., for the bk3000 or bk5000 system.
Guides on redefining a label, bodymark, or measurement screen key to another key of the same type.
Details how to open the setup window for Pro Packages and presets.
Covers adjusting the split between Doppler/M-mode and B-mode images, and their sizes.
Explains preserving nearfield width when decreasing image depth.
Describes assigning functions to user-definable keys, foot-switch pedals, and transducer buttons.
Explains the depth control settings and how to use them as magnification controls.
Lists configurable areas within the System tab: General, Clip Storage, 3D, Printer, Password, Network Drive, Version, Video I/O, Battery Support, Miscellaneous.
Covers changing location, language, video format, date/time, and staging area size.
Guides on changing the date and time and their formats.
Explains how to restore all factory default settings, noting customization loss.
Details specifying the size (storage capacity) of CD/DVD used for copying or archiving.
Covers changing how Clip Browser and Cine functions work.
Explains options for specifying prompts, automatic ROI selection, and viewing acquired 3D volumes.
Covers setting up paper size for printers, printing test pages, and office printers via network.
Guides on configuring pre-installed printer drivers to work with an office printer via network.
Explains changing passwords, managing users, and enabling/disabling password protection.
Details setting up a network drive for archiving, entering UNC path, username, and password.
Provides information about software/hardware versions and exporting a system log file.
Explains specifying Video Output Mode (OFF, Analog Monitor, Passive Display, Cloned Display).
Covers customizing battery operation: Power save mode, alarms, and power profile.
Guides on customizing various functions via the Miscellaneous System Setup window.
Explains customizing measurement setup for each Pro Package.
Describes using the window to import/export measurements and define new ones.
Explains defining or editing user-defined curves.
Covers setting measurement parameters and changing how measurements are displayed.
Explains the capability to redefine screen keys for labels, bodymarks, and measurements.
Provides steps to redefine screen keys via the Measure and Mark tab and Advanced settings.
Describes the Key Definition menu appearing upon clicking the circle on a screen key.
Guides on making a new label if the desired word is not found in the label key.
Explains how to set a default position for system labels and typed labels.
Discusses additional features and setting possibilities for some measurement keys.
Explains how to restrict options in 'More' keys lists to make them more manageable.
Notes that configuration requires system familiarity; default settings are optimized.
Explains how to configure on-screen information, keys, input fields, etc., for the system.
Guides on redefining a label, bodymark, or measurement screen key.
Covers custom labels, default positions, and other configuration options.
Explains how imaging tab subtabs can be made Visible or Invisible.
Describes the special 3D mode tab appearing after 3D data acquisition or review.
Covers two versions of Measure and Mark tabs, one with subtabs and one without.
Explains the extra menu appearing above the Documentation tab when reviewing clips/images.
Guides on opening the Patient dialog to configure displayed columns, input fields, and keys.
Explains display areas outside the image and how info boxes show measurement results and settings.
Covers deciding placement of info boxes and display priority for measurements and settings.
Guides on creating a new Pro Package with keys, tabs, input fields, and display area.
Explains copying GUI controls from one Pro Package to another using a memory stick.
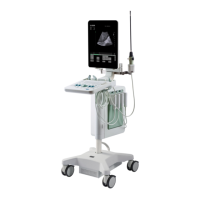
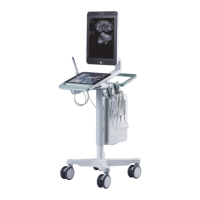
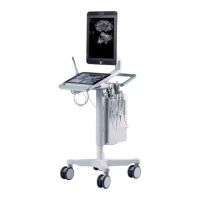
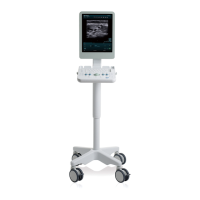
| Type | Ultrasound System |
|---|---|
| Application | Diagnostic Imaging |
| Power Requirements | 100-240 V AC, 50/60 Hz |
| Frequency Range | 2-15 MHz |
| Display | High-resolution LCD |
| Battery Life | Not applicable |
| Applications | surgery, urology |
| Portability | Mobile |