Do you have a question about the Black & Decker BDMS100 and is the answer not in the manual?
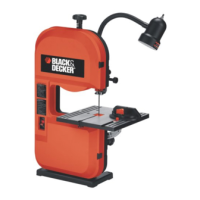
| Voltage | 120V |
|---|---|
| No Load Speed | 0-3000 spm |
| Variable Speed | Yes |
| Power Source | Corded |
| Blade Size | 1 inch |
| Stroke Length | 1 inch |
Defines safety alert symbols (Danger, Warning, Caution) and lists California Proposition 65 warnings.
Provides 23 essential rules for safe operation, maintenance, and workshop practices.
Details crucial safety measures for operation, blade handling, and machine setup.
Specifies electrical requirements, circuit protection, and extension cord gauge recommendations.
Lists the operating voltage and frequency for the miter saw.
Explains the importance of grounding and procedures for safe electrical connection.
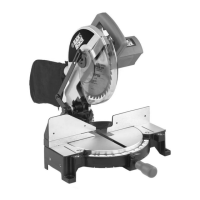
Lists all components included in the product packaging.
Provides instructions for unpacking the saw and cleaning its surfaces.
Lists the tools needed for assembling the miter saw, both supplied and not supplied.
Recommends minimum gauge extension cords based on amperage rating and cord length.
Details the saw's cutting capacities, angle ranges, and included features like a dust bag.
Informs users that illustrations are representative and may not match the exact model.
Step-by-step guide for rotating the table to the 90-degree position using the lock handle.
Instructions on how to raise and lock the cuttinghead using the handle and knob.
Procedure for clipping the dust bag onto the saw's dust chute.
Guidance on securely mounting the miter saw to a workbench or supporting surface.
Identifies the designated hazard area on the saw table and warns against placing hands within it.
Explains how to start and stop the saw using the switch trigger and blade brake.
Advises checking the arbor screw periodically for tightness after braking.
Details how to rotate the table for miter cuts and use positive stops for common angles.
Notes the triangle indicator on the bevel scale for specific crown moulding angles.
Explains how the pointer and scale indicate the angle of cut.
Provides steps for adjusting the angle pointer for accurate readings.
Instructions for securing the cuttinghead in the down position for transport.
Guide to tilting the cuttinghead for various bevel angles and using positive stops.
Mentions the triangle indicator on the bevel scale for crown moulding angles.
Describes the function of the rear support bar for stability and carrying.
Steps to ensure the saw blade is parallel with the table slot for accurate cuts.
Instructions for adjusting the fence to provide clearance for bevel cuts.
Procedure to limit the saw blade's downward travel to prevent contact with machine parts.
Guide to adjust the saw for a precise 90-degree bevel cut relative to the table.
Instructions for adjusting the saw for a precise 45-degree bevel cut relative to the table.
Instructions for adjusting the tension of the cuttinghead return spring.
Provides tips for accurate cutting, workpiece handling, and hazard zone awareness.
Explains the use and installation of an auxiliary fence for repetitive cuts.
Details the saw's capacity for cutting standard lumber sizes like 2x4s, 2x6s, and 4x4s.
Covers cutting crown mouldings and plastic pipe with the miter saw.
Best practices for cutting aluminum extrusions, including lubrication.
Guidance on positioning bowed workpieces correctly to prevent binding.
Instructions on constructing and using work support extensions for long pieces.
Specific steps and angles for cutting inside and outside corners of 52°/38° crown moulding.
Notes the alternative angles (30° bevel, 35-1/4° miter) for 45°-45° crown moulding.
Detailed procedure for replacing the saw blade, including tool and blade requirements.
Steps for inspecting motor brushes and replacing them if worn or damaged.
Advises using authorized service centers and identical replacement parts for safety.
Addresses issues like saw not starting, poor cuts, vibration, and inaccurate miter cuts.
Provides contact details for technical advice, repair, and locating service centers.
Outlines the two-year home use warranty and procedure for obtaining replacement warning labels.