Do you have a question about the Black Horse Model PITTS and is the answer not in the manual?
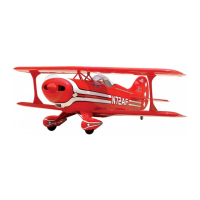
Details wingspan, length, weight, radio, servos, and engine size.
Warns the aeroplane is not a toy and user assumes all risk.
Advises beginners to join clubs for training and advice.
Lists essential tools and supplies for assembly.
Lists the fuselage component.
Lists the left and right wing halves.
Lists vertical and horizontal stabilizers.
Advice on unwrapping parts and protecting surfaces during assembly.
Emphasizes trial fitting parts and potential minor adjustments.
Warns about chemicals affecting painted and plastic parts.
Advises reading instructions thoroughly, even for experienced builders.
Explains how to fix minor film creases or warps using heat.
Warns against overheating the film covering to prevent damage.
Reiterates that the model is not a toy.
Advises checking radio frequency to avoid interference.
Warns against smoking near fuel.
Provides guidelines for safe fuel storage.
Recommends wearing safety glasses.
Stresses secure attachment of the glow plug clip.
Warns against flipping the propeller with fingers.
Advises keeping loose items away from the propeller.
Prevents starting the engine near people.
Guides engine adjustments to be made safely away from the propeller.
Details the process of installing the aileron servo in the lower wing.
Guides installing rubber grommets and brass eyelets onto the servo.
Explains removing covering to create the servo tray.
Details using thread and tape to pull the servo lead through.
Instructs on drilling pilot holes for servo mounting screws.
Guides the installation of the servo tray with the servo into the wing.
Details the process of installing the aileron control horn.
Shows how to connect the aileron control linkages.
Details the process of attaching wing struts using glue.
Instructs to find the aluminium wing dihedral brace.
Advises testing the fit of the dihedral brace in the wing halves.
Details drilling and securing the wing halves together with the brace.
Guides the attachment of the engine mount using screws.
Details installing the stopper assembly into the fuel tank.
Explains connecting silicon fuel lines to the stopper.
Describes bending nylon tubes for vent and fueling.
Details bending the third nylon tube for the fueling valve.
Advises testing the fit of the stopper assembly in the tank.
Guides tightening the machine screw to seal the tank opening.
Instructions on cutting fuel lines to length.
Details routing fuel lines through the firewall.
Explains applying sealer to secure the fuel tank.
Advises against permanent fuel tank securing until after balancing.
Locating and preparing the throttle pushrod wire.
Guides fitting the engine to the engine mount using screws.
Details drilling holes and securing the engine to the mount.
Guides positioning the fiberglass cowl over the engine.
Details aligning the cowl front with the engine crankshaft.
Explains securing the cowl with wood screws.
Covers installing the muffler and making necessary cutouts and connections.
Details installing the metal connector onto the servo arm.
Advises securing the connector with C/A glue to prevent loosening.
Guides installing the spinner backplate, propeller, and cone.
Explains securing the spinner cone with wood screws.
Details installing the elevator servo into its tray.
Guides installing grommets and collets for the elevator servo.
Explains mounting the servo to the tray using screws.
Details attaching the horizontal stabilizer using C/A glue.
Guides marking and sliding the horizontal stabilizer into the fuselage.
Explains cutting away fuselage covering for stabilizer fit.
Instructs marking the vertical stabilizer shape onto the rudder.
Details removing covering from the horizontal stabilizer using marked lines.
Warns against cutting into the balsa structure when removing covering.
Guides applying 30-minute epoxy to the stabilizer mounting area.
Advises checking and ensuring the stabilizer is parallel to the wing.
Details removing tape, inspecting glue joints, and filling gaps.
States elevator control horn installation is similar to the aileron's.
Notes that elevator and rudder pushrod installation mirrors the aileron's.
States rudder servo installation follows the elevator servo method.
Guides removing covering from fuselage and hinge slots for the vertical stabilizer.
Instructs marking the vertical stabilizer shape onto the rudder.
Details cutting the rudder covering along marked lines.
Guides removing covering from the horizontal fin.
Guides placing and aligning the vertical stabilizer at 90 degrees to the horizontal stabilizer.
Details applying epoxy to secure the vertical stabilizer and rudder hinge.
States rudder control horn installation mirrors the aileron's.
Notes rudder pushrod installation is the same as the aileron's.
Guides positioning the tail wheel assembly on the plywood plate.
Details marking and drilling pilot holes for the tail wheel bracket.
Explains securing the tail wheel bracket with wood screws.
Guides attaching the main landing gear components using screws and glue.
Details securing the main landing gear parts.
Guides cutting the switch hole and drilling mounting holes.
Explains securing the switch with machine screws.
Guides plugging servo and switch leads into the receiver.
Explains wrapping components in foam for protection.
Details positioning and securing the receiver and battery pack.
Advises temporary securing of receiver and battery until after balancing.
Guides locating the aluminium wing dihedral brace.
Advises test fitting the dihedral brace into wing halves.
Details attaching the wings and fuselage hatch.
Guides drilling and securing the wing attachment points.
Stresses the criticality of proper balance for flight control.
Specifies the CG location: 65mm back from the wing's leading edge.
Guides marking, checking, and confirming the balance point on the wing.
Suggests adjusting balance for desired flying characteristics.
Describes final check, identifying and correcting tail/nose-heavy conditions.
Recommends and details measuring control throws at widest points.
Advises verifying control surfaces move in the correct directions.
Lists specified throw values for ailerons, elevator, and rudder.
Advises charging batteries and checking all fasteners and glue joints.
Emphasizes re-checking balance, control surfaces, antenna, and propeller.
| Brand | Black Horse |
|---|---|
| Model | PITTS |
| Category | Toy |
| Material | Balsa wood |
| Type | Aeroplane |
| Radio | 4 channel |