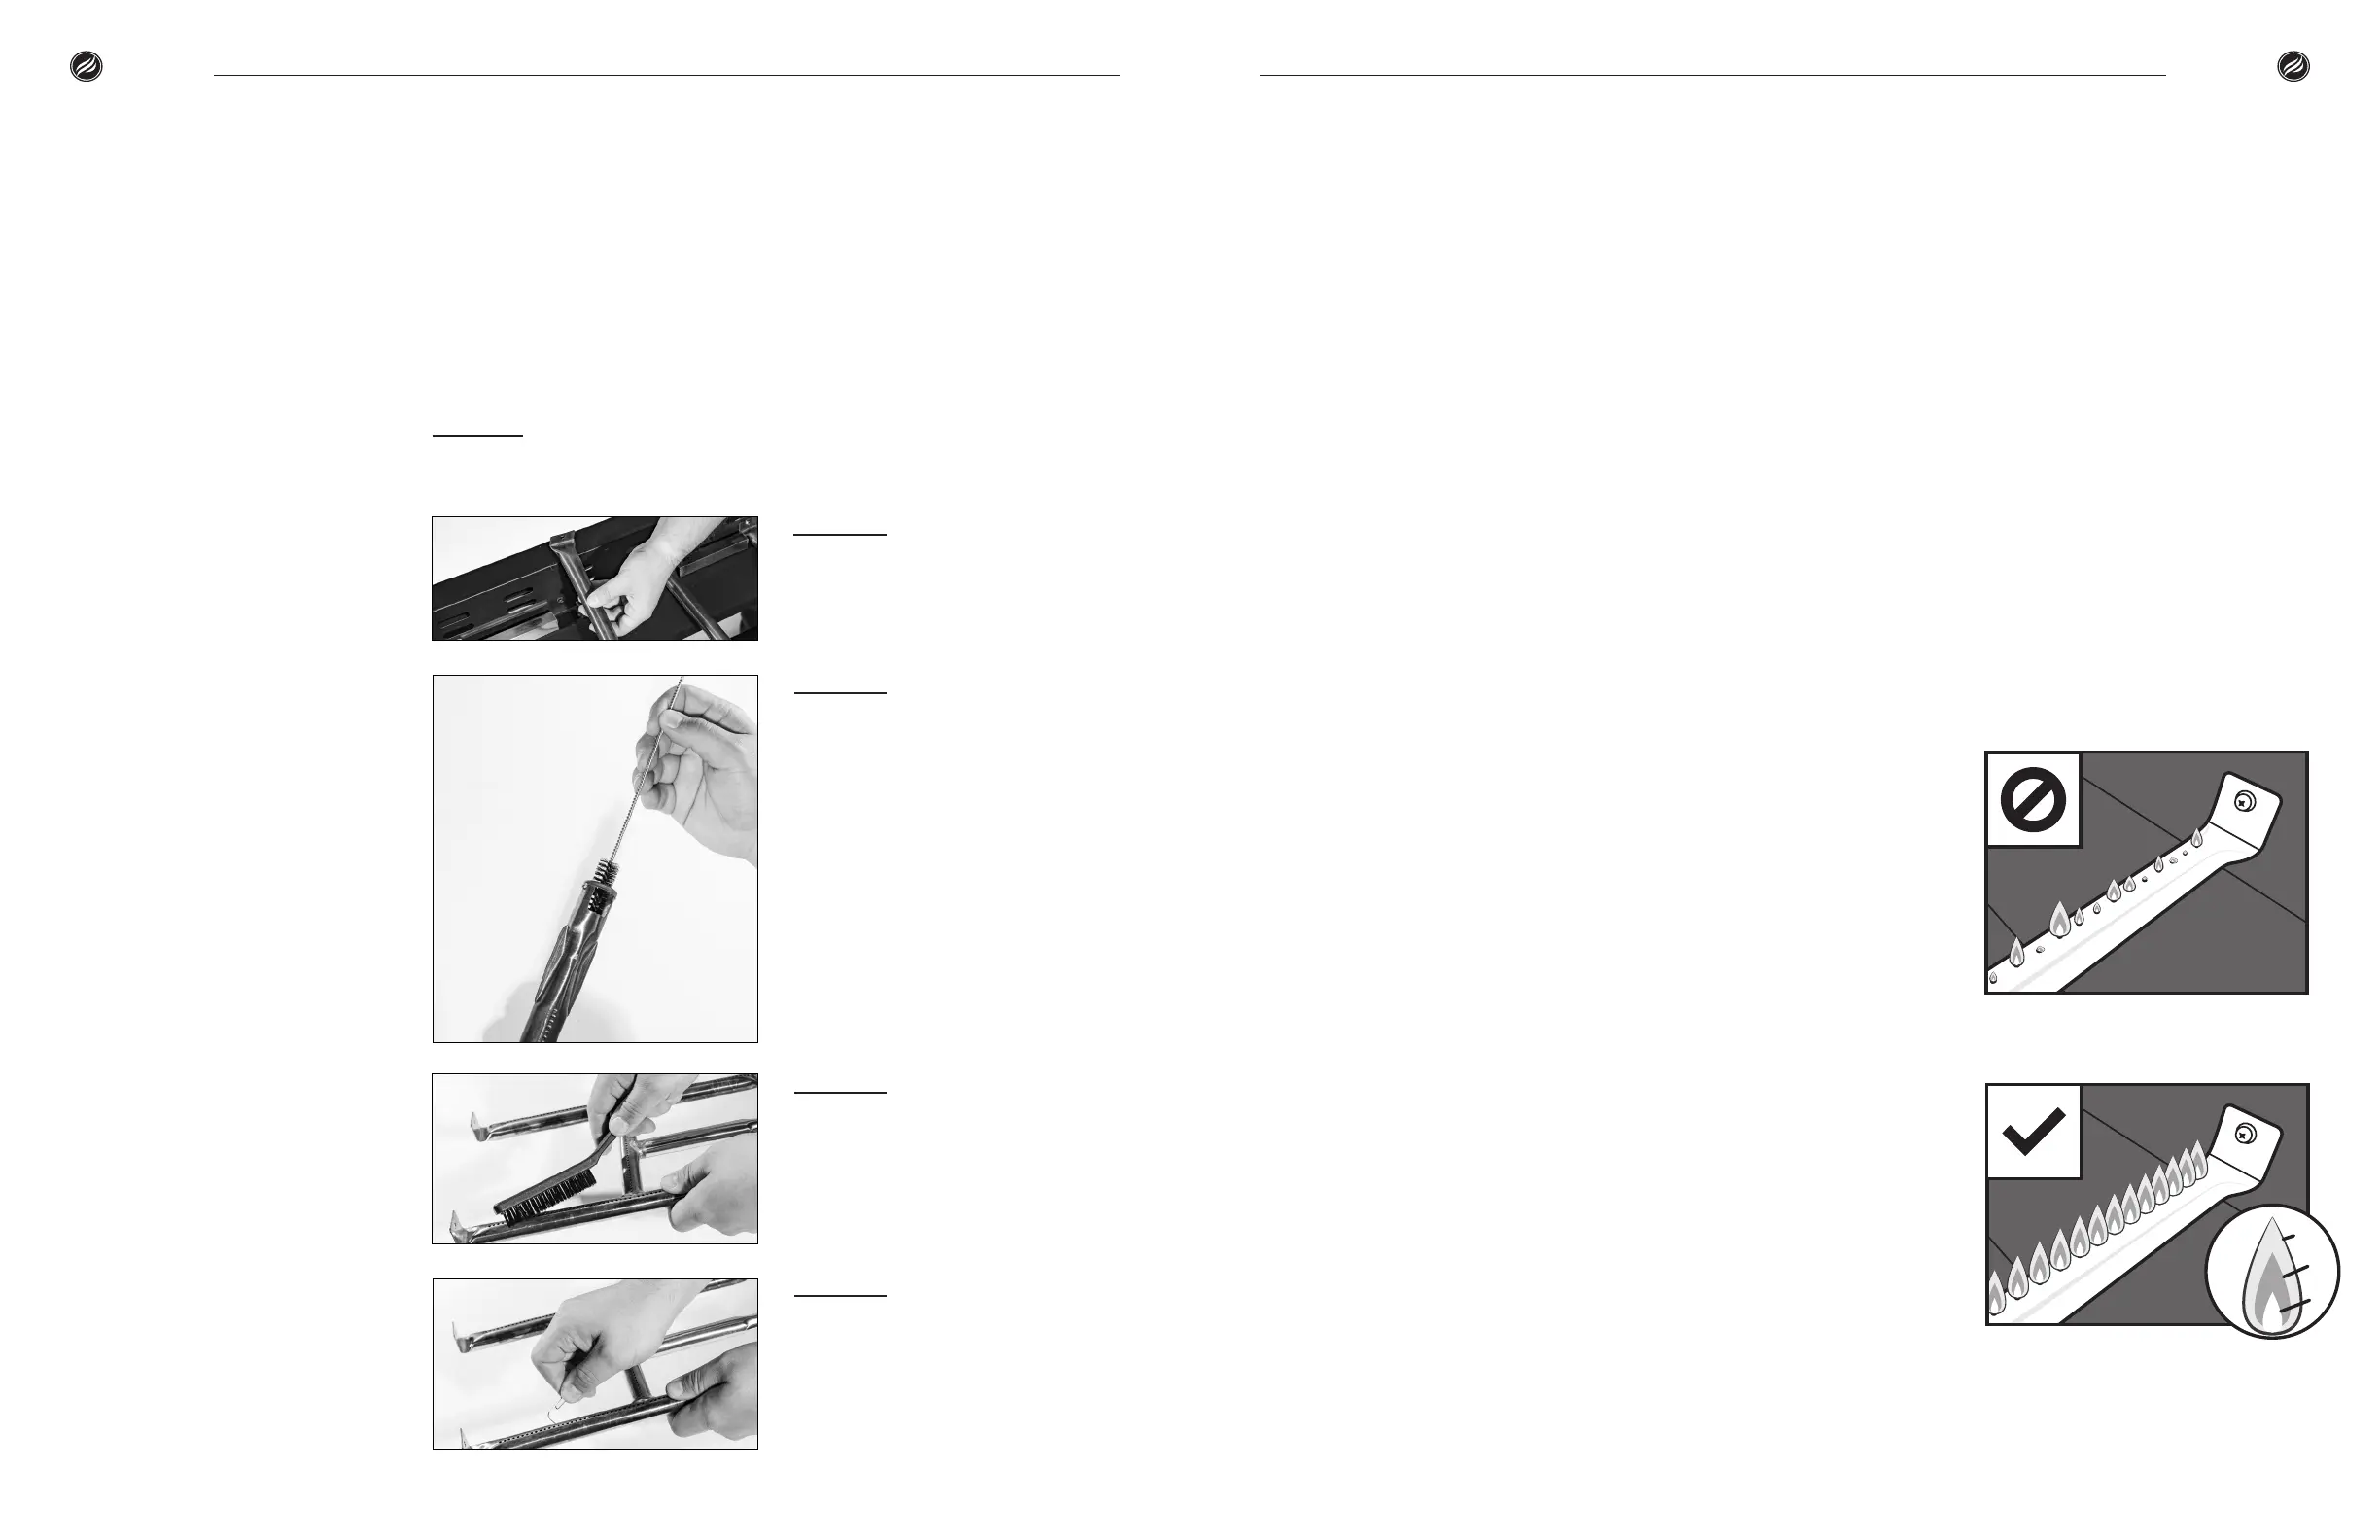
STEP
Turn gas OFF at control knobs and gas supply. Remove
griddle top.
STEP
Carefully detach and
remove the burner.
STEP
Run a narrow bottle
brush through each burner
tube several times. (Do not use
wire brushes)
Additional Methods Include:
a Run a sti wire bent into a small
hook through each burner tube
several times.
b Use an air hose to force air into
burner tube and out burner ports.
Check that air blows through each
hole. (Wear eye protection)
STEP
Brush entire outer
surface of burner to remove grime.
STEP
Clean any blocked ports
with sti wire such as an open
paper clip. Then, carefully replace
burners and reattach. Burner
tubes must be reengaged with the
valve openings.
Section 03
CLEANING THE BURNER ASSEMBLY
Unit burners vary, however these instructions apply to all units. Clean
burner assembly and check burner for damage. If any large cracks or
holes are found, replace burner.
Care & Maintenance
BURNER FLAME CHECK
01. Light burners and rotate knobs
from high to low. When knob is
at high, ames should be larger
than when knob is at low.
02. Perform burner ame check
by looking below griddle top
on the side of unit to view
burners below.
03. Always check burner ame
before use.
If there is a sudden drop or low
ame issue, please reference the
Troubleshooting chapter.
For additional support, see youtube.
com/blackstonegriddles
MATCH LIGHTING
INSTRUCTIONS
Before beginning, check for gas
leaks. (Please reference the
Leak Test Instructions in the Fuel
chapter.)
01. Ensure control knob is in
OFF position.
02. Remove griddle top.
03. Light a match (or long lighter)
no shorter than 11 inches long.
Place the ame on the right or
le side of the burner.
04. Push in and turn the control
knob to the HIGH position.
Ensure burner lights and
stays lit.
Healthy ames might have a few
ickers of yellow color ❶, then a
dark blue color ❷, followed by a
vibrant blue by the burner tube ❸.
❶
❷
❸
Care & MaintenanceModel 1819 | Owner’s Manual | | Owner’s Manual | Model 1819
28 29

 Loading...