ENGLISH
BLACKSTONEPRODUCTS.COM/SUPPORT
OWNER’S MANUAL | ASSEMBLY GUIDE
ASSEMBLY INSTRUCTIONS
Find a large, clean area to assemble your appliance.
Remove all packing material before assembling.
⚠ CAUTION
Sharp edges. Wear gloves while assembling.
NOT INCLUDED (OPTIONAL):
Two (2) D batteries
ELECTRIC REQUIREMENTS:
120V 60Hz
MODEL:
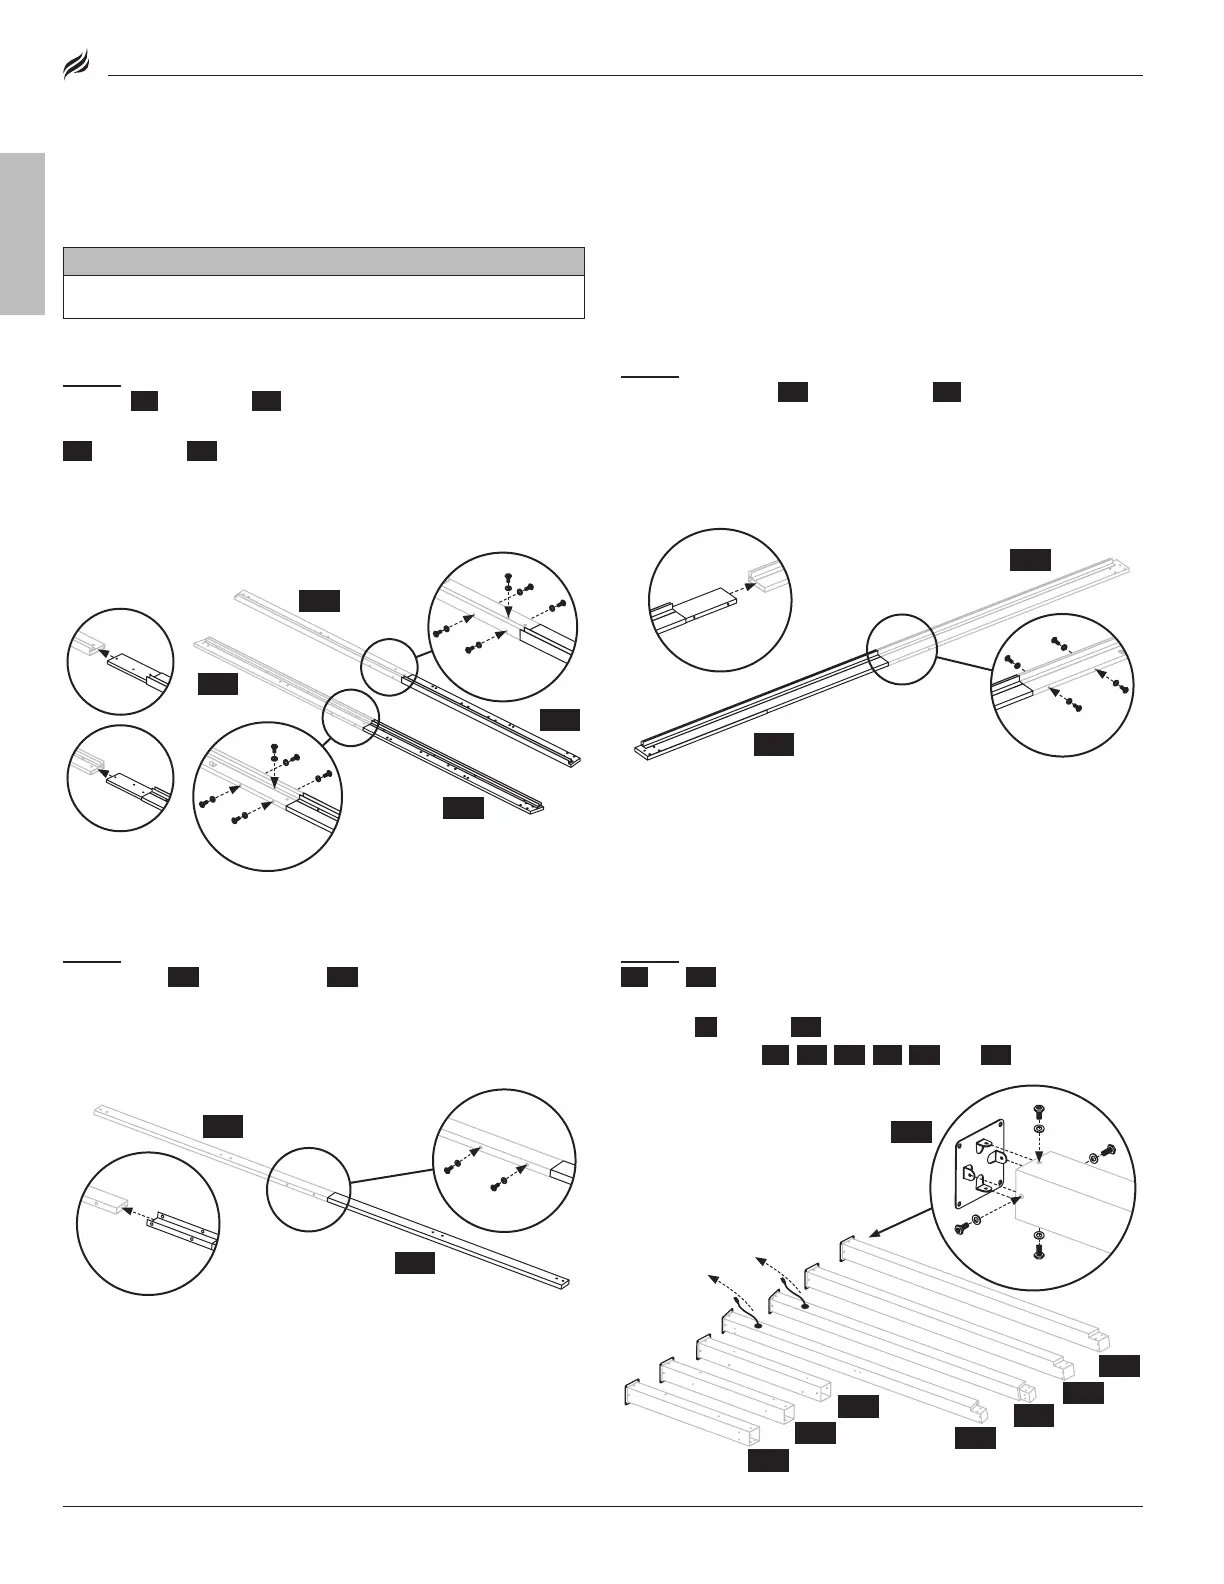
STEP 01
Use five (5) [AA] bolts and five (5) [FF] flat washers to attach
roof rib 1 {F1} to roof rib 2 {F2}.
Use five (5) [AA] bolts and five (5) [FF] washers to attach roof rib 3
{F3} to roof rib 4 {F4}.
STEP 02
Use four (4) [AA] bolts and four (4) [FF] flat washers to
attach cross beam 2 {D2} to cross beam 1 {D1}.
STEP 03
Use two (2) [AA] bolts and two (2) [FF] flat washers to attach
cross beam 4 {D4} to cross beam 3 {D3}.
STEP 04
Pull the electric cord out through the plug on posts
{A1} and {A2}.
Use four (4) [AA] bolts and four (4) [FF] flat washers to attach one (1)
foot base {B} to post 3 {A3}.
Repeat with posts {A1}, {A2}, {A4}, {A7}, {A8}, and {A9}.
For ease of assembly, it is recommended to have 3 or more people
and allow enough time to completely finish the assembly.
(Assembly can take 6-8 hours.)
DO NOT tighten screws until all the screws and washers are properly
installed.
[FF] × 2
D4
D3
[AA] × 28
[FF] × 28
A3
A4
A1
A2
A8
A7
A9
B
[FF] × 10
F1
F2
F3
F4
[FF] × 4
D2
D1