BLACKSTONEPRODUCTS.COM/SUPPORT
ENGLISH
| OWNER’S MANUALASSEMBLY GUIDEMODEL:
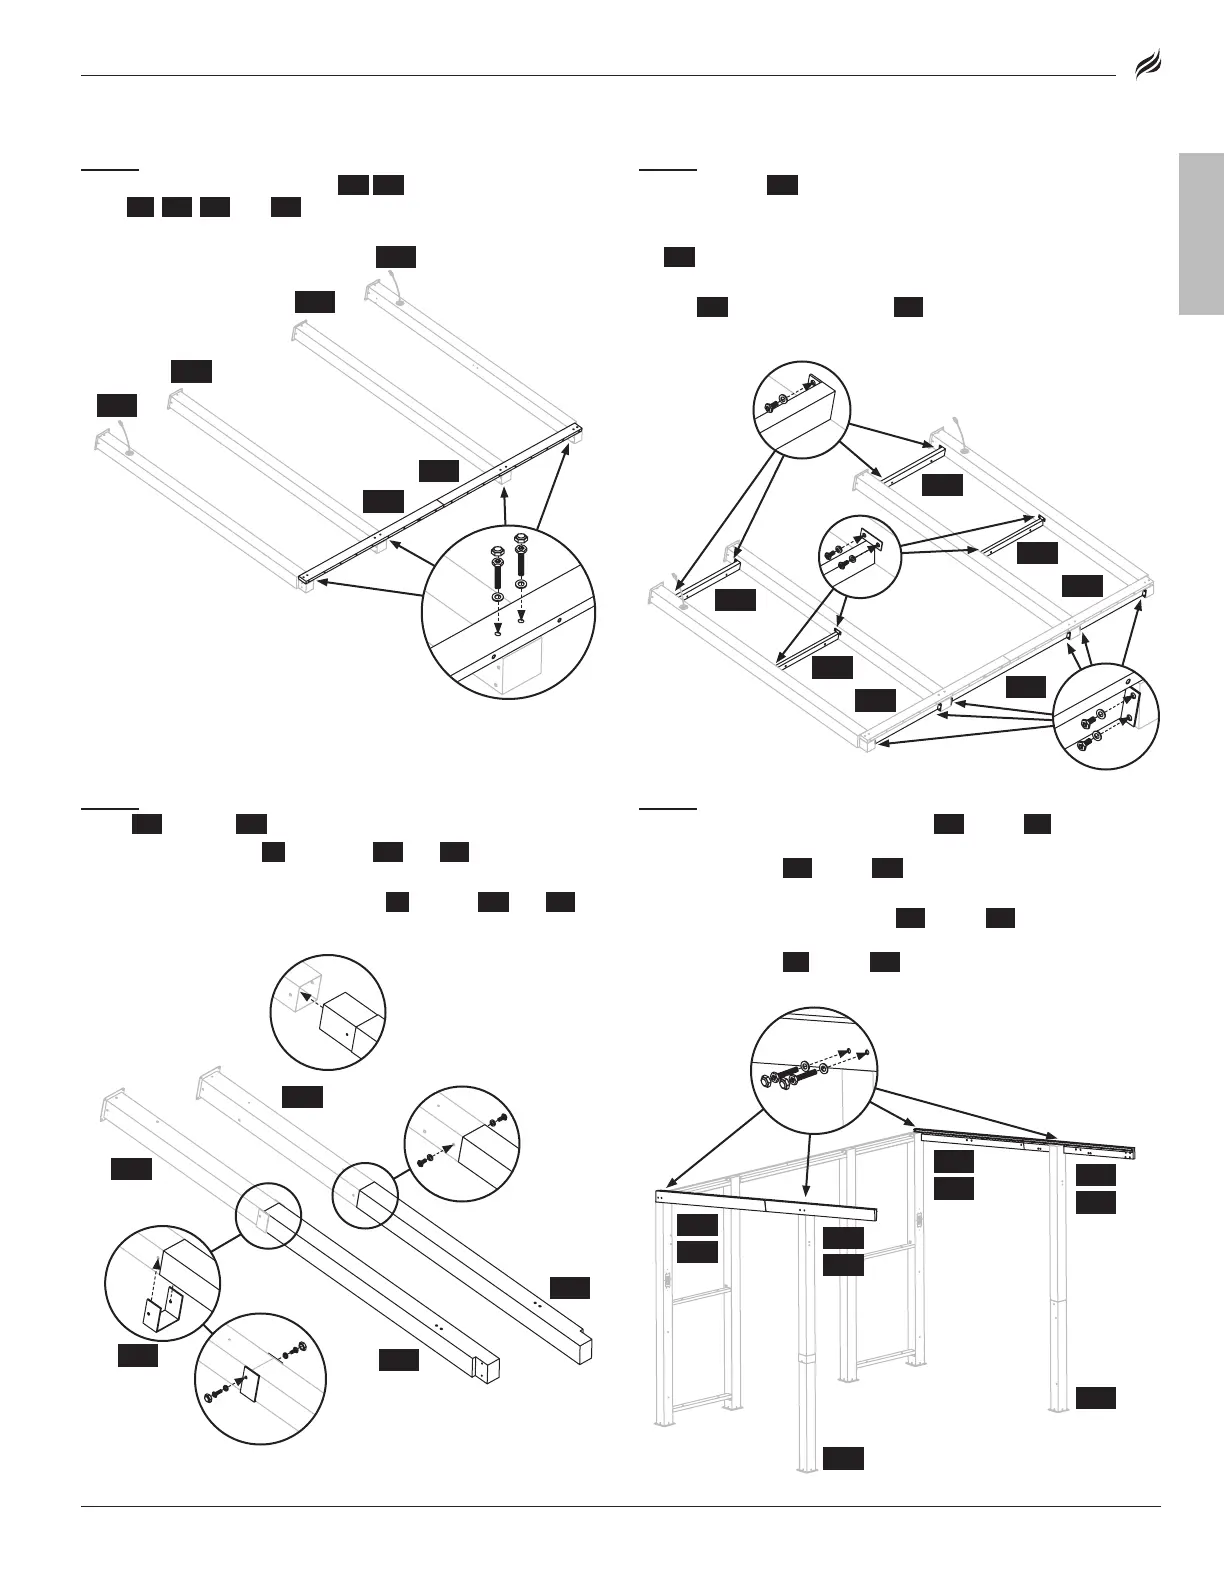
STEP 05
Use eight (8) [CC] bolts, eight (8) [HH] washers, and eight
(8) [KK] plastic caps to attach the {D3} {D4} cross beam assembly to
posts {A1}, {A3}, {A4}, and {A2}.
STEP 06
Use eight (8) [AA] bolts and eight (8) [FF] flat washers
to attach two (2) {D5} cross beams to the bottom of the post
assemblies.
Use eight (8) [AA] bolts and eight (8) [FF] flat washers to attach two
(2) {D6} cross beams to the middle of the post assemblies.
Use twelve (12) [AA] bolts and twelve (12) [FF] flat washers to attach
two (2) {D5} cross beams and the {D7} cross beam to the top of the
post assemblies.
STEP 07
Use two (2) [AA] bolts and two (2) [FF] flat washers to attach
post 6 {A6} to post 8 {A8}.
Slide the post protector {O} over posts {A5} and {A7}.
Use two (2) [AA] bolts, two (2) [HH] flat washers, and two (2) [KK]
plastic caps to attach the post protector {O} to posts {A5} and {A7}.
STEP 08
Use two (2) [CC] bolts, two (2) [HH] flat washers, and two (2)
[KK] plastic caps to attach cross beam {F4} to post {A1}. Use two (2)
[CC] bolts, two (2) [HH] flat washers, and two (2) [KK] plastic caps to
attach cross beam {F3} to post {A5}.
Use two (2) [CC] bolts, two (2) [HH] flat washers, and two (2) [KK]
plastic caps to attach cross beam {F2} to post {A2}. Use two (2) [CC]
bolts, two (2) [HH] flat washers, and two (2) [KK] plastic caps to
attach cross beam {F1} to post {A6}.
[CC] × 8
[HH] × 8
[KK] × 8
A3
D3
D4
A4
A1
[AA] × 4
[FF] × 2
[KK] × 2
[HH] × 2
A8
A7
A6
A5
O
A7
A5
A8
A1
A2
F4
F3
F2
F1
A6
[CC] × 8
[HH] × 8
[KK] × 8
D5
D5
D6
D7
D5
D5
D6
[AA] × 28
[FF] × 28