ENGLISH
BLACKSTONEPRODUCTS.COM/SUPPORT
OWNER’S MANUAL | ASSEMBLY GUIDE MODEL:
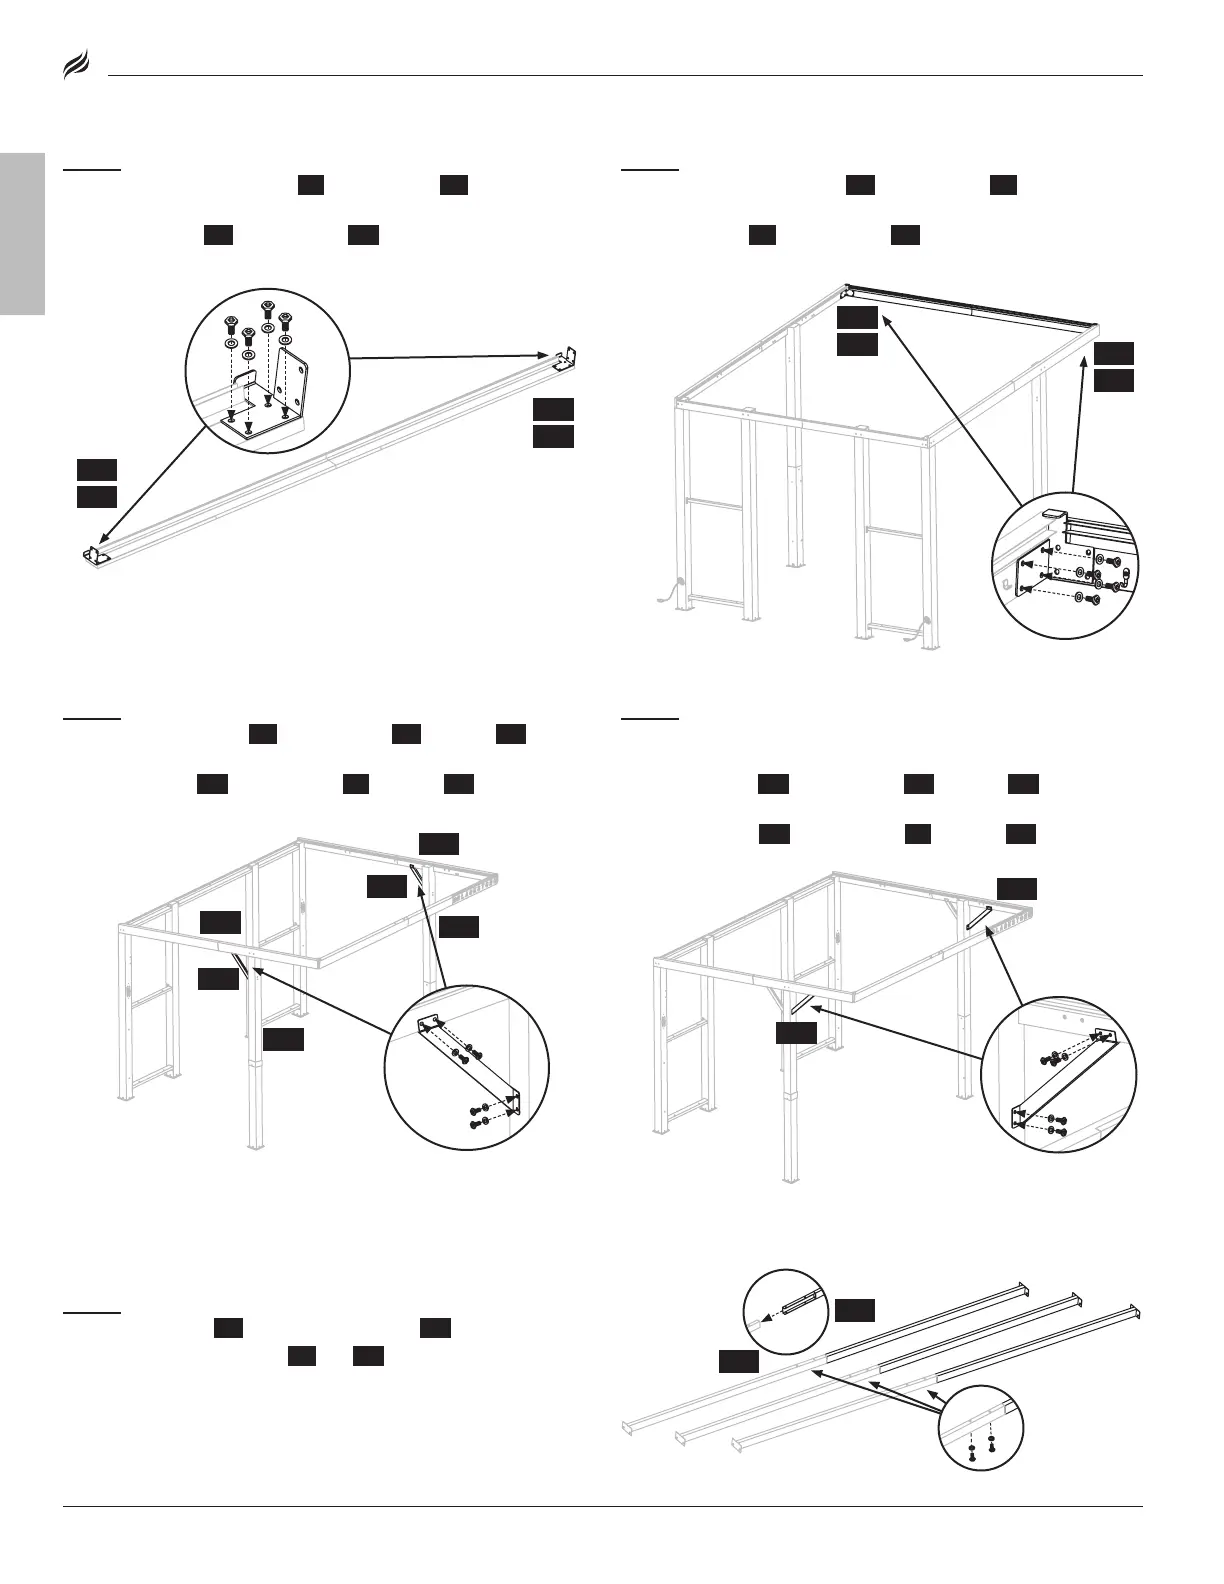
STEP 09
Use four (4) [AA] bolts and four (4) [FF] flat washers to
attach cross beam connecter 1 {E1} to cross beam {D1}.
Use four (4) [AA] bolts and four (4) [FF] flat washers to attach cross
beam connecter 2 {E2} to cross beam {D2}.
STEP 10
Use four (4) [AA] bolts and four (4) [FF] flat washers to
attach cross beam connecter {E2} to cross beam {F1}.
Use four (4) [AA] bolts and four (4) [FF] flat washers to attach cross
beam connecter {E1} to cross beam {F3}.
STEP 11
Use four (4) [AA] bolts and four (4) [FF] flat washers to
attach support bracket 1 {G1} to cross beam {F3} and post {A5}.
Use four (4) [AA] bolts and four (4) [FF] flat washers to attach
support bracket 1 {G2} to cross beam {F1} and post {A6}.
STEP 12
Note: DO NOT tighten the bolts completely until all the bolts
and washers are properly installed.
Use four (4) [AA] bolts and four (4) [FF] flat washers to attach
support bracket 3 {G3} to cross beam {F3} and post {A5}.
Use four (4) [AA] bolts and four (4) [FF] flat washers to attach
support bracket 4 {G4} to cross beam {F1} and post {A6}.
STEP 13
Use two (2) [AA] bolts and two (2) [FF] flat washers to attach
one (1) roof top rib 1 {H1} to one (1) roof top rib 2 {H2}.
Repeat with the other two (2) {H1} and {H2} roof top ribs .
[AA] × 8
[FF] × 8
D2
E2
D1
E1
H1
H2
[AA] × 6
[FF] × 6
F1
F3
E2
E1
[AA] × 8
[FF] × 8
G2
G1
F1
F3
A5
A6
[FF] × 8
G4
G3
[FF] × 8