BLACKSTONEPRODUCTS.COM/SUPPORT
ENGLISH
| OWNER’S MANUALUSING YOUR BLACKSTONE
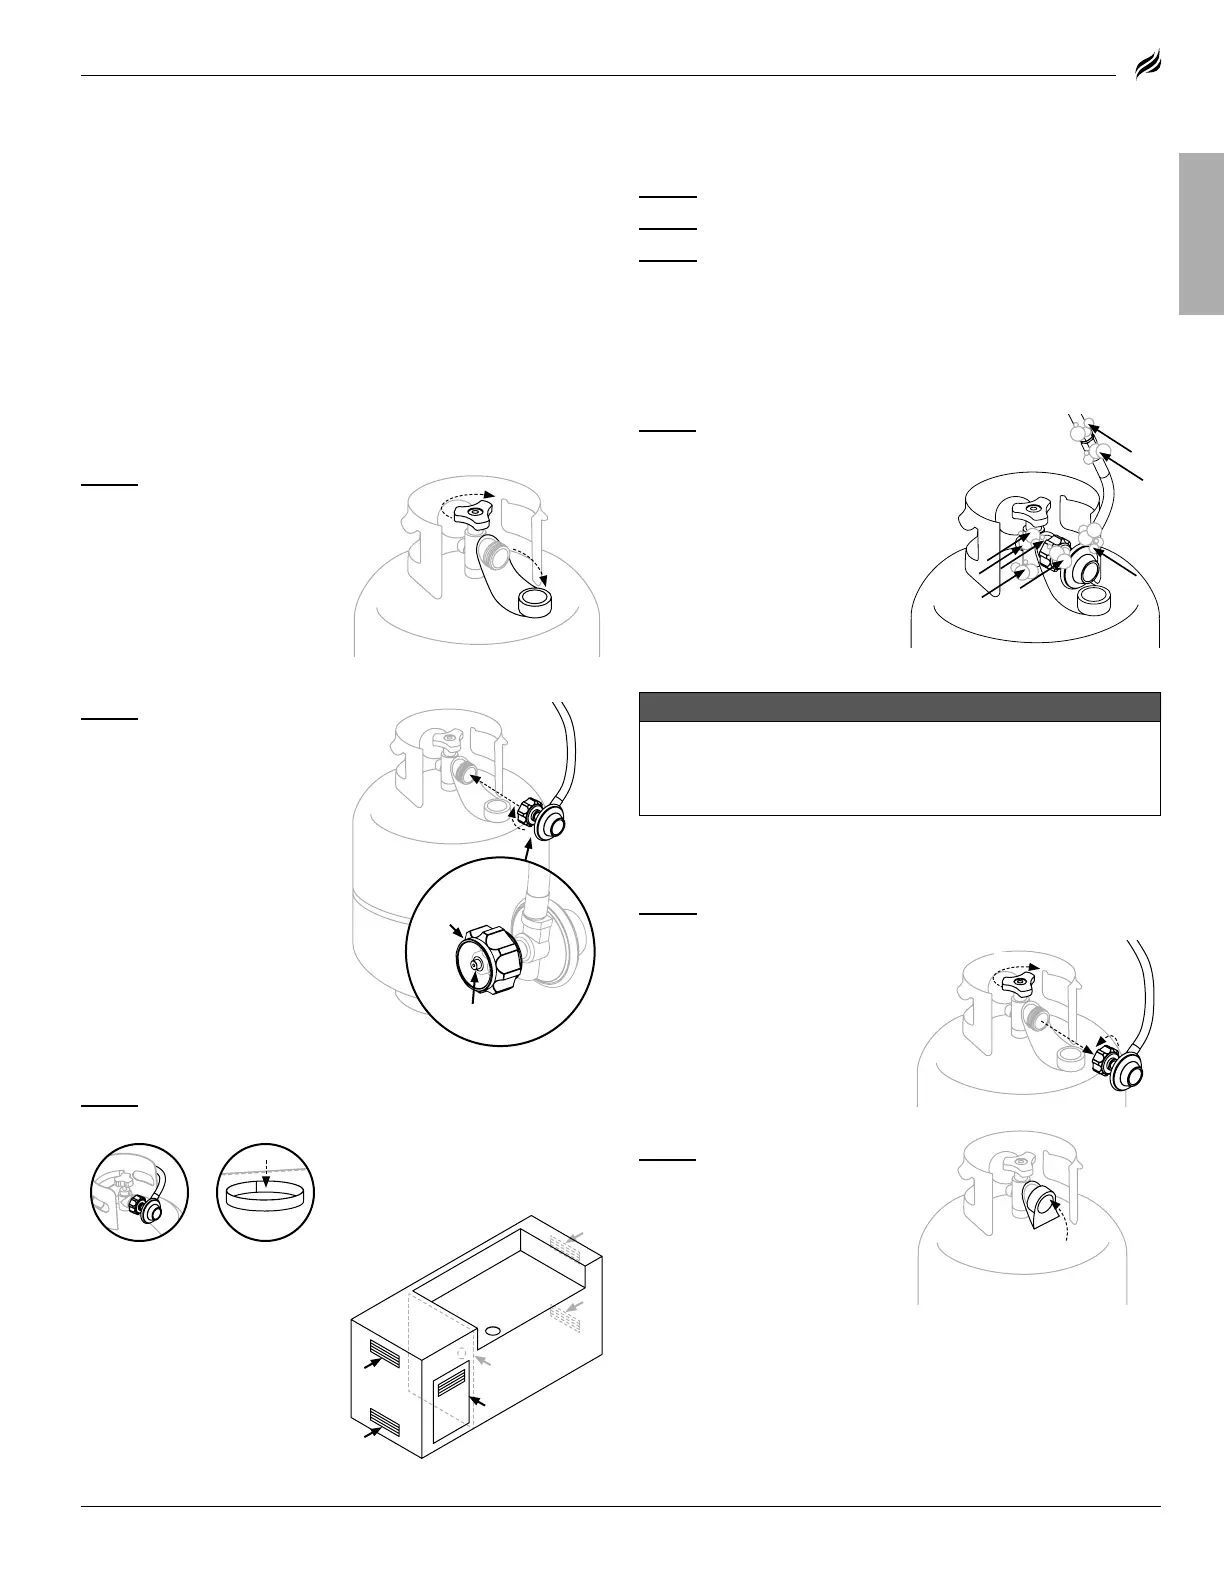
CONNECT THE LPG CYLINDER
STEP 01
Turn the control
knobs to OFF.
❶
Ensure that the LPG cylinder
is OFF by turning the OPD hand
wheel clockwise to a full stop.
❷
Remove the safety cap from
the Type 1 valve outlet.
STEP 02
Hold the regulator in a
straight line with the Type 1 valve
outlet so as not to cross thread
the connection.
Center and insert the regu-
lator nipple into the Type 1
valve outlet.
Hand-tighten the coupling nut in
a clockwise direction.
(DO NOT use tools to connect.)
If connection cannot be completed,
If connection cannot be completed,
disconnect regulator and repeat this
disconnect regulator and repeat this
step.
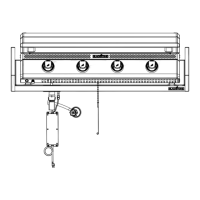
LEAK TEST: VALVES, HOSE & REGULATOR
STEP 01
Turn the control knobs to OFF.
STEP 02
Connect the regulator to the LPG cylinder.
STEP 03
Completely open the LPG tank by turning the OPD hand
wheel counterclockwise.
• If you hear a rushing sound, turn gas o immediately. There is a
major leak at the connection.
• Immediately close the LPG cylinder by turning the OPD hand wheel
clockwise and re-tighten connections. If leaks cannot be stopped
DO NOT TRY TO REPAIR.
STEP 04
Use a clean paintbrush
to brush a 10/90 mild soap and
water solutionn onto joint areas
of valves and regulator.
(Indicated by arrows in figure 02.)
(Indicated by arrows in figure 02.)
• Leaks are indicated by
growing bubbles.
• Immediately close the LPG
cylinder by turning the OPD
hand wheel clockwise and
re-tighten connections.
WARNING
If leaks cannot be stopped, DO NOT try to repair.
Regulator must be replaced with a Blackstone approved
model by a professionally licensed, authorized dealer.
The safety relief valve must face
away from the user while the
appliance is in use.
DISCONNECTING THE LPG CYLINDER
20 LB (9 KG)
STEP 01
Ensure that the control knobs are turned to OFF.
❶
Ensure that the LPG cylinder
is OFF by turning the OPD hand
wheel clockwise to a full stop.
❷
Turn the coupling nut count-
er-clockwise by hand to remove
the regulator. (DO NOT use tools
to disconnect.)
STEP 02
Place dust cap on LPG
cylinder valve outlet whenever
cylinder is not in use.
Only install the type of dust cap on
Only install the type of dust cap on
cylinder valve outlet that is provided
cylinder valve outlet that is provided
with the cylinder valve. Other types of
with the cylinder valve. Other types of
caps or plugs may result in leakage of
caps or plugs may result in leakage of
propane.
REGULATOR SAFETY
• Use this appliance, as purchased, only with gas and regulator/valve
assembly supplied.
• DO NOT cross thread the connection between your LPG cylinder
and regulator.
Cross threading can occur if you force thread a connection at an improper
Cross threading can occur if you force thread a connection at an improper
angle. This will damage the threads, lead to propane leaking, and potentially
angle. This will damage the threads, lead to propane leaking, and potentially
result in a build-up of fuel that can ignite.
result in a build-up of fuel that can ignite.
• If you can not connect the regulator, DO NOT use the regulator.
Regulator must be replaced with a Blackstone approved model by a profession-
Regulator must be replaced with a Blackstone approved model by a profession-
ally licensed, authorized dealer.
ally licensed, authorized dealer.
❷
Coupling nutCoupling nut
Regulator nippleRegulator nipple
figure 02
❷
STEP 03
Set the LPG cylinder into
the propane cabinet.
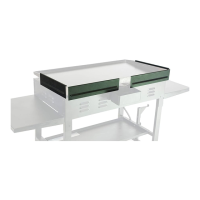
ENCLOSURE CONSTRUCTION
A:
4 in x 6 in vents at top and bottom,
4 in x 6 in vents at top and bottom,
and both sides of cabinet.
and both sides of cabinet.
B:
Plenum wall to separate the LPG
Plenum wall to separate the LPG
cylinder compartment.
C:
LPG cylinder access door.
LPG cylinder access door.
A
A
A
A
C
B
Use an LPG cylinder retention
system to prevent the cylinder
from tipping over.
MODEL:
 Loading...