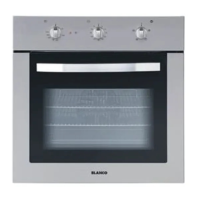
This document is a user manual for the Blanco BSO62 Fan Forced Oven. It provides instructions for use, care, and installation, along with safety recommendations, specifications, and warranty information.
Function Description
The Blanco BSO62 is a fan-forced electric oven designed for domestic use. It features various cooking functions, including:
- Defrost: Operates the oven fan to circulate cold air, aiding in the defrosting of frozen products without heating elements.
- Traditional Cooking: Suitable for meats, poultry requiring long, slow cooking, and baking bread and sponge cakes. Food should be inserted when the oven reaches the desired cooking temperature.
- Fan Assist: Creates a continuous circulation of warm air, ideal for cooking on multiple shelves. This method generally requires lower cooking temperatures, saving time and energy.
- Grill: Utilizes the grill element for toasting, melting cheese, or browning. Recommended for short cooking times (no longer than 5 minutes) at 200°C.
- Fan Grill: Combines the grill element and fan for grilling meats, vegetables, and poultry. The oven should be preheated, and food placed on a grill rack in a baking tray in the middle of the oven at 200°C. Other foods can be cooked underneath simultaneously.
The oven door must remain closed for all cooking methods.
Important Technical Specifications
- Model: BSO62
- Type: Fan Forced Oven
- Electrical Features:
- Input voltage: 230-240V 50 Hz
- Grill element: 1800 W
- Upper element: 800 W
- Lower element: 1000 W
- Circular element: 2100 W
- Lighting bulb: max 25 W
- Compliance:
- EEC 89/336 specifications for magnetic compatibility.
- EEC 89/109 specifications for components in contact with foodstuffs.
- Electrical Connection: Fitted with an Australian approved 10 Amp flexible cord and plug, requiring connection to a correctly earthed socket outlet. For direct connection without a plug, an omnipolar switch with a minimum 3mm opening between contacts is required, ensuring the grounding wire is uninterrupted.
- Cabinetry Requirements: Materials must withstand temperatures up to 90°C.
- Dimensions (proudmount installation):
- Overall width: 598 mm
- Overall height: 594 mm
- Overall depth: 499 mm
- Cut-out width: 560 mm
- Cut-out height: 575 mm
- Cut-out depth: 558 mm (for under-bench installation, 450mm for wall-mounted)
Usage Features
- Controls: The oven is controlled by a selector switch (A) for functions and a thermostat switch (B) for temperature selection. The oven lamp remains on during operation.
- Clock Setting: Upon power connection, the display shows "0.00" and "Auto" flashes. To set the clock, press both (1) and (2) keys simultaneously, then use (1) or (2) to adjust the time within 4 seconds.
- End of Cooking Time Setting:
- Select oven mode and temperature.
- Press (1) or (2) to activate Auto mode.
- Press (1) or (2) to set and adjust cooking time. The display will briefly show the set time before reverting to the clock.
- The oven operates in Auto mode, indicated by the "Auto" light.
- To check remaining time, press (1) or (2) briefly.
- At the end of cooking, an acoustic signal sounds, the oven turns off, and "Auto" flashes. To cancel the signal and return to manual mode, turn off oven function and temperature switches, then press (1) or (2) once. To continue cooking, stop the signal, then press (1) or (2) again to return to manual mode, remembering to turn off switches when done.
- The acoustic signal automatically cuts out after 2 minutes if not cancelled.
- Safety Lock for Children:
- Activation: Press both (1) and (2) switches simultaneously for about 10 seconds until "ON" appears. Release simultaneously. Press (2) again, and the key symbol will appear. The display shows current time, with the key symbol appearing every 30 seconds for 3 seconds.
- Deactivation: Press both (1) and (2) switches simultaneously for about 10 seconds until "OF" appears. Press (2) again, and "On" will be displayed. The safety lock is deactivated, and the display shows the current time.
- Maximum Programming Time: 23 hours, 59 minutes.
- Power Outage: If there's a voltage cut, the clock needs to be reset.
- Pilot Light of the Thermostat (°C): Illuminates when the oven is heating and turns off when the preset temperature is reached.
- Cooling Motor: A built-in fan automatically starts when the oven is in use to cool the oven cavity.
- Concealed Base Element: The base heating element is concealed for easier cleaning and better access.
- Important: Do not place aluminum foil or metal objects directly on the oven base during cooking, as this can damage the enamel surface due to concentrated heat. Such damage is not covered by warranty.
- Preheating: Necessary for most cooking, except for very fatty meats placed in a cold oven. Preheating adds about 15 minutes to cooking times.
- Energy Saving: The oven can be switched off a few minutes before cooking ends, using residual heat. Minimize door opening; check progress through the glass.
- Cooking Times Table: Provides indicative shelf positions, temperatures, and times for various foods (sweets, fish, meat, bread/pizza, bakes). Times are for single food items; add 5-10 minutes for multiple items. For beef, veal, pork, and turkey roasts with bones or rolled, add about 20 minutes.
Maintenance Features
- General Cleaning:
- Always disconnect the oven electrically before cleaning.
- Clean the oven after each use once it has cooled.
- Remove fat deposits with a sponge or cloth dampened with warm soapy water and detergent.
- Never use abrasive cloths or sponges, as they can damage the enamel.
- Clean control panel parts (handgrip, knobs) on white ovens each time to prevent yellowing from fat vapours.
- Rinse stainless steel parts thoroughly with water and dry with a soft cloth or buckskin. For persistent stains, use non-abrasive cleaning agents, specific stainless steel products, or warm vinegar.
- Clean door glass with warm water only; avoid rough cloths.
- Lowering Grill Element for Cleaning:
- Ensure all controls are "OFF" and the grill element is cool.
- Support the front of the grill element.
- Remove the knurled screw retaining the element.
- Carefully lower the front of the element to its rest position.
- Clean the oven, taking care not to apply force to the grill element.
- Remove all cleaning chemicals and water from the grill element.
- Carefully raise the element and secure it with the knurled screw.
- Warning: Never use the oven with the grill element hanging down.
- Replacing the Oven Bulb:
- Electrically disconnect the oven.
- Unscrew the glass protection cap and the bulb.
- Replace with a new bulb suitable for high temperatures (300°C / E14).
- Reassemble the glass cap and reconnect the oven.
- Cleaning the Oven Door (Removing Glasses):
- Warning: For safety, remove the oven door before removing the glasses.
- Open the oven door wide.
- Lift the hinge jumpers with thumb and index fingers, turning them fully outwards (Fig.A).
- Turn the door towards the closure position and lay it on the jumpers to block the hinge spring. Fully closing the door unhooks the hinges from the oven muffle (sequence 1,2,3 of Fig.B).
- Reassemble the door by reversing these steps.
- Disassembling Door Glasses:
- After removing the door, release the two upper blocks (picture C).
- Remove the glass (picture D).
- After cleaning, reassemble the glass, replace the blocks, and lock them into position.
- Ensure all components are correctly assembled before reassembling the door onto the oven.
- Look for the "OK" symbol for correct assembly.
- Care of Catalytic Liners (if fitted):
- Splashes of food and fats collect on the catalytic liner.
- After cooking high-fat dishes or when grease spots are visible:
- Remove baking dishes and oven racks.
- Wipe out the oven bottom and clean the door.
- Turn the oven to 220°C for approximately 20 minutes.
- Once cool, wipe out the oven bottom.
- Manual cleaning of catalytic liners is not recommended. Damage will occur if soap-impregnated steel wool pads, aerosol cleaners, or other abrasives are used.
- Slight discolouration and polishing of the catalytic surface may occur over time but do not affect its catalytic properties.
- Safety Thermostat: Cuts out electrical supply to prevent overheating. If activated, wait for the oven to cool before using again. If a fault persists, contact a Blanco service agent.
- Protection Filter of the Oven Fan:
- Should be placed in the oven before cooking fatty foods to prevent fat residue from striking the fan.
- After cooking and once the oven cools, remove and wash the filter.
- Install by leaning it against the rear wall at the fan's level, then pushing the tang downwards. Reverse to remove.
- Attention: The filter should only be used for fatty foods. Better cooking results for non-fatty foods are achieved without the filter installed.
- Duration: Two (2) years from the date of purchase, covering all parts and labour.
- Conditions: Applies to normal single-family domestic installation and use, as per the instruction manual, against manufacturing defects.
- Exclusions: Does not cover replacement of parts due to normal wear and tear (including light globes), or damage from accident, misuse, neglect, abuse, faulty installation, misadjustment, or tampering by unauthorized persons.
- Commercial/Rental Use: A separate 12-month warranty applies, covering all parts with 3 months on labour.
- Service: Contact an approved Blanco Service Provider during normal business hours for service.
- Limitations: Blanco/MEA is not liable for freight, transportation costs, or damage during transit, or for economic loss due to appliance failure outside normal service areas, unless prohibited by statute.
- Validity: Valid for major appliances imported and distributed by BLANCO/MEA, purchased and used in Australia.
- Record Keeping: Complete the Date of Purchase, Model No., and Serial No. section in the manual and retain with proof of purchase.