EasyManua.ls Logo

Blanco BOSE752 - User Manual

Blanco BOSE752
22 pages
Print Icon
To Next Page IconTo Next Page
Loading...
MULTIFUNCTIONAL OVEN
BOSE752
141 blanco 17-02-2004 10:55 Pagina 1
Instructions for the Use and Care and Installation of
Question and Answer IconNeed help?

Do you have a question about the Blanco BOSE752 and is the answer not in the manual?

Summary

Safety Recommendations

Specification

Electrical Features

Details of input voltage, grill, upper, lower, circular elements, lighting, and fans.

Electrical Connection

Information on the 15 Amp flexible cord, plug, and connection requirements for safety.

Cabinetry Preparation

Important Notice to the User

Oven Base Foil Warning

Warning against placing aluminium foil or metal objects on the oven base during cooking to prevent damage.

Notes for Installation

General Installation Information

Appliance must be installed per codes by a licensed electrician, using provided cable.

Electrical Connection Details

Information on three-pole feeding cable, grounding conductor, and connection to mains.

Connecting the Feeding Cable

Steps and checks for connecting the oven's feeding cable to a suitable plug or mains.

Insertion and Assembly

Instructions for fitting the oven into furniture, securing it, and ensuring proper air circulation.

Pre-use Oven Preparation

Steps before first use: remove film, heat empty oven, clean inside.

Instructions for Use

Oven Lamp Operation

Details on when the oven lamp is on during operation.

Defrost Function

Explanation of the defrost mode using the oven fan.

Traditional Heating Mode

Describes using upper and lower elements for slow cooking of meats, poultry, and cakes.

Fan Assist Mode

Explains using upper/lower elements with fan for even heat circulation, suitable for multiple shelves.

Bottom Element + Fan Mode

Details using the lower heating element with the oven fan for cooking.

Fan Forced Mode

Describes using circular element and fan for even heat distribution, ideal for cakes and multiple dishes.

Grill Function

Instructions for using the grill element for browning, melting cheese, or toasting.

Fan Grill Function

Using grill element and fan for grilling meats, vegetables, and poultry.

Programming the Oven Overview

Explains the keys, pilot lights, and programmer display for oven functions.

Indicator Lights Explained

Describes the meaning of indicator lights for general operation, automatic, and minute minder.

Setting the Timer

Instructions on setting the minute counter and how the display behaves on power application.

Setting the Time of Day

Procedure to set the current time using specific keys.

Automatic Operation Programming

Guide to programming the oven to switch on and off automatically.

Semi-automatic Operation

Instructions for programming the oven to switch off automatically.

Minute Minder Function

How to use the device as a simple minute minder.

Manual Operation Mode

How to use the oven manually without programming.

Safety Lock for Children

Procedure to lock and unlock the oven controls to prevent unintended operation.

Thermostat and Operation Pilot Lights

Explanation of the pilot lights for the thermostat and general operation.

Safety Thermostat Function

Details on the safety thermostat that cuts out power to prevent overheating.

Cooling Fan Operation

Explanation of the cooling fan's role in cooling components and its automatic operation.

Instructions for Cooking

Oven Cooking Basics

Advice on pre-heating the oven, using deep baking dishes, and keeping the door closed.

Energy Saving Tips

How to save energy by switching off early and minimizing door openings.

General Cooking Advice

Overview of heating types and tips for using fan forced for multiple dishes.

Oven Fan Protection Filter

Instructions on using and cleaning the filter to protect the fan from fat residue.

Filter Installation

Guidance on how to mount and remove the protection filter.

Cooking Time Remarks

Notes on adjusting cooking times for roasts with bones and for multiple items.

Table of Cooking Times

Cleaning and Maintenance

General Cleaning Guide

Instructions for cleaning enamelled parts, control panel, stainless steel, and door glass.

Lowering the Grill Element

Procedure to lower the grill element for cleaning purposes, with safety warnings.

Replacing the Oven Bulb

Steps to safely replace the oven light bulb after disconnecting power.

Cleaning the Oven Door

Instructions on how to clean the oven door and its glasses.

Disassembling Door Glasses

Steps for safely disassembling and reassembling oven door glasses for cleaning.

Care of Catalytic Liners

Instructions for cleaning and maintaining catalytic liners, including recommended procedures.

Overview

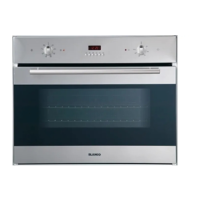
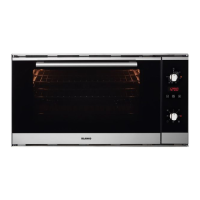
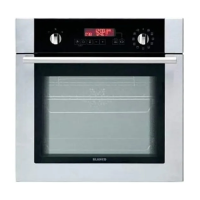
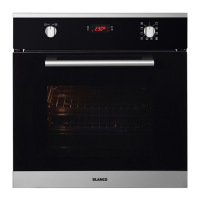
This document provides comprehensive instructions for the use, care, and installation of the BLANCO BOSE752 Multifunctional Oven, designed to blend seamlessly into modern kitchens with its clean lines and high-standard performance.

Function Description

The BLANCO BOSE752 is a versatile multifunctional oven equipped with various heating positions and temperature adjustment options, allowing for a wide range of cooking methods. The oven door must remain closed for all cooking functions to ensure optimal performance and safety.

Heating Functions:

  • Lamp Only: Illuminates the oven interior without activating any heating elements. The lamp remains on during all oven operations.
  • Defrost: Utilizes the oven-fan to circulate cold air, facilitating quick defrosting of frozen foods without heat.
  • Traditional: Engages both the upper and lower heating elements. The temperature is adjustable from 50°C to MAX. This mode is ideal for cooking meats, poultry, and cakes that require long, slow cooking, and pre-heating is recommended.
  • Fan Assist: Combines the upper and lower heating elements with the oven-fan, creating a continuous circulation of warm air. Temperature is adjustable from 50°C to MAX. This function is suitable for cooking on multiple shelves simultaneously.
  • Bottom Element + Fan: Activates the lower heating element and the oven-fan. Temperature is adjustable from 50°C to MAX.
  • Fan Forced: Engages the circular heating element and the fan, ensuring even heat distribution across all shelf positions. This mode is excellent for most cakes, large quantities of food, and cooking various dishes simultaneously. Pre-heating is essential.
  • Grill: Uses the grill element for toasting, melting cheese, or browning. This function is designed for short cooking times, typically no longer than 5 minutes.
  • Fan Grill: Combines the grill element with the fan for grilling meats, vegetables, and poultry. Pre-heat the oven, place food on the grill rack in a baking tray, and position it in the middle of the oven.

Usage Features

The oven features an intuitive control panel with knobs for selecting functions and adjusting temperature, along with a digital programmer for managing cooking times.

Programming the Oven:

The programmer display shows the time and allows for various settings:

  • Minute Counter (Timer): Set and display a countdown timer.
  • Cooking Time: Set and display the desired cooking duration.
  • End of Cooking Time: Set and display the time when cooking should conclude.
  • Manual Operation: Use the oven without any programmed settings.
  • Time Adjustment: Keys are provided to decrease or increase time settings.

Setting the Time of Day: Upon initial connection or after a power cut, the display blinks and shows "0.00". To set the actual time, press keys (1) and (2) simultaneously, then use the (-) and (+) keys within 4 seconds. The oven will remain in manual operation.

Automatic Operation: The oven can be programmed to switch on and off automatically.

  1. Select the desired cooking function and temperature.
  2. Press key (2) and set the cooking time.
  3. Press key (3) and set the end of the cooking time. The actual time will reappear, and the "AUTO" pilot light will illuminate. The oven will start at the appropriate time and switch off automatically when the cooking time is complete.

Semi-automatic Operation (Setting the end of cooking time): The oven can be programmed to switch off automatically.

  1. Select the desired cooking function and temperature.
  2. Press key (2) and set the cooking time. The actual time will reappear, and the "A" and "AUTO" pilot lights will illuminate. The oven will switch off automatically when the cooking time is complete.

Minute Minder: To use as a simple minute minder, press key (1) and program the desired time using the (-) and (+) keys. The "B" symbol will activate.

Safety Lock for Children: The programmer includes a safety lock to prevent accidental operation.

  • Lock Activation: Press both switches (1) and (2) for about 10 seconds until "ON" appears, then release. Press switch (+) until "OF" and the "key" symbol appear. The lock will activate after 5 seconds.
  • Lock Deactivation: Press both switches (1) and (2) for about 10 seconds until "OF" appears, then release. Press switch (+) until "ON" appears. The lock will deactivate after 5 seconds.

Pilot Lights:

  • Thermostat Pilot Light: Illuminates when the oven is heating to the set temperature and switches off once the temperature is reached.
  • Operation Pilot Light: Stays on in all working positions, indicating the appliance is powered.

Cooling Fan: An automatic cooling fan cools the control panel, knobs, and internal elements, with airflow exiting from both the control panel and oven door.

Practical Hints to Save Energy: The oven can be switched off a few minutes before cooking is complete, as residual heat will finish the process. Avoid opening the oven door unnecessarily; use the glass to check cooking progress.

Maintenance Features

Regular cleaning and maintenance are crucial for the oven's longevity and performance. Always disconnect the oven electrically before any cleaning or maintenance operations.

General Cleaning: Clean the oven after each use once it has cooled down.

  • Enamelled Parts: Use a sponge or cloth dampened with warm soapy water and a mild detergent. Avoid abrasive cloths or sponges to prevent damage to the enamel.
  • Control Panel, Handgrip, Knobs: Clean regularly, especially on white ovens, to prevent yellowing from fat vapours.
  • Stainless Steel Parts: Rinse thoroughly with water and dry with a soft cloth or chamois. For persistent stains, use non-abrasive cleaning agents, specific stainless steel products, or warm vinegar.
  • Door Glass: Clean with warm water only; avoid rough cloths.

Ovens with Lowering Grill for Cleaning:

  1. Ensure all controls are "OFF" and the grill element is cool.
  2. Support the front of the grill element while removing the knurled screw.
  3. Carefully lower the front of the element to its rest position.
  4. Clean the oven, taking care not to apply force to the grill element.
  5. Remove all cleaning chemicals and water from the grill element.
  6. Raise the element back into position and secure with the knurled screw. Never use the oven with the grill element hanging down.

Replacing the Oven Bulb:

  1. Electrically disconnect the oven.
  2. Unscrew the glass protection cap and the bulb.
  3. Replace with a new bulb suitable for high temperatures (300°C / E14).
  4. Reassemble the glass cap and reconnect the oven.

Cleaning the Oven Door:

  1. Open the oven door wide.
  2. Lift the hinge jumpers with your thumb and index fingers, turning them fully outwards.
  3. Turn the door towards the closure position and lay it on the jumpers to block the hinge's spring. This unhooks the hinges from the oven muffle.
  4. Reassemble by reversing these steps.

Disassembling the Door Glasses: To facilitate cleaning after removing the door:

  1. Release the two upper blocks (as shown in picture C).
  2. Remove the glass (as shown in picture D).
  3. Clean the glass.
  4. Reassemble the glass, replace the blocks, and lock them into position.
  5. Ensure all components are correctly assembled before re-assembling the door onto the oven.

Care of Catalytic Liners (if fitted): Splashes of food and fats will collect on the catalytic liner. After cooking fatty dishes or when grease spots are visible:

  • Remove baking dishes and oven racks.
  • Wipe out the bottom of the oven and clean the door.
  • Turn the oven to 220°C for approximately 20 minutes.
  • Once cool, wipe out the bottom of the oven. Manual cleaning of the catalytic liner is not recommended. Avoid soap-impregnated steel wool pads, aerosol cleaners, or other abrasives, as these can cause damage. Slight discolouration or polishing of the catalytic surface over time is normal and does not affect its properties.

Blanco BOSE752 Specifications

General IconGeneral
Number of Functions8
TypeElectric
Energy Efficiency ClassA
Voltage220-240 V
Installation TypeBuilt-in
ColorStainless Steel
Dimensions (H x W x D)595 x 595 x 575 mm
Weight35 kg
Capacity71 liters
Power3200 W
Frequency50 Hz

Related product manuals