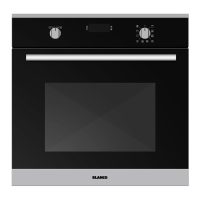
This document provides instructions for the use and care of the BLANCO BOSE 164 Fan Forced Built-in Oven.
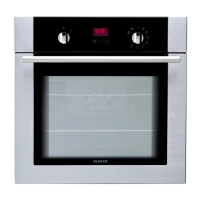
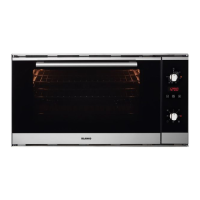
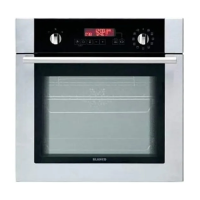
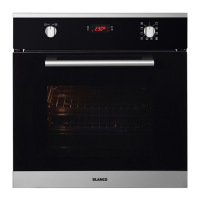
Function Description
The BLANCO BOSE 164 is a multifunction fan-forced built-in oven designed for various cooking types, depending on the food's nature, firmness, and volume. All cooking must be done with the oven door closed, and the oven light remains on during all cooking functions. The oven features an electronic programmer for setting the time of day, cooking duration, end of cooking time, and a minute minder.
The oven offers several cooking functions, selectable via the function control knob:
- Oven Light: Turns on whenever the oven is in use.
- Conventional Cooking: Utilizes both top and bottom heating elements, suitable for recipes requiring extra base browning (e.g., pizzas, quiches, flans) or top browning (e.g., gratins, lasagnes, hotpots). Pre-heating is necessary for this function. The base drip tray should be removed.
- Fan Assist Cooking: Top and bottom elements heat the oven cavity, and a fan circulates hot air. Ideal for baking cakes, biscuits, or bread. The base drip tray should be removed.
- Bottom Element: Enables finishing dishes by heating from the bottom only. The base drip tray should be removed.
- Economy Grill: Uses the inner grill for small quantities, helping to save energy. Grilling must be done with the oven door closed and the grill pan handle removed.
- Dual Grill: Activates the full grill element, recommended for larger quantities. Grilling must be done with the oven door closed and the grill pan handle removed.
- Fan Grill: Provides a spit roast effect for joints, eliminating the need to turn food during cooking, though large items may require turning halfway. The grill element and oven fan operate alternately, circulating hot air. This function minimizes cooking smells and allows grilling with the oven door closed.
- Fan Forced Cooking: This system uses a circular element and fan behind the oven's back wall, allowing roasting or baking on any shelf with minimal flavor transference.
- Pizza/Bake Cooking: The bottom element provides direct heat to the base of pizzas, quiches, or pies, while the fan circulates air to cook toppings or fillings.
- Defrosting: The oven fan operates without heat, circulating room temperature air to accelerate defrosting. This function is suitable for delicate foods like cream-filled gateaux, iced cakes, pastries, bread, and other yeast products.
The electronic programmer allows for automated cooking:
- Cooking Duration: Automatically switches off the oven after a programmed cooking time.
- End of Cooking Time: Automatically switches off the oven at a programmed end time.
- Combined Cooking Duration and End of Cooking Time: Allows setting the oven to switch on and off automatically at a later time.
- Minute Minder: An alarm sounds at the end of a timed period, but the oven remains on if in use.
A cooling fan is integrated to cool the oven walls and components, switching on automatically after a few minutes of cooking and remaining on after the oven is switched off until it has cooled.
Important Technical Specifications
Model Number: BOSE 164
Oven Ratings (230-240V):
- Top heating element: 835 W
- Bottom heating element: 1,045 W
- Traditional system (top+bottom elements): 1,880 W
- Convection system: 2,090 W
- Convection fan: 30 W
- Grill element: 1,830 W
- Double grill element: 2,660 W
- Pizza/Bake cooking: 3,130 W
- Oven lamp: 15 W
- Cooling fan: 30 W
- Total rating: 3.2 kW
Recess Dimensions:
- Height: 580 mm
- Width: 560-570 mm
- Depth: 550 mm
Internal Oven Dimensions:
- Height: 32 cm
- Width: 42 cm
- Depth: 39 cm
- Oven Capacity: 1.9 cu.ft (53 litres)
Electrical Connection:
- Designed for 230-240 V (50 Hz) electricity supply.
- Terminal block marked L (Live), N (Neutral), and Earth.
- Cable types: H07RN-F, H05 RN-F, H05 RR-F, H05 VV-F, H05 V2V2-F T90, H05 BB-F.
- Minimum cable cross-section: 1.5 mm².
- Requires a two-pole switch with a minimum rating of 13 A and a minimum contact distance of 3 mm for direct connection to the mains supply. The yellow/green earth cable must not be broken.
- The appliance must be earthed.
Safety Features:
- Safety Thermostat: Protects the oven if the main oven thermostat fails and the temperature becomes too high.
- Grill Element Control: The grill element is controlled by a thermostat to prevent overheating, cycling on and off during cooking.
- Anti-Tip Shelves: The oven is supplied with three anti-tip shelves, which must be positioned correctly to prevent tipping.
Usage Features
Installation:
- The oven is heavy and requires care when moving.
- All packaging must be removed before use.
- Installation and electrical work must be done by qualified installers according to current standards.
- The oven will only work if the time of day has been set.
- Before first use, switch the oven control to fan forced and the thermostat to MAX, then run empty for 30 minutes to burn off protective materials and remove unpleasant smells.
Cooking Guidelines:
- Thermostat Control Knob: Selects cooking temperature from 50°C up to approximately 250°C (MAX setting). The temperature light indicates when the oven is preheated and maintains temperature.
- Oven Door: Keep the oven door closed as much as possible during cooking to avoid heat loss and excessive electricity consumption. Always grill with the oven door closed.
- Shelf Positions: Middle shelf position is generally best for heat distribution in conventional cooking. Lower shelves increase base browning, higher shelves increase top browning. In fan ovens, runner positions are not critical, but shelves should be evenly spread.
- Baking Trays and Dishes: Material and finish affect base browning. Enamelware, dark, heavy, or non-stick utensils increase base browning, while glassware, shiny aluminum, or polished steel trays reflect heat.
- Preheating: Generally not necessary for fan ovens, but may be beneficial for recipes requiring higher temperatures (e.g., bread, pastries, soufflés).
- Temperatures: Fan oven cooking typically requires lower temperatures (20-25°C less) than conventional cooking.
- Multiple Dishes: Fan ovens allow cooking multiple batches of the same food simultaneously. When cooking different sizes or types of food, they may not be ready at the same time.
- Grilling: Place food on the grid in the grill pan to allow air circulation. Adjust grid and grill pan runner position based on food thickness. Preheat the grill for a few minutes before use. Turn food over as required.
- Defrosting: Place frozen food in a single layer and turn it over halfway through the process. Do not leave defrosted food at room temperature; cook or refrigerate immediately.
Safety During Operation:
- Do not use the oven if it is in contact with water or with wet hands.
- Do not place pans, dripping pans, biscuit pans, or aluminum foil directly on the oven bottom.
- Take care when heating fats and oils as they can ignite.
- Do not place plastic or any material that may melt in or on the oven.
- Always use oven gloves when removing food.
- Support the grill pan when removing it.
- Stand back when opening the oven door to allow steam/heat to release.
- Do not allow the drop-down oven door to fall open; support it with the handle.
- Do not place sealed cans or aerosols inside the oven.
- Do not hang towels or clothes from the oven or its handle.
Maintenance Features
Cleaning the Oven:
- General: Ensure all control knobs are in the OFF position when not in use. Allow the oven to cool down before cleaning or maintenance.
- Oven Cavity: Best cleaned while still warm. Wipe with a soft cloth soaked in warm soapy water after each use. For thorough cleaning, use a proprietary oven cleaner, but avoid abrasive scourers, steel wool, or caustic-based cleaners.
- Glass Door: Clean with a soft cloth soaked in warm soapy water. Do not use abrasive scourers or steel wool.
- Shelves and Shelf Supports: Soak chrome parts in warm detergent water. Remove stubborn marks with a wetted, soap-impregnated pad. Rinse well and dry with a soft cloth. Do not use abrasive scourers or steel wool.
- Grease Filter: Install the special stainless steel grease filter when roasting meat to protect the fan from fat splashes. Remove and clean thoroughly with warm soapy water after roasting. It is dishwasher safe. Do not install during baking.
- Hinged Grill: This model has a hinged grill element for easy cleaning of the oven roof. Ensure the oven is cool and isolated from electricity supply before cleaning. Undo screws, gently pull the grill downward, clean the roof, then push the grill back into place and firmly screw the holding nuts.
- Oven Door Seal: Periodically check for damage. If damaged, do not use the oven until repaired. Use only original spares. Do not use abrasive objects or substances when cleaning.
Care of Catalytic Liners:
- Catalytic liners destroy food and fat splashes when the oven temperature is around 220°C. Run the oven for approximately half an hour to aid this process.
- Manual cleaning of catalytic liners is not recommended, as it can cause damage. Avoid soap-impregnated steel wool pads, aerosol cleaners, and other abrasives.
- Slight discoloration or polishing of the catalytic surface may occur over time but does not affect its properties.
- To reduce soilage, cook at recommended temperatures, use minimal oil/fat, and cover joints during cooking. Use the roasting tin with a trivet to contain fat.
Replacing Appliance Components:
- Always disconnect the appliance from the electricity supply before any maintenance work or replacing the oven light.
- Oven Light: Push in and turn the glass lid anticlockwise. Remove the faulty bulb and replace with a heat-resistant 15W, 240V, 50Hz, 300°C, E14 bulb. These are available from your local Service Centre.
- Removing Oven Shelf Supports: Unscrew the ring nuts, slide out the supports from their retaining pins. This allows access to clean the back panel.
Troubleshooting (Something Not Working):
- Power Cuts: Reset the programmer clock after power is resumed.
- Oven Not Turning On (Manual Cooking): Check if the programmer is set to automatic. If not, check the appliance connection, supply switch, fuse in the socket (replace if needed), and fuse in the fuse box. If issues persist, contact Service Agents.