Using the Headset Clip Mount with Adhesive
1. Before removing the protective strip from the double-sided adhesive, find the best location to
place the Headset Clip Mount.
2. Clean the part of the helmet that the Headset Clip Mount with Adhesive will be attached to.
Remove any dirt or grease. Do not use cleaners that may damage the helmet or that will leave an
oily residue. Make sure the surface is dry before continuing.
3. Check again the positioning of the clip. Once it is
mounted it will not be possible to move without
making the adhesive unusable. So please take care
when choosing its position.
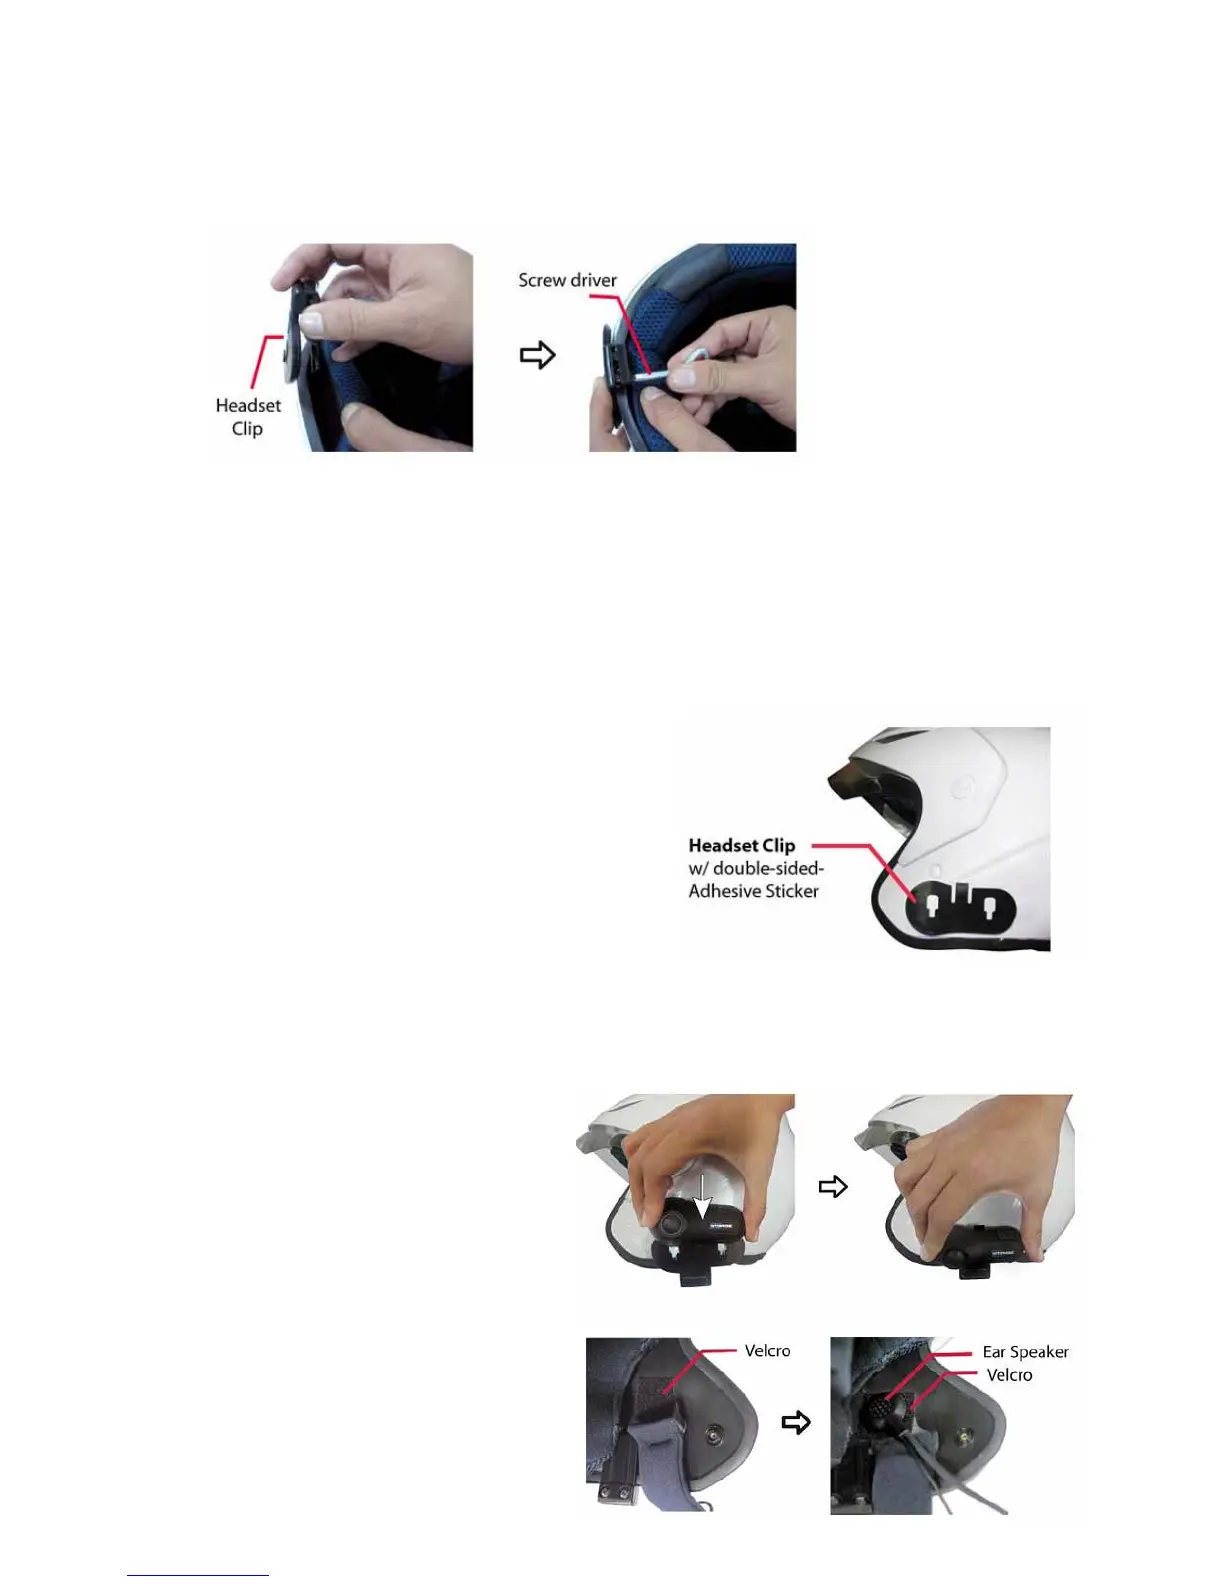
4. Note that the small section of the two holes/slots
in the Clip must be faced towards the bottom of the
helmet. As shown in the picture to the right.
5. Remove the protective strip from the double-sided
adhesive and carefully attach the Clip to the outside
shell of the helmet.
Mounting the Headset
1. Take your headset and slide it down
into the slots in the Headset Clip Mount.
Make sure that it’s perfectly fitted and
locked into place by trying to extract it,
pulling upwards.
2. Now you need to attach the speaker
and microphone arm to the inside of the
helmet. Take the Velcro pad which the
speaker will attach to, and test for the
best position to fix it. The Velcro Pad
should be fixed at the height of your ear
in the helmets ear pocket. You will