18
19
GB IE
FR
PL
IMPORTANT - RETAIN THIS INFORMATION FOR FUTURE REFERENCE: READ CAREFULLY
IMPORTANT - À CONSERVER POUR CONSULTATION ULTÉRIEURE : À LIRE SOIGNEUSEMENT
RUS
ES
TR
ВАЖНО - СОХРАНИТЕ ДЛЯ ПОСЛЕДУЮЩЕГО ИСПОЛЬЗОВАНИЯ: ПРОЧТИТЕ ВНИМАТЕЛЬНО
IMPORTANTE - GUARDE ESTA INORMACIÓN PARA FUTURAS CONSULTAS: LEA ATENTAMENTE
ÖNEMLİ – BU BİLGİLERİ DAHA SONRA KULLANMAK ÜZERE SAKLAYIN: DİKKATLE OKUYUN
15
17
16
GB IE
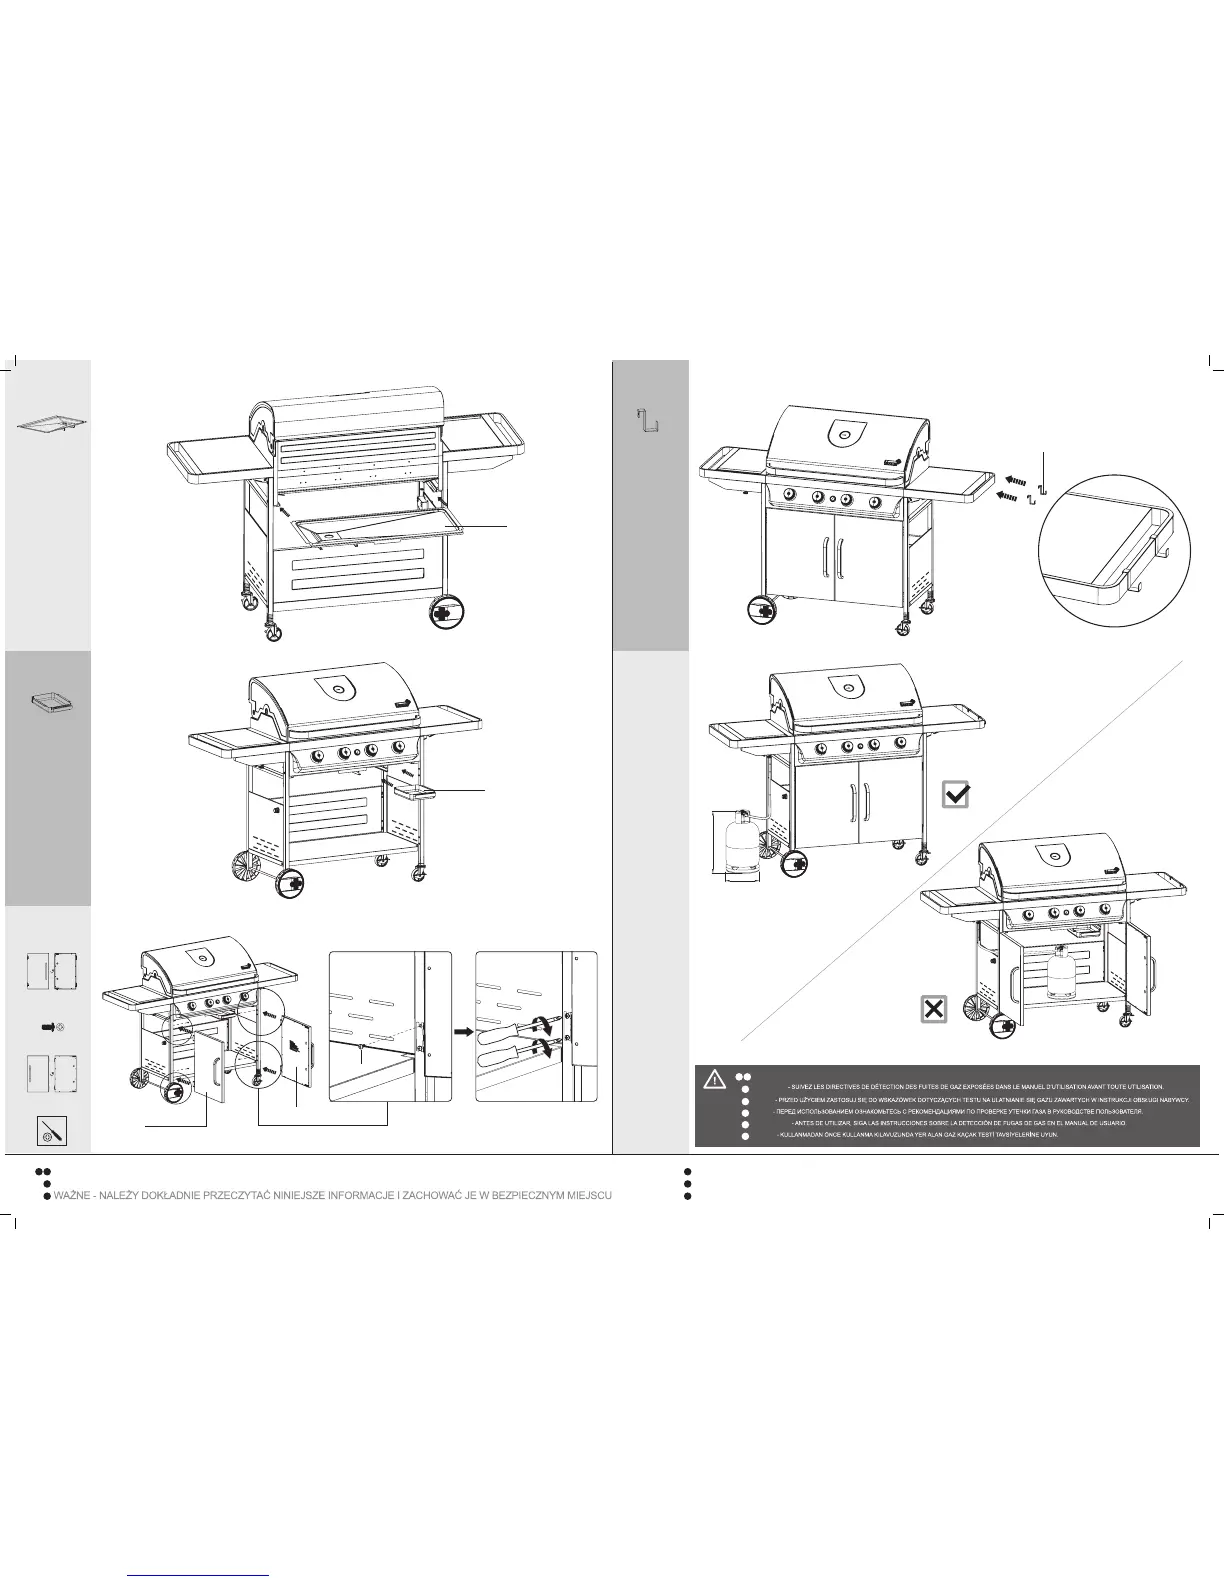
IMPORTANT - FOLLOW GAS LEAK TEST ADVICE IN OWNER’S MANUAL BEFORE USE. ENSURE ALL CONNECTIONS ARE TIGHT AND SECURE.
FR
IMPORTANT
PL
WAŻNE
RU
Важно
ES
IMPORTANTE
TR
ÖNEMLİ
KHK-IMP PID 63932 C6
[18]
[19]
[20]
[40]
M
M1 M2
[36]
[32]
≤ 615 mm
≤ 310mm
[36] x 4
[20] x 1
[40] x 1
[18] x 1
[19] x 1
[32] x 2
Lighting the appliance
1. If the appliance has a lid/hood, open it.
2. Ensure all knobs are in the off position.
Open the gas control valve on the gas bottle or regulator.
3. Push and turn the control knob to the high position.
Press the ignition button rapidly several times until the burner is lit.
4. If burner fails to ignite, turn control knob to the off position and
turn gas off at the bottle or regulator. Wait five minutes, then repeat
the above steps.
5. If the appliance still fails to light, please refer to the manual ignition instructions
.
6. After successful lighting, light each burner as desired.
G56201-BBQ-Blooma-IM-A2-06.indd 7 11/5/13 10:39 AM