Mounting
RC66 | 08-2021
12
Blum-Novotest GmbH
4. Mounting
4.1 Selecting the installation position
The installation position has no effect on other machines – see 3.5 Area of work.
The measuring device is reached – see 3.5 Area of work.
The receiver is optimally protected against coolant and flying chips.
Test the desired installation position before installation.
Use the drilling template included.
4.2 Mounting variants
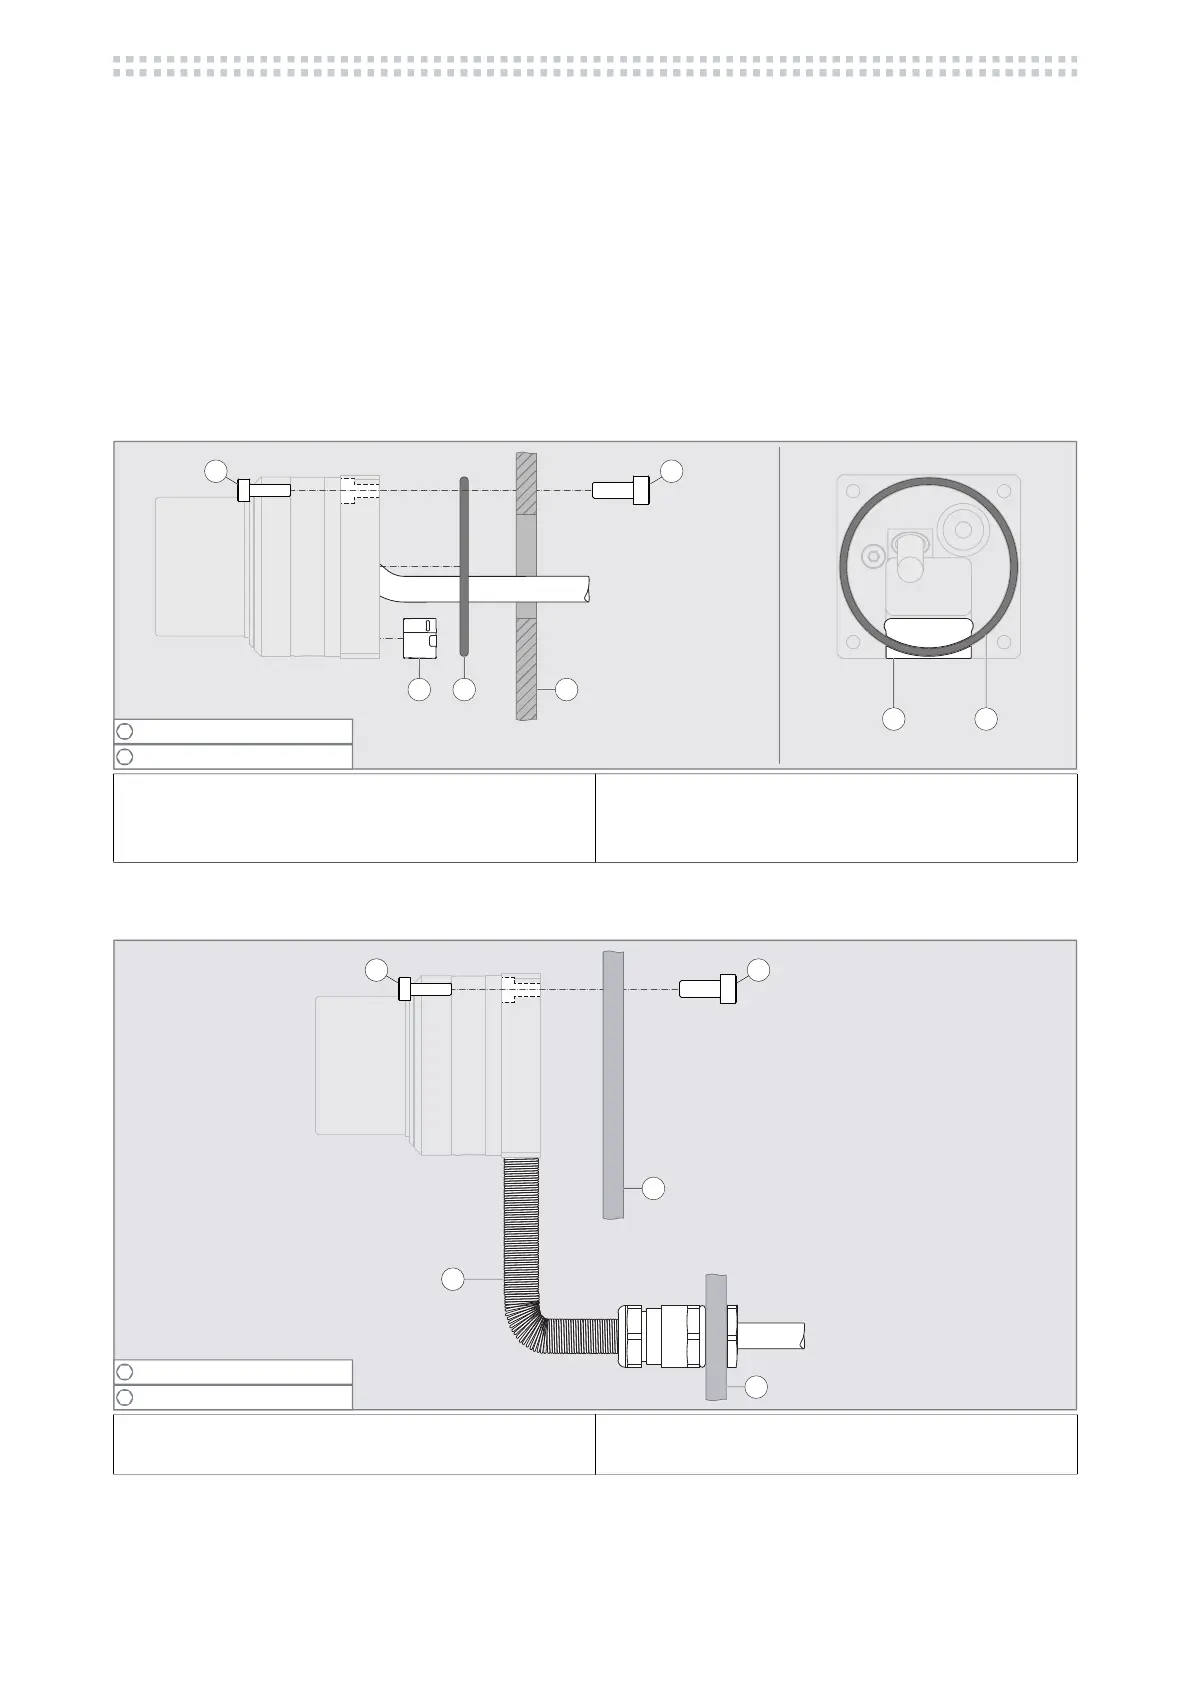
4.2.1 Horizontally facing cable
Fig. 4-1 RC66 – Installation with horizontally facing cable.
4.2.2 Cable (outgoing) downward
Fig. 4-2 RC66 – Installation with cable facing downward.
1 2 3
1 2
4
5
2,5 mm (M3) – 1,3 N·m max.
3 mm (M4) – 3,0 N·m max.
(1) Seal insert
(2) O-ring 40× 2(NBR 70)
(3) Machine wall
(4) 4× holding screws M3×10 (ISO 4762)
(5) 4× holding screws M4×10 (ISO 4762)
1 2
4
3
4
2,5
mm (M3) – 1,3
N·m max.
3
mm (M4) – 3,0
N·m max.
(1) 4× holding screws M3×10 (ISO 4762)
(2) 4× holding screws M4×10 (ISO 4762)
(3) BLUM Heavy Duty Kit – see 6. Order numbers
(4) Machine wall
 Loading...