5
5. Using the BLOKS. remote 14d
5.1 Switching on and o, screen explanaon
Turning the system on:
The system as a whole consists of the remote and the pedelec. To turn on the system, press either the “Power” buon on the BLOKS.
remote 14d or the buon on the baery (varies depending on the model). The display screen will turn on aer a few seconds.
The next picture [Fig. 8, page 6] shows all segments of the display at once. While riding, the display will not actually show all segments at
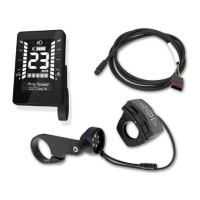
the same me – it will look more like the screen above [Fig. 7]. In the example above, you are riding with the third support level at a speed
of 27 km/h. The baery is not enrely full, but well charged, and you have covered a distance of 65.3 kilometers on this trip.
Turning the system o:
To turn o the system, press either the “Power” buon on the BLOKS. remote or the buon on the pedelec’s baery (varies depending on
the model). The display and your pedelec will be turned o.
Automac switch-o:
If your pedelec is not used for several minutes, the system will be switched o automacally. Pressing the “Power” buon again switches
the system on again.
4. Overview of rocker switch and buons
The enre display of the BLOKS. remote 14d forms a rocker switch. The display can be
pressed at the top for the "+" funcon and at the boom for the "-" funcon. In addion,
there are three buons for "Power", "Light" and "Set" [Fig. 7]. The rocker switch and the
buons have the following funcons:
"Power" = Switches display / pedelec* on or o
"+" = Motor support is increased one level
"+" press and hold = Walk assist is turned on
"-" = Motor support is decreased one level
"-" long press = Trip is reset to 0
"Light" = Switches lighng on or o
"Set" = Changes the selecon in the display
"Set" long press = Changes units between metric and imperial
*depends on pedelec model, see chapter 5.1 below
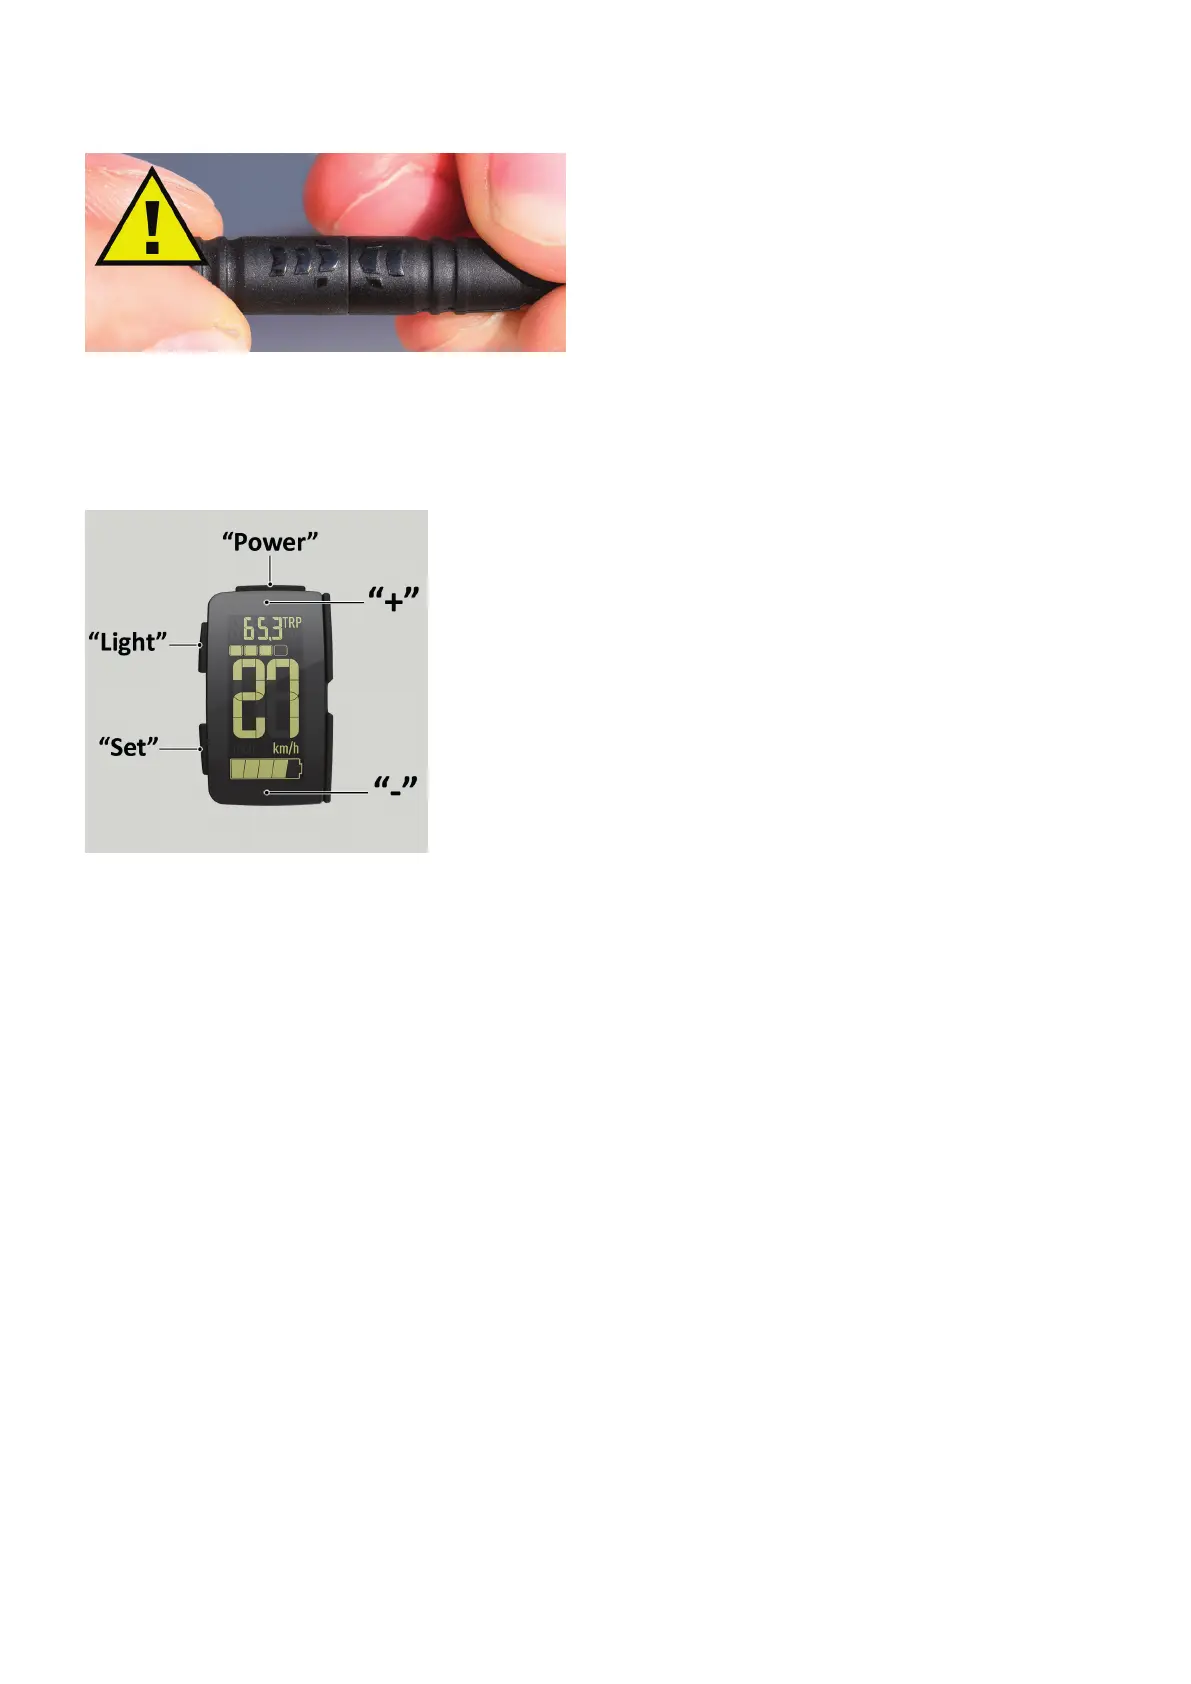
Cauon: Carefully press the two ends of the plug together [Fig. 6]. If
the two ends are not correctly aligned, the plug could be damaged.
When disconnecng or connecng the plug, make sure only to hold
the ends of the plug, not the cable itself. When connecng the plug,
do not bend the cable to avoid kinking and damaging it.
[Fig. 6] Carefully press plug together
[Fig. 7] Rocker switch and buons


 To Next Page