12
ProductAssembly STEP
1
2
3
4
5
6
7
8
9
1
0
1
1
1
2
1
3
1
4
1
5
1
6
1
7
1
8
1
9
2
0
2
1
2
2
2
3
2
4
2
5
2
6
2
7
2
8
2
9
3
0
3
1
3
2
1
2
3
4
5
6
7
8
9
1
0
1
1
1
2
1
3
1
4
1
5
1
6
1
7
1
8
1
9
2
0
2
1
2
2
2
3
2
4
2
5
2
6
2
7
2
8
2
9
3
0
3
1
3
2
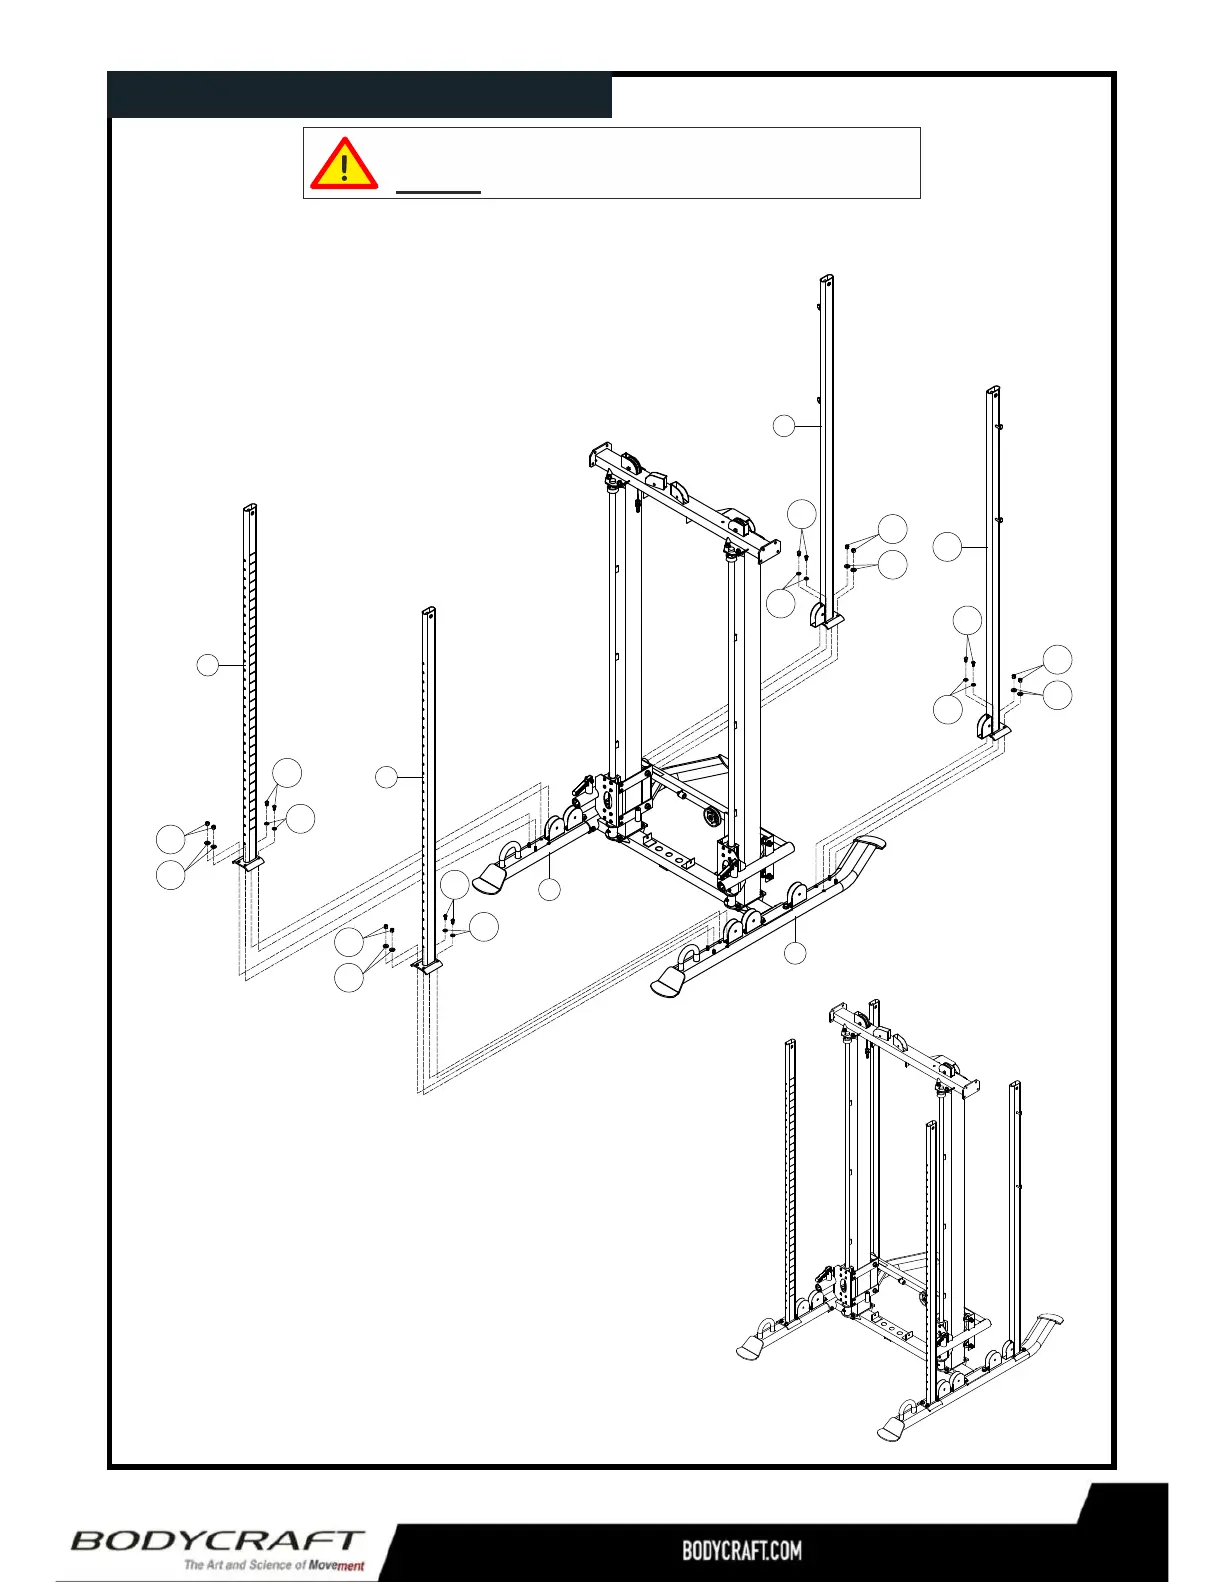
1.LooselyattachFrontRightFrontLeftUpright
Frames(7R8L)totheRightLeftBaseLegs
(2R3L)usingfour3/8”Washers(118),four
3/8”NylonNuts(131),four5/16”X5/8”Screws
(145)andfour5/16”SpringWashers(146).
2.LooselyattachRearRightLeftRearUpright
Frame(9R10L)totheRightLeft
ConnectorFrame(2R3L)usingfour3/8”
Washers(118),four3/8”NylonNuts(131),
four5/16”X5/8”InnerHexScrews(145)and
four5/16”SpringWashers(146).
7R
2R
3L
8L
131
9R
10L
118
131
145
145
118
131
118
131
145
118
146
146
145
146
146
Toeasetheassemblyprocess,
donottightenboltsuntiltoldtodoso.
6
 Loading...