13
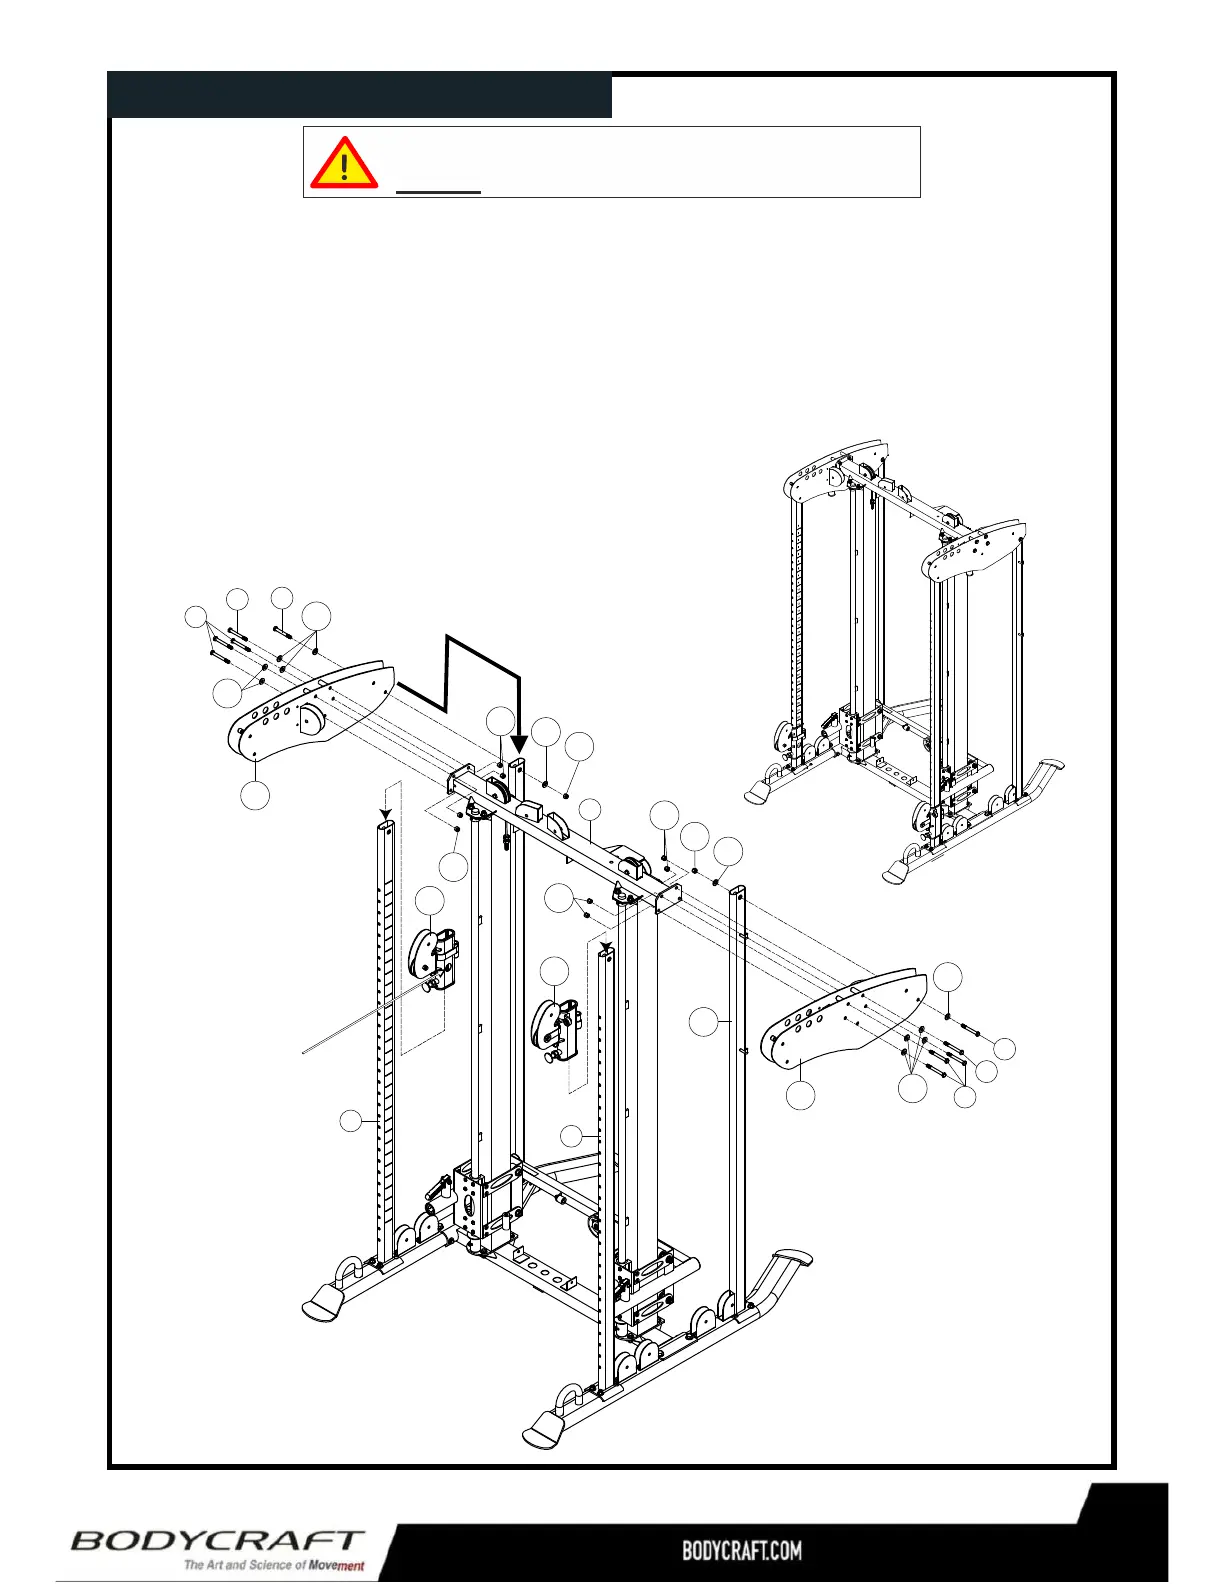
ProductAssembly STEP
1.SlidetheRightLeftPulleyHeightAdjusters(19R20L)withthenumbergauge
openingfacinginward,ontotheRightLeftCableAdjustingUprightFrame(7R
8L)asshownbypullingthepop-pin.
2.LooselyattachtheRightLeftTopPanels(22R23L)totheTopFrame(13)by
firstloweringthemontothefrontandrearuprightsthensecureusingeight3/8”X
3-1/8”HexBolts(94),eight3/8”Washers(118)andeight3/8”NylonNuts(131).
3.NowlooselysecurebackportionoftheRightLeftTop
Panels(22R23L)totheRightLeftRearUprightFrame
(9R10L)usingtwo3/8”X3”HexBolts(95),four3/8”
Washers(118)andtwo3/8”NylonNuts(131)asshown.
Number
Gauge
Opening
Toeasetheassemblyprocess,
donottightenboltsuntiltoldtodoso.
7
1
2
3
4
5
6
7
8
9
1
0
1
1
1
2
1
3
1
4
1
5
1
6
1
7
1
8
1
9
2
0
2
1
2
2
2
3
2
4
2
5
2
6
2
7
2
8
2
9
3
0
3
1
3
2
95
13
7R
8L
94
94
94
95
94
118
118
22R
19R
20L
10L
23L
131
131
131
131
118
118
118
131
118
130
 Loading...