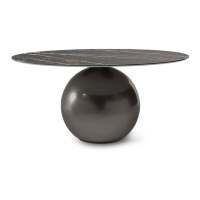
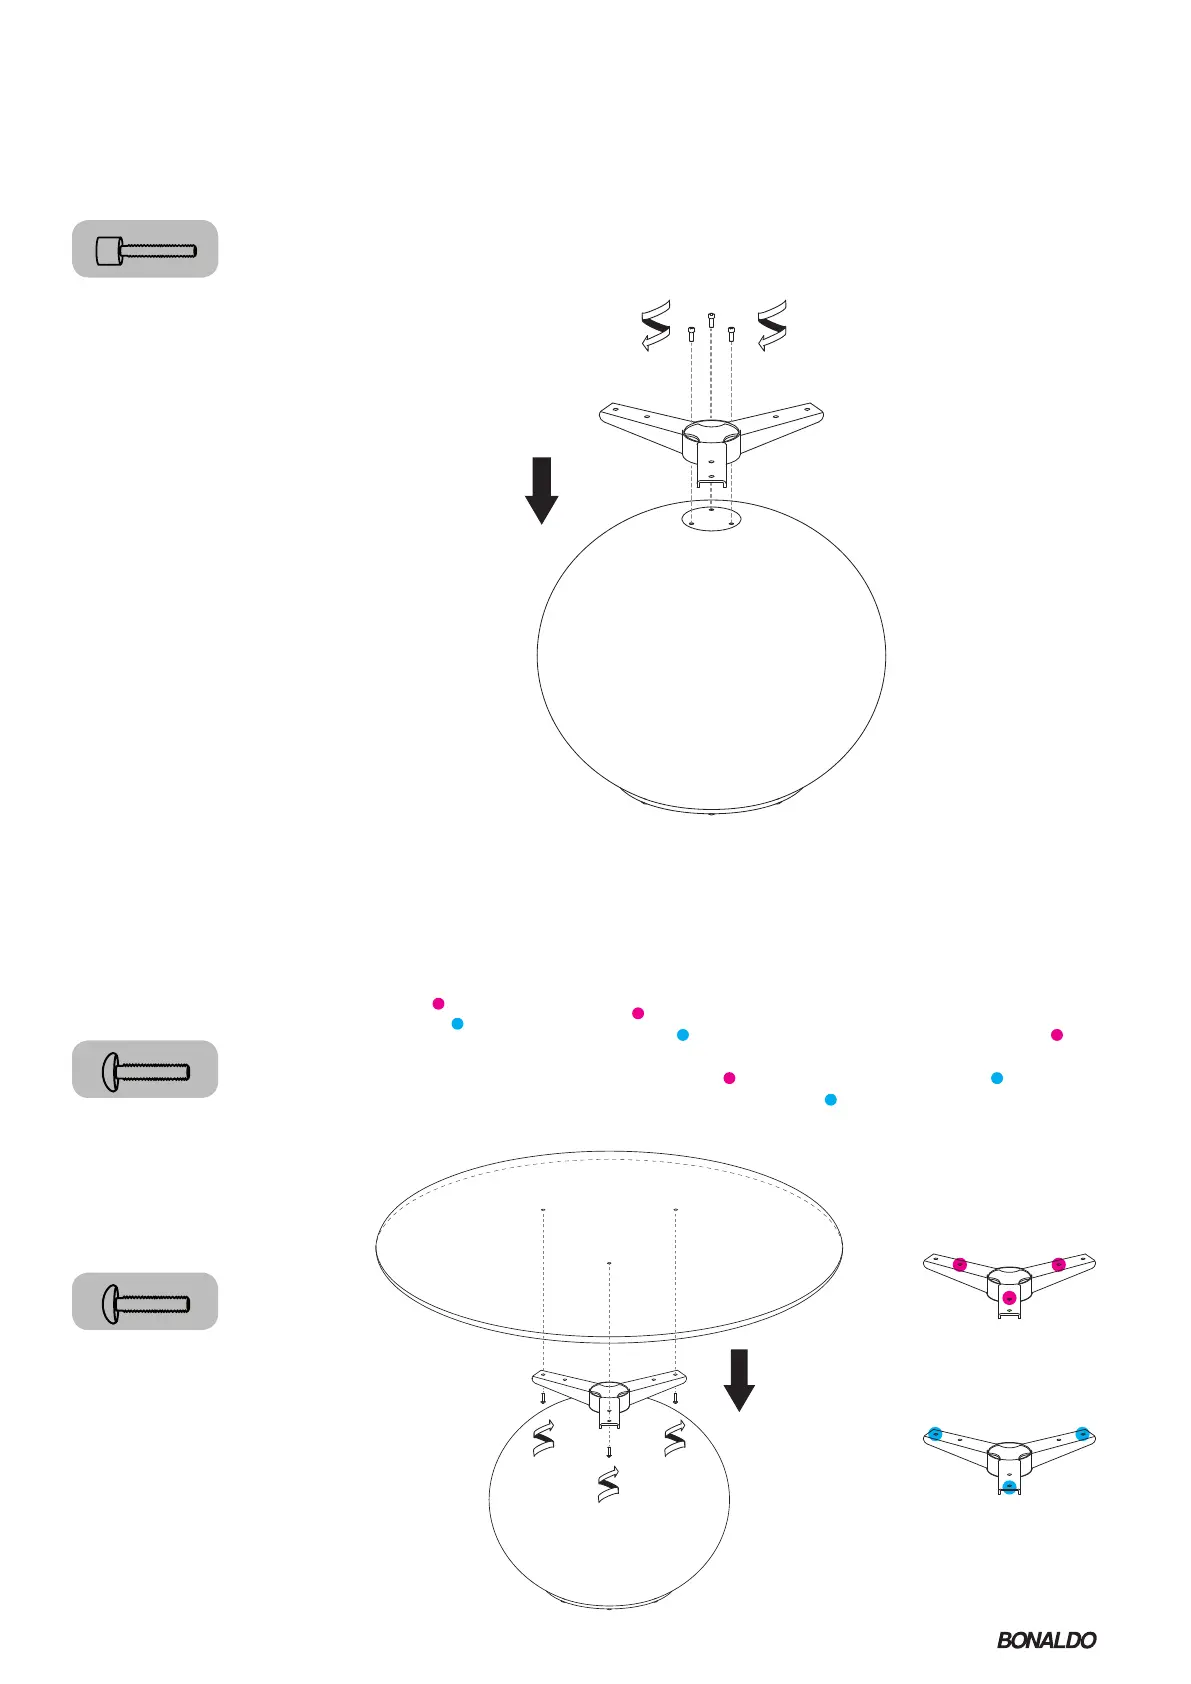
Estrarre il piano
dall’imballo.
Posizionare il piano
sopra il telaio e ssarlo
con le viti in dotazione,
come mostrato in
gura.
Utilizzare i fori
per il
piano Ø140, i fori
per
il piano Ø160 e Ø180.
Estrarre il telaio
dall’imballo e
posizionarlo sopra
la sfera. Fissare gli
elementi con le tre viti
B in dotazione, come
mostrato in gura.
Nehmen Sie den Deckel
aus der Verpackung.
Positionieren Sie
das Kochfeld über
dem Rahmen und
befestigen Sie es mit den
mitgelieferten Schrauben,
wie in der Abbildung
gezeigt.
Verwenden Sie die Löcher
für das Kochfeld Ø140
und die Löcher
für das
Kochfeld Ø160 und Ø180.
Nehmen Sie den
Rahmen aus der
Verpackung und
legen Sie ihn über die
Kugel. Befestigen Sie
die Elemente mit den
drei mitgelieferten
Schrauben B, wie in der
Abbildung gezeigt.
Retirez le haut
de l’emballage.
Positionnez la table
de cuisson au-dessus
du cadre et xez-la
avec les vis fournies,
comme indiqué sur la
gure.
Utilisez les trous
pour la plaque Ø140,
les trous
pour la
plaque Ø160 et Ø180.
Retirez le cadre de
l’emballage et placez-
le sur la balle. Fixez les
éléments avec les trois
vis B fournies, comme
indiqué sur la gure.
Remove the top
from the packaging.
Position the hob above
the frame and secure
it with the screws
provided, as shown in
the gure.
Use the holes for the
Ø140 top, the holes
for the Ø160 and Ø180
tops.
Remove the frame
from the packaging
and place it over
the ball. Fasten
the elements with
the three screws B
provided, as shown in
the gure.
4
5
C
D
B
x 3
x 3
x 3
M8 x 16
M8 x 12
M8 x 35
Piano Legno/ Wood Top
Holz Platte/ Bois Plateau
Piano Legno/ Ceramica
Ceramic/ Marble Top
Keramik/ Marmor Platte
Céramique/ Marbre Plateau
Ø140
Ø160
Ø180
6/8
 Loading...