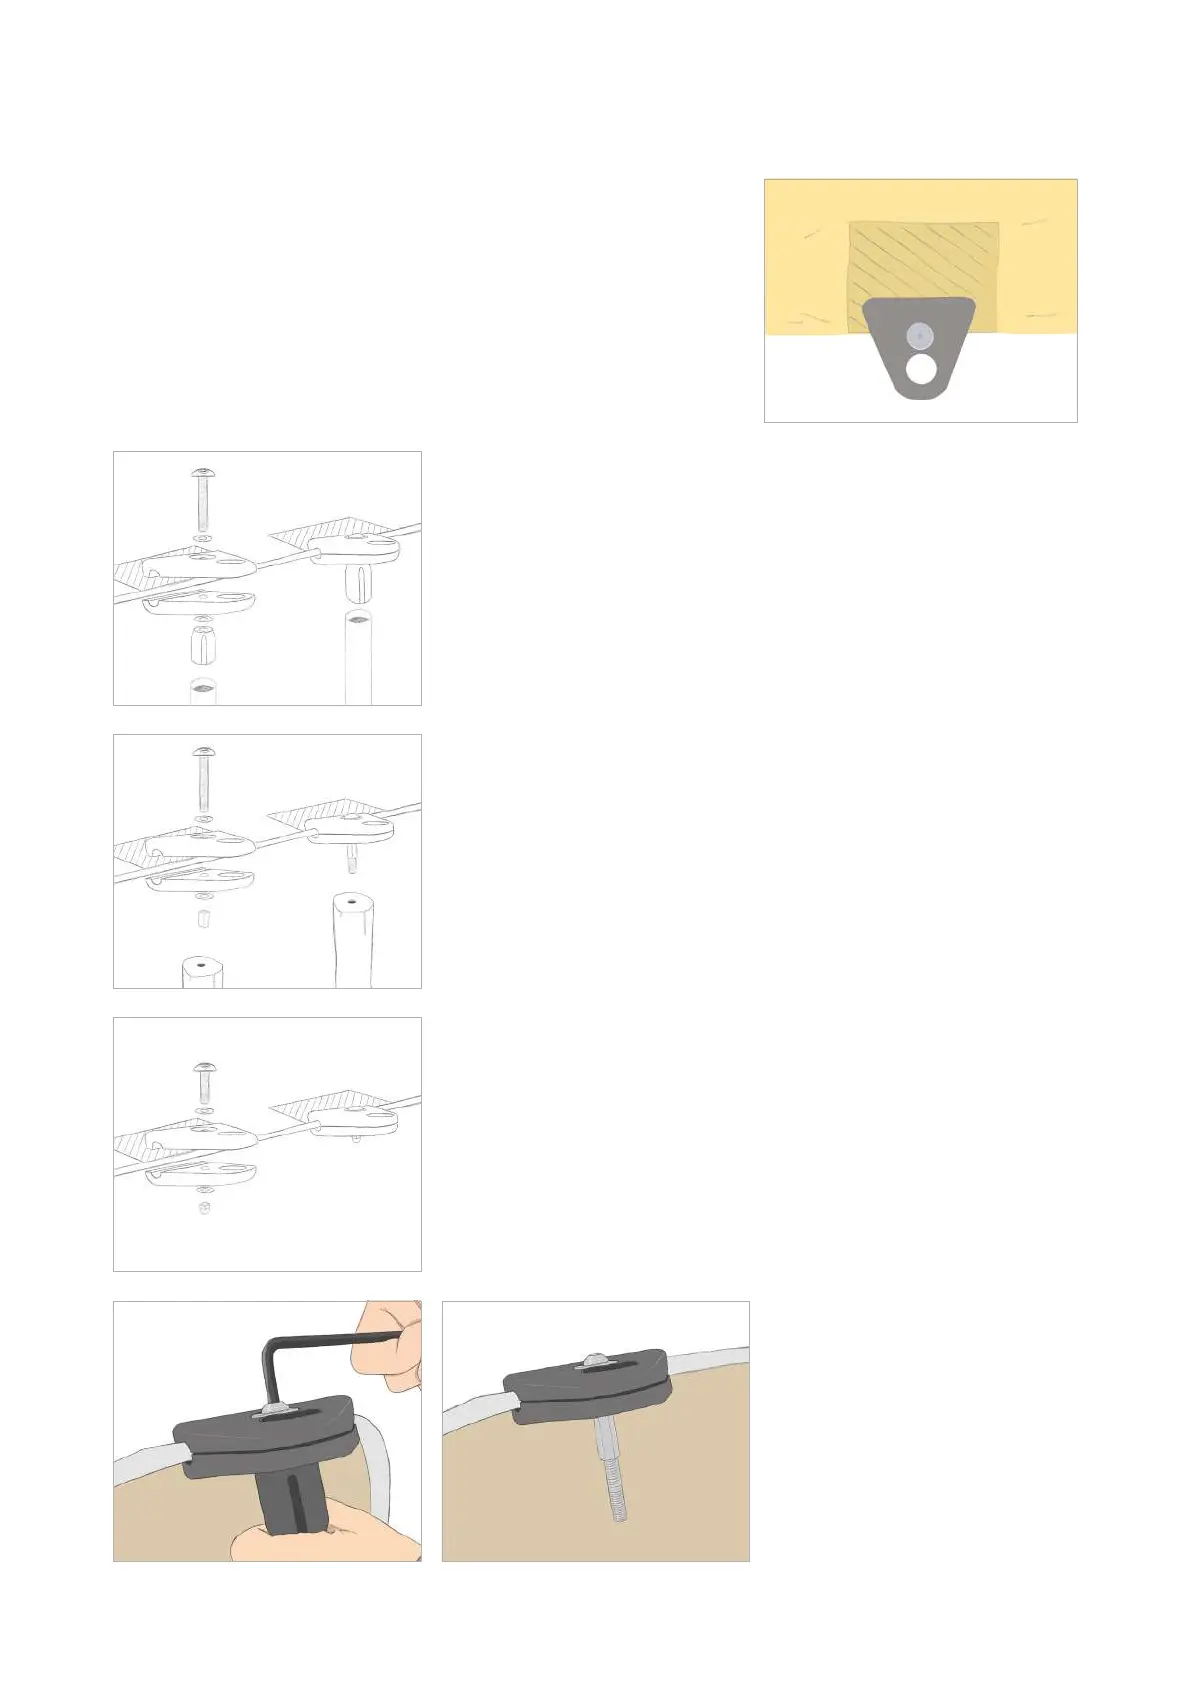
STEP 2: ASSEMBLING AND ATTACHING SIDE CLAMPS
The edge of the Bonga stretch tent has reinforced zones every
metre. Only place the side clamps on these reinforced zones!
You can see and feel the reinforced zones when you look at
the tent canvas closely. This is very important to prevent
damage to the canvas edge.
The side clamps under which no pole will be installed or
side clamps in combination with carabiners, can be
fitted with a hexagon socket bucket head screw (35 mm)
with cap nut which is supplied in the zip bag. This ensures a
neater appearance without hand clamps (see step 1.1.1 for
aluminium poles and step 1.2.2 for wooden poles).
For side clamps under which a wooden pole is standing,
remove the hand clamp and slide the screw into the pre-
drilled holes. The instructions on how to do this can be found
in step 6.
For tents of + 10 m we strongly recommend to use carabiners
with the wooden poles (see step 1.2.2).
Only for - 10 m: Side clamps under which an
aluminium pole is standing slide easlily into the pole
and are fixed in place using the hand clamp (see
step 1.1).
Now go to where the
reinforced zones are
attached on the assembly
plan and fix the side clamps
in the locations indicated.
Always tighten the side
clamps firmly. To do this
you can use the hexagonal
wrench supplied in the zip
bag.
11