18 19
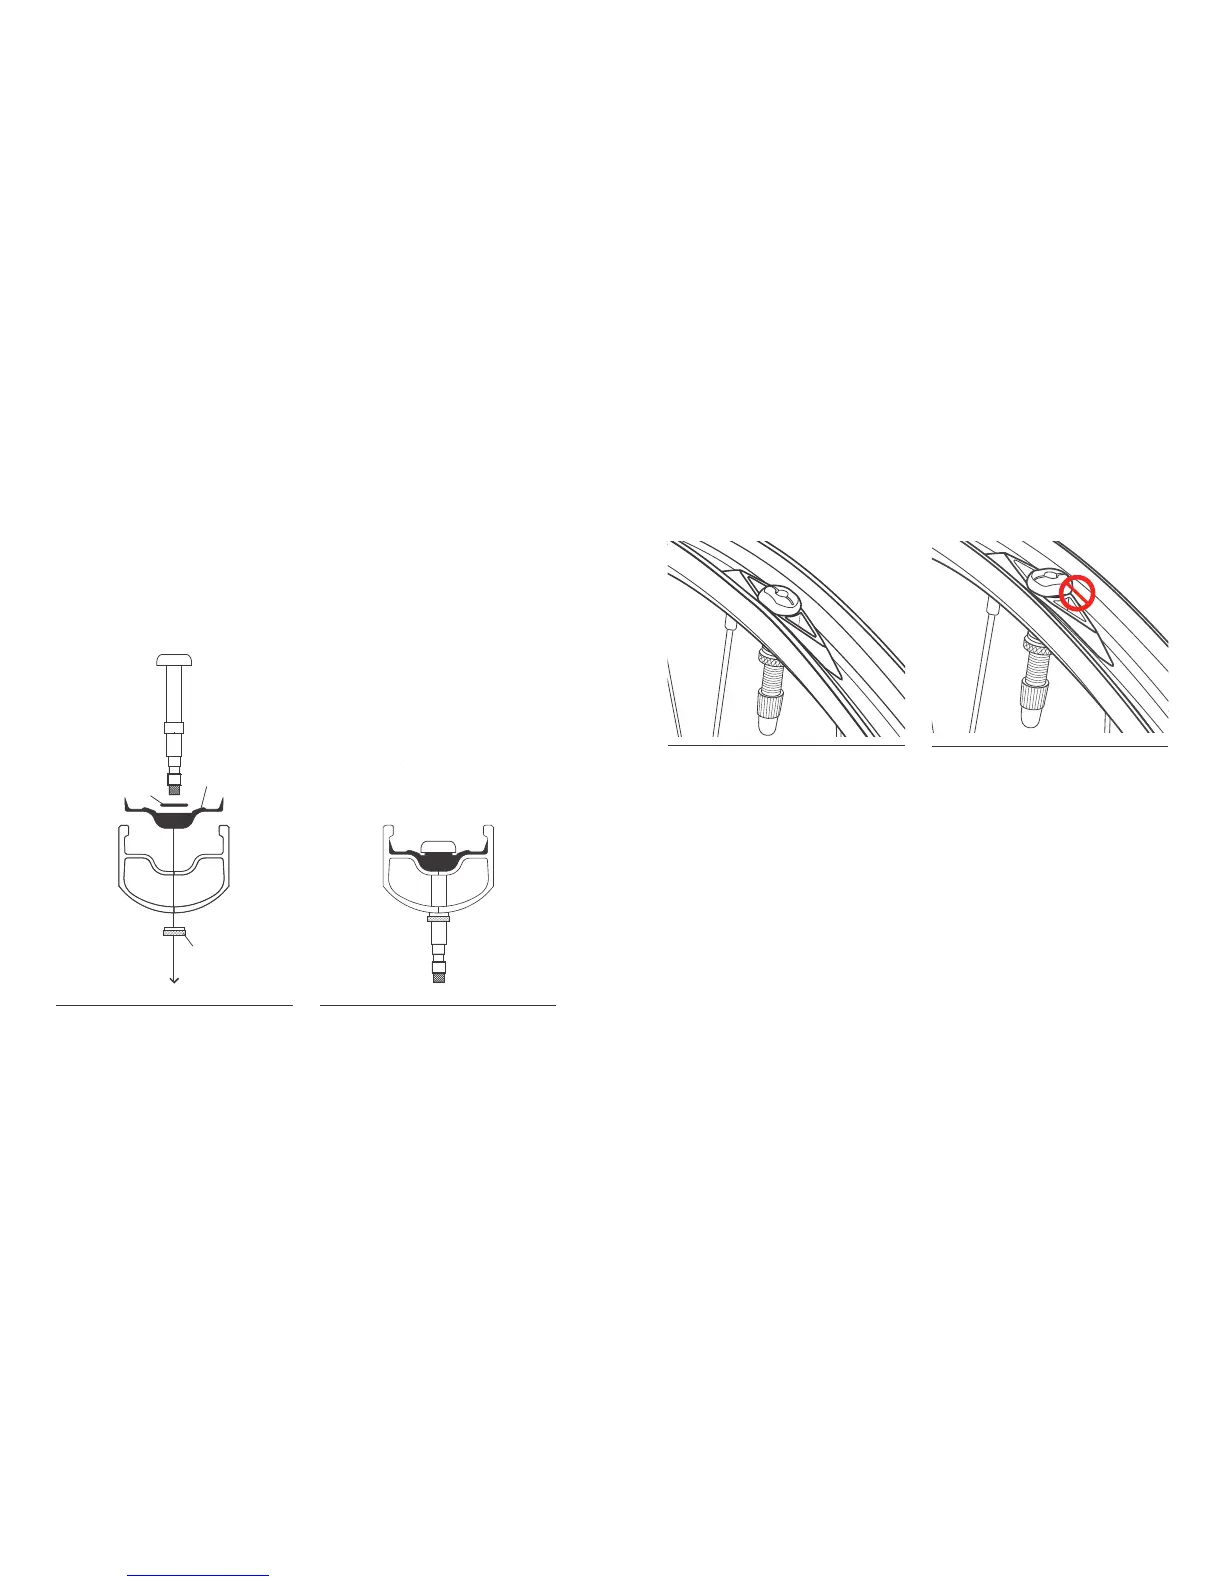
Figure 13. Incorrect alignment. Flat sides of
valve not aligned with rim.
Figure 12. Correct alignment. Flat sides of
valve are aligned with rim wall.
4. Align the flat sides of the valve base with the walls of the rim (Figure 12 & 13).
5. Tighten the valve nut over the threads of the valve until finger tight. Do not tighten with a tool.
6. Work the rim strip into the rim, moving away from the valve stem in both directions using
only your thumbs. Do not use tools because they can damage the rim strip.
Installing TubeLess Ready Rims Strip and Valve
The following steps will prepare a Bontrager rim for the installation of a TubeLess Ready or
Tubeless tire.
1. Check the TubeLess Ready rim strip for tears, holes or deformed areas near the valve hole or
along its edges. Only use a Bontrager TubeLess Ready rim strip that have not been damaged.
2. Align the rim valve hole and the valve hole of the rim strip. The U shape of the rim strip
should face toward the center of the rim and offset rim strips should match the offset in the
rim Figure 10.
3. Place the Tubeless Ready valve through the rim strip’s valve hole and then through the rim.
Make sure that the rubber o-ring is on the valve before dropping it into rim (Figure 11).
Figure 10. The U shape of the rim strip should
face towards the center of the rim.
Figure 11. Place the Tubeless Ready valve
through the rim strip and the rim.
Rim Strip
O-Ring
Valve Nut