6
Extension Cords
• Replace damaged cords immediately. Use of
damaged cords can shock, burn or electrocute.
• If an extension cord is necessary, a cord with
adequate size conductors should be used to
prevent excessive voltage drop, loss of power
or overheating. The table below shows the
correct size to use, depending on cord length
and amperage rating on the tool’s nameplate. If
in doubt, use the next heavier gauge. Always
use U.L. and CSA listed extension cords.
Ampere Rating (shown on nameplate)
0- 2.1- 3.5- 5.1- 7.1- 12.1-
2.0 3.4 5.0 7.0 12.0 16.0
25' 18 18 18 18 16 14
50' 18 18 16 16 14 12
75' 18 18 16 14 12 10
100' 18 16 14 12 10
150' 16 14 12 12 Wire Gauge
Note: The smaller the gauge number, the larger
the wire is in the cord.
Cord Length
"SAVE THESE INSTRUCTIONS"
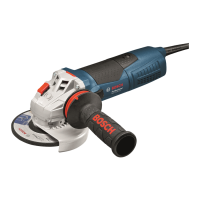
Operating the Tool
Slide "ON-OFF" switch with Lock
The tool is switched "ON" by the slide switch
located at the side of the motor housing. The
switch can be locked in the "ON" position, a
convienience for long grinding operations.
TO TURN THE TOOL "ON" without locking
it, slide the switch forward by appling pressure
ONLY at the REAR portion of the button.
When pressure is released the switch button
will snap to "OFF" position.
TO LOCK THE SWITCH "ON", slide the
switch button forward and press "IN" the
FRONT portion.
TO UNLOCK THE SWITCH, simply press
and release the REAR portion of the button.
Switch is spring loaded and will snap back
automatically.
WARNING ! Hold the tool with both hands
while starting the tool, since torque from the
motor can cause the tool to twist.
“Soft Start” Feature
(1348AE)
The grinder is equipped with the “soft start”
feature which gradually increases the starting
speed and torque, reducing the stress that occurs
from a high torque start.
Start the tool before applying to work and let
the tool come to full speed before contacting
the workpiece. Lift the tool from the work
before releasing the switch. DO NOT turn the
switch “ON” and “OFF ”while the tool is under
load; this will greatly decrease the switch life.
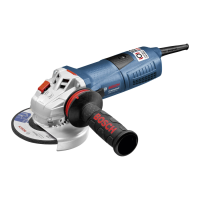
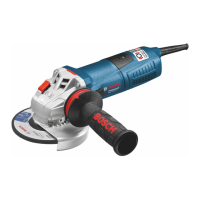
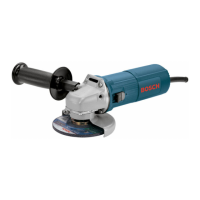
Side Handle
The side handle 1 used to guide and balance the
tool can be threaded into the front housing on
either side of the tool, depending on personal
preference and comfort. Use the side handle
for safe control and ease of operation.
Wheel Guard
Always attach wheel guard 5 for grinding
operation. Attach with collar screw 6.
Lock Nut and Backing Flange
Your tool is equipped with a threaded spindle 4
for mounting accessories. Always use the
supplied lock nut 9 and backing flange 7 that
has same thread size as spindle.
Spindle Lock
This tool is equipped with a spindle lock 3 to aid
in mounting accessories to spindle.
WARNING! Do not depress spindle lock
while operating tool.
GRINDING OPERATION
Wheel Guard Installation
WARNING! Wheel guard 5 must be attached
when using disc grinding wheels. Always keep
wheel guard between you and your work while
grinding.
To attach the grinding guard DISCONNECT
tool from power source, place wheel guard
collar over neck of bearing plate, then secure
guard with the collar screw as shown on page 2.
BM 3609929584 7/01 7/26/01, 12:40 PM6
 Loading...